

Wrinkle finish, texture finish, wrinkle coat, hammer finish, crinkle finish, whatever you want to call it, it’s a fickle creature. Desired by many, but frustrating to get it right. Personally I’ve had very poor results with this stuff over the years, often finding myself disappointed when my newly painted part doesn’t even come close to emulating the OEM finish I desire. Well, Last weekend I finally got it right after channeling a few tips I’ve read online over the years (and in a previous issue of AutoSalon Magazine). The general consensus was pretty consistent; three heavy coats, each at a different angle from the last, with a bit of heat to aid the process. Funnily enough, that same advise was clearly printed on the back of the can, under “Instructions”, who would’ve thought? (Didn’t I feel stupid!)
Step-by-step process below, click on the images for larger 1000px versions…

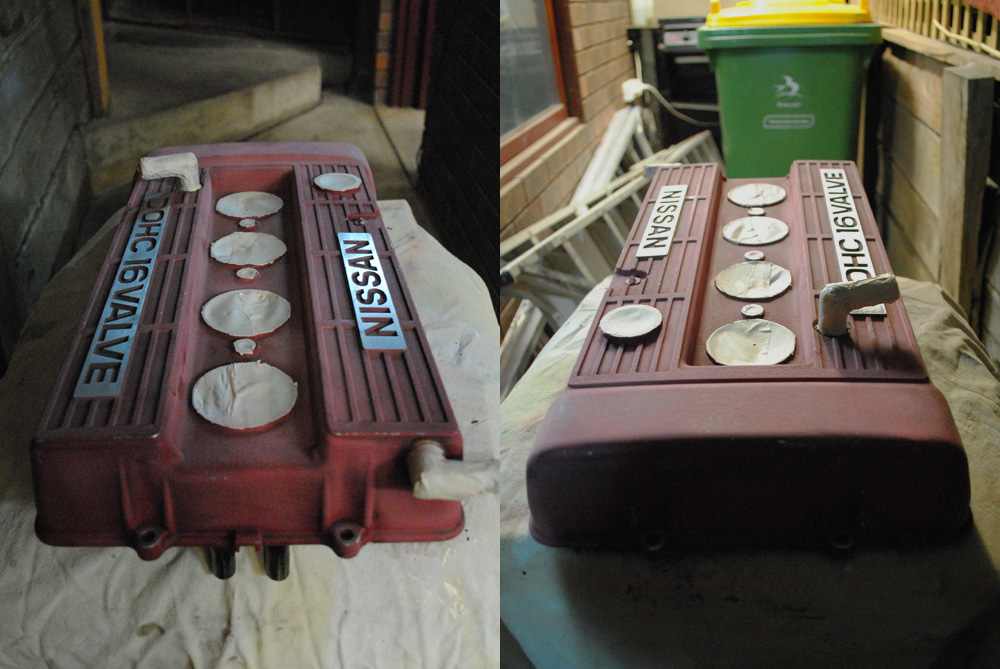
Here’s what I started with: An old L-series rocker cover which had seen better days, some wax & grease remover, oven cleaner, and of course a can of VHT Wrinkle Plus.

First up this rocker cover needed a good cleaning. I had some oven cleaner lying around that I bought to clean a gearbox but never used it, so I thought I’d test it out on this.

Apparently it’s quite harmful stuff, and proper protection is recommended, so I sure as hell wasn’t going to take any chances. I’m surprised my neighbours didn’t call the feds when they saw me walking around my front yard like I was building a friken bomb and/or meth lab.

Oven cleaner doin’ work on this inside…

…and the outside.

After rinsing off the cleaner I hit it with a high-pressure hose, dryed it off, then wiped it down with some wax & grease remover. When it comes to painting, the cleaner the better.

Scraping off the remainder of the old gasket.

Taped up and ready for a good ol’ paintin’.

As I said earlier, each coat is meant to be at a different angle to the last, the above shows the basic approach I took.

Make sure you lay it on thick as possible. Try to get each coat to the point where the paint almost about to run.

Allow 5mins between each coat.

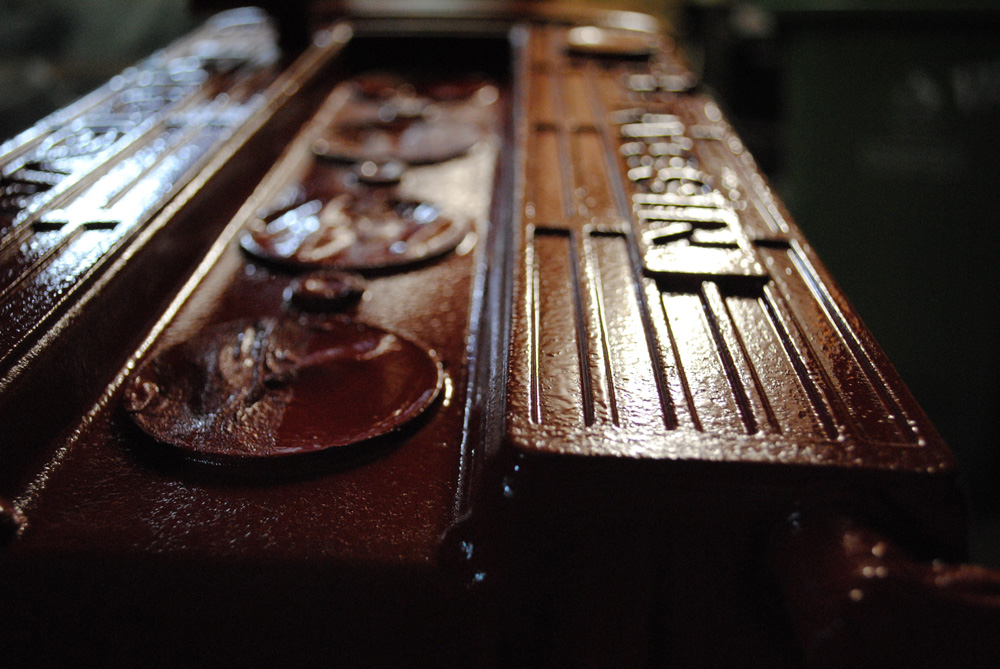
It goes on smooth and glossy, but the magic happens during the drying stages.

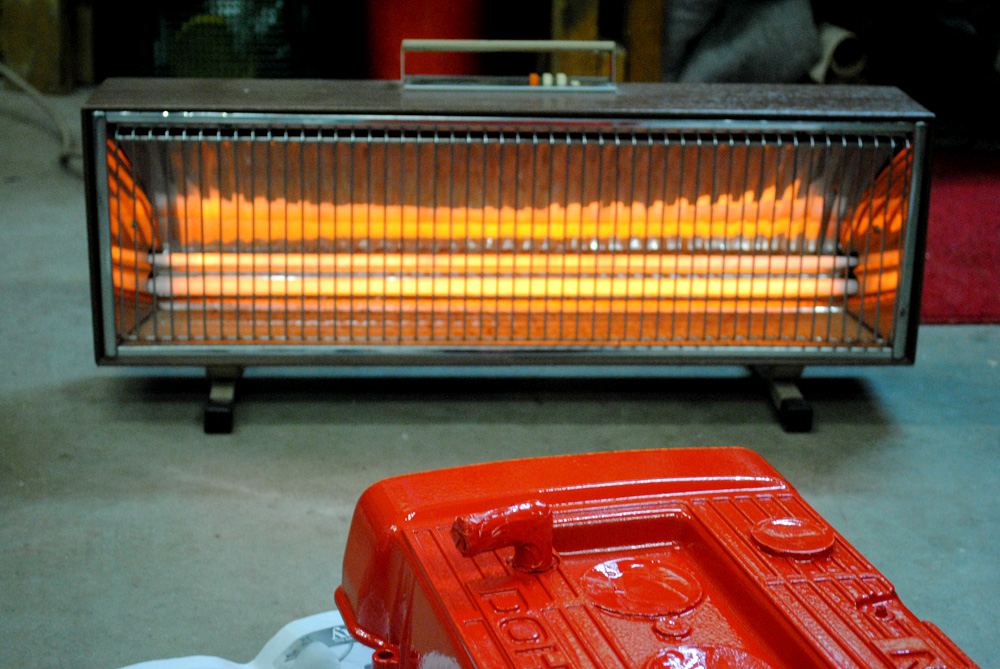
The secret weapon. Since I chose the worst possible weather to do painting (cold and raining), I used a heat gun every now and then to evenly heat up the paint. Be careful not to get too close or leave it on one area for too long, otherwise you might get certain areas wrinkling up more than others, this has happened to me in the past and resulted in me blasting the item with heat out of pure frustration (this approach does not work!).

After the third coat has had some time to dry, you can see the texture starting to form. It’s a slow process so don’t be alarmed if nothing happens straight away.

Crazy huh! All these years I thought this paint produced more of a spotted/grainy texture, but it actually makes these cool squiggly lines, reminding me of a Keith Haring style painting.

Now we’re getting somewhere.


I left it to dry properly until the following day. The final step was to sand back the lettering. First I scraped off as much as I could with a razor blade, to make less work for the sandpaper.

As usual, a piece of sandpaper wrapped around a wooden block does the trick.

Keep going until all the paint is off the lettering. At this point you can continue with finer grades of sandpaper and then polish it, but I liked the rougher look of the sanding marks. Some rocker covers have the lettering embossed/sunken into the metal, in that case you can use blu-tac to fill up those areas before painting and then remove it afterwards.

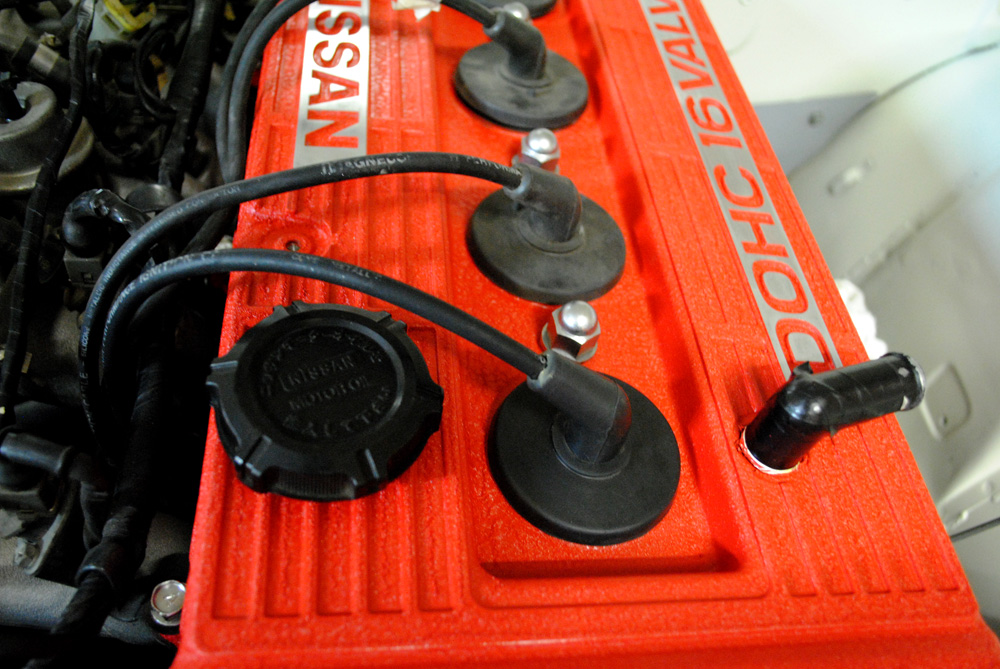
After blowing out all the sanding dust we’re ready to admire the finished product.


I’m very happy with the results, it’s nice and even all over with no blotches or smooth sections. I could have gone further with the sanding, such as the ridge below the lettering, but this was just a test to see if I could do it, and now that I know I can I’m confident enough to paint my FJ rocker cover.
I hope this little write-up helps in some way shape or form if you’re interested in this kind of finish. Please feel free to link to this article if anyone you know is having difficulty getting a good result.
UPDATE:
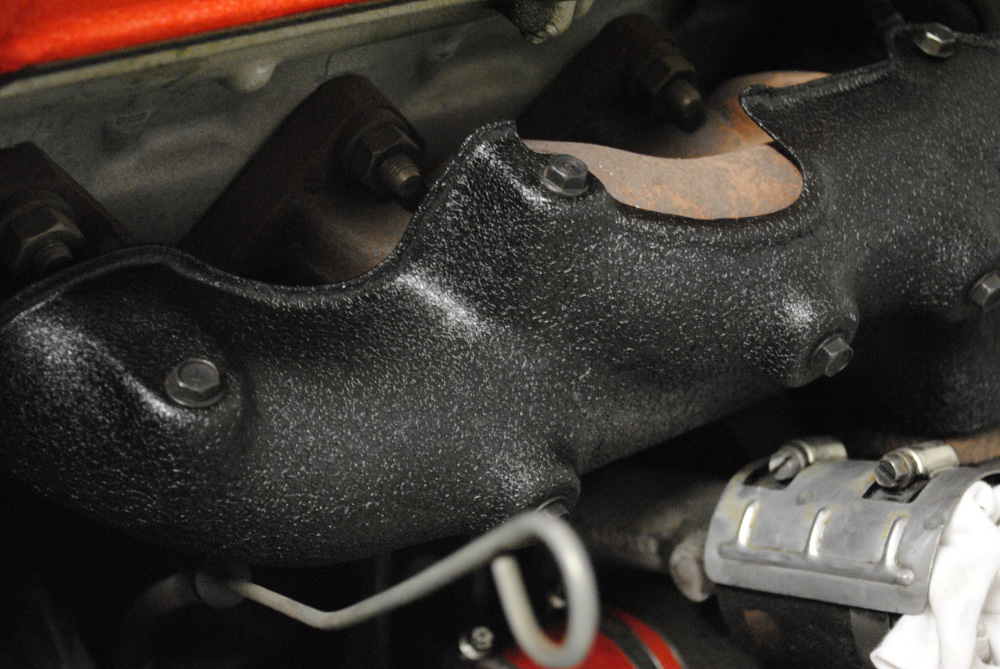
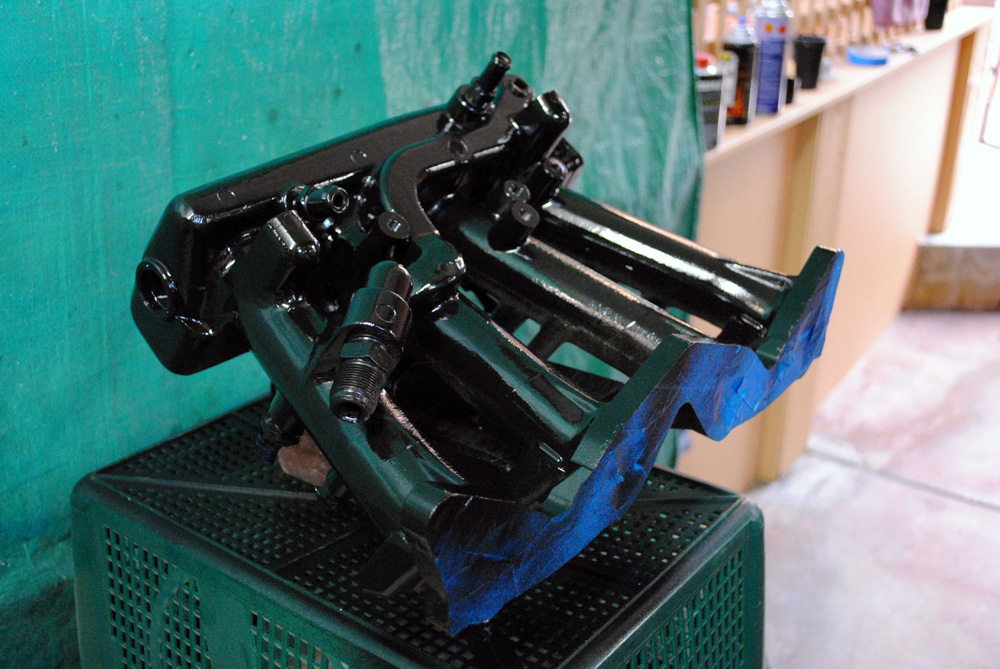
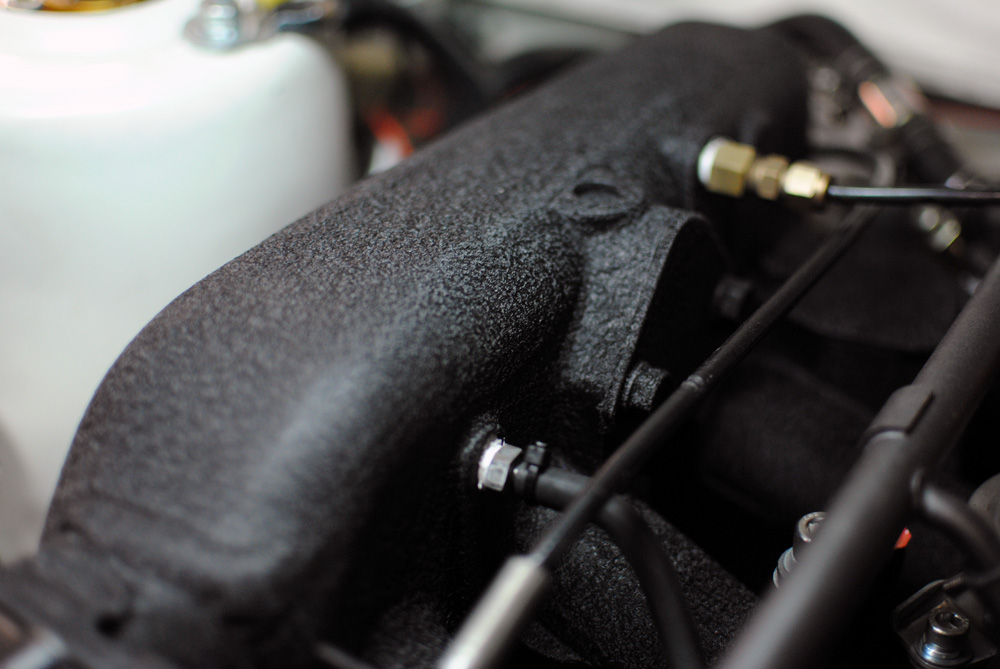
I thought I’d post some more items that I’ve painted since writing this DIY guide…

cool post…..need to make mine now…
What kind of spray paint is that? Regular spray can, or heat resistant… what?
It is called VHT Wrinkle Plus, here is a link to more info http://www.vhtpaint.com/wrinkleplus.html
I find that popping the whole piece in the oven at around 60degC for a couple of hours just as the paint starts to dry really tightens the wrinkles up and gets it all nice and uniform. Beware the wrath of your significant other however, as it does smell a bit, make sure you have a good couple of hours to air the house out afterwards!
I’ve heard of both the oven and bbq techniques, but I’m not sure if I like the idea of my next roast tasting like VHTs finest!
I did an GT-R SR valve cover in black the same, got a great finish by curing it on my car’s parcel shelf in the sun on a mid 20ËšC day (my oven’s not big enough for car parts)
Great article Anth, I’m going to try this with some upcoming Mk1 Golf bits and pieces I’ve got to clean up.
I’ve used this crinkle paint on some interior pieces in my Miata. They came out okay. I used it on the spark plug and timing gear covers on my 1JZ and I had some spots that came out more “crinkly” than others.
One thing you should know: this won’t get you the OEM valve cover paint look. Ever. The best way to get that effect is to take your parts to a powder coater and let them go to work. Shouldn’t be more than $25-50 depending on the cover. Way more resilient, better looking, comes in a wider range of colors, don’t have to deal with the labor except for prepping.
very cool writeup, might have to do a couple parts with the crinkle finish.
Great write-up!
Am I able to post this on my site? I think many would be interested in ‘how to’ do this to their JetSki heads and manifolds!
Go for it Cameron, just please include a link back to my site 🙂
if you get smooth spots what is the best way to fix them?
I used this same product to restore a set of 66 cobra valve covers and air cleaner. I was really impressed with the outcome. To answer Mario’s question, if you monitor the process, you can hit the “flat spots” with another bit of paint after the 3rd covering. This will help wrinkle it up. I had the same thing happen in two spots… and it worked perfectly. If you wait until it dries, you’ll have to start over again from the beginning (with paint stripper or a bead blaster).
Hi i want to paint my klr 650 motor with the wrinkle paint would it be ok for the whole engen like head and cylinder thanks rob
If you burn some toast after curing the paint in the oven it will help disguise the smell as you air out the house. Hopefully your other half will just think you were hungry!
Great job and excellent write-up. Much appreciated.
Excellent results!!! Are you laying on any primer prior to the (3) wrinkle coats?
Hi there – great tips but I have a project in mind that you may be able to help with. I have bad bad bad clear coat fade due to the hot sun here in Nelson – NZ. So…..I have decided to paint the bonnet and roof panel of my 97 Toyota Hilux in wrinkle finish – In my mind the image looks great – so great in fact that after I do this (if it can be done) I want to keep on going and finish the whole truck in wrinkle – never seen it done and want to be the first – any ideas for this project would go down well – regards Dino – NZ
Hey Dino, if you search VWvortex.com you’ll find posts from a few years back about a guy who repsrayed his Audi with truck bedliner paint. I think something you can mix into a proper spray gun would be better than a whole bunch of wrinkle finish cans, I’m not sure if you’ll get an even finish, since you’d have to make sure you put the exact same amount of paint on each coat. Plus if some parts of your car are in the sun, like the bonnet/roof, they’ll winkle up more than the rest. good luck and let me know how you go!
I wanted to get my BMW valve cover, intake manifold and top covers powder coated, however it it a bit too much cost for me so I started looking at other options and found the paint and your write-up. My question is will this paint work on covers and manifolds made out of durable plastic? Also, on my cosmetic covers i want the silver letters to still be silver and I saw how you did it however mine are plastic and the sanding trick will not work. Any suggestions?
Here is what the cover looks like.. http://c1552172.r72.cf0.rackcdn.com/116220_x800.jpg
Hi Adam,
The paint should work on plastic, but it might require you to scuff it up with some sandpaper first or maybe use some plastic primer, it’d pay to do a practice run first if that’s possible. As for your lettering, you could either painstakingly use masking tape and a razor blade, or one trick I’ve heard people doing is using vasaline (not sure if you have that where you’re from) and smear that over the parts you don’t want the paint to stick to, then once the paint is dry you can just wipe it off. Otherwise, you could try wiping the paint off with a rag and some alcohol before it’s fully cured, but be careful not to smudge any of the other areas. Hope that helps!
can this wrinkle paint be bought in qt. cans?
Beautiful work. I love it. Thanks for preparing this article it is so useful.
thanks for awsome info getting ready to do a 1973 sporster iron head harley davidson in wrinkle finish on whole engine and outer covers basically whole engine and transmission ive always had problem with wrinkle finish fully confident this time will use paint you used be blessed all pics look awesome steve
Steve Wolfe. How did the 883 turn out? Did you dismantle the engine or do it as one piece?
I have used this same aerosol wrinkle paint on semi automatic morse code key bases (steel) for many years. Never had any problems. Full instructions are on the can. I do it outdoors on a hot day and leave for about four days. If I need a slightly shinier wrinkle I just polish with black boot polish. Have just done one and after the process I noticed a few very very small bubbles. After a day they were all gone and perfect finish.
I’m told it also comes in red.
… Ron
Hi mate. Ok to do your engine blocks with? Just 3 coats and whack in the oven? Looks like a real good job you have done there. Cheers
to ensure even heating, place painted item on bench, cut the flaps of a large cardboard box, place the box over item, cut a circular hole in top of box the same diameter as the nozzle of a hair drier, punch a few vent holes on the side of the box, leave hair drier running on low heat for a few minutes. don’t use a heat gun
Do you think this paint effect would work on a motorcycle helmet?? I really like the squiggly lines!!
Hey Bryan, I think it would work on anything, depending on your taste!
I refinished cash registers for several years and did quite a few in crinkle black. I do not remember the brand of paint – was probably a company made product. But the big secret was heated dry – we had a 3ft by 3ft by 3ft oven with calrod heating strips to bake the finish. Making a little oven out of wood or something should be easy, or use an old stove/oven.
Hey just a heads up…if you put chapstick on the letters before painting itll just peel right off with your fingernail.
its a lot easier than the razor and risking messing up the finish.
I did not read all responses, but from my experience letting painted parts sit for a long while helps in handling. After a whIle the paint hardens up nice and becomes more friendly towards handling. Soft for a while till it cures. Lots of paint and baking is the trick.
hey! Great job. Such a excellent information. Very appreciated. Thanks for this.
Great write up …… just one question did you use VHT primer or spray the wrinkle finish directly onto the cover.