

This is the second half of the original post, that I have now split into two…
Ferrari F40 LM Restoration Index.
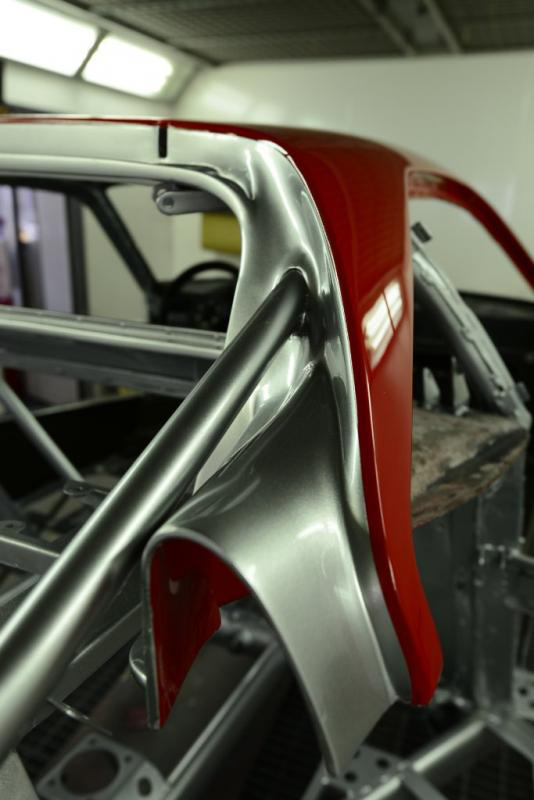
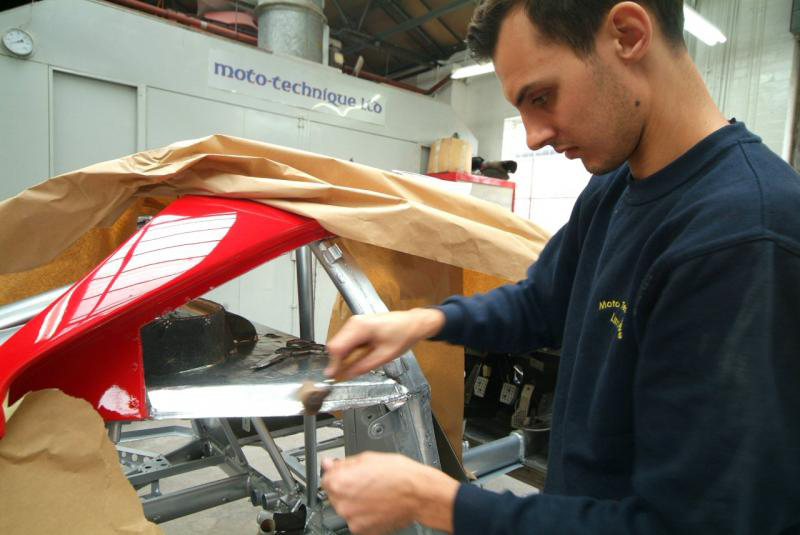
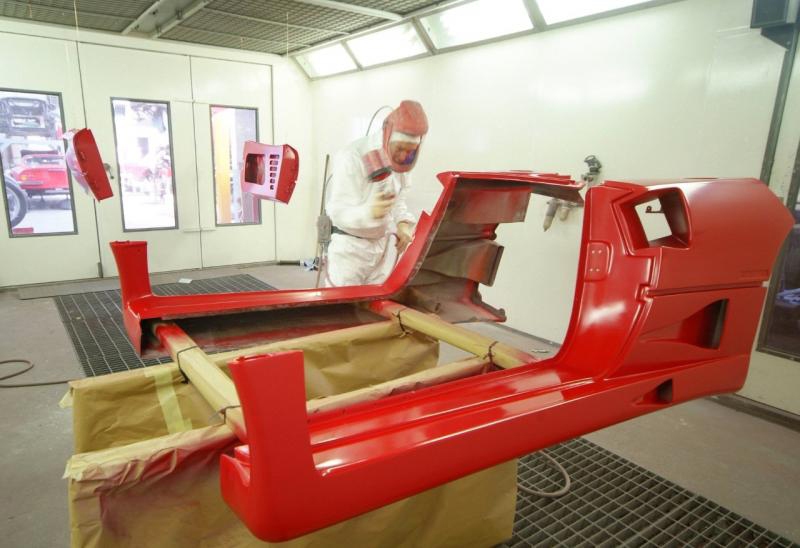
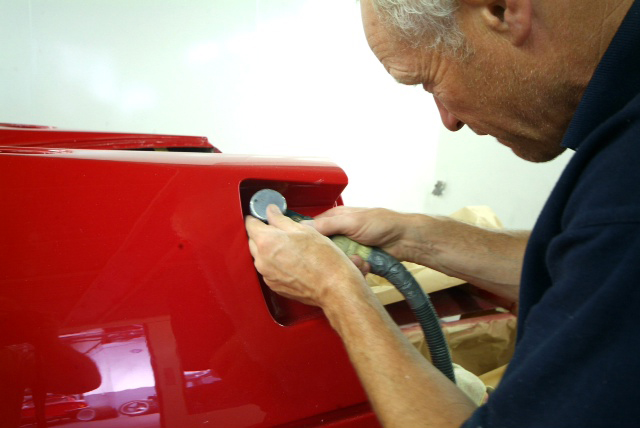
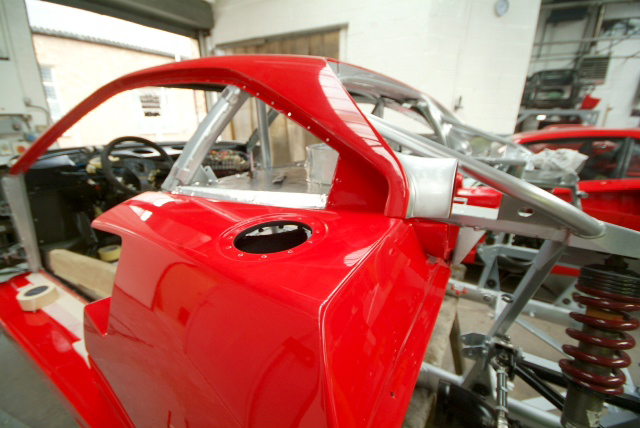
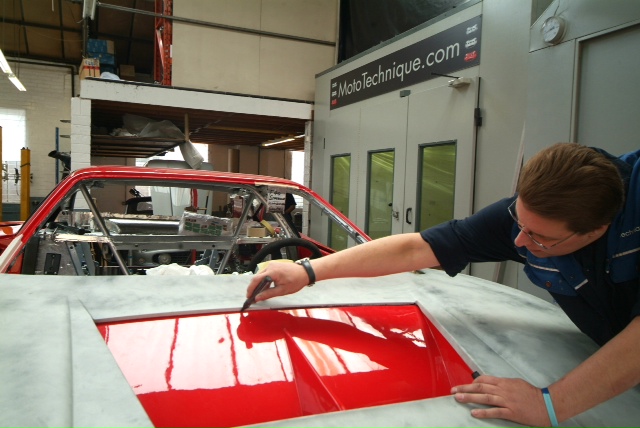
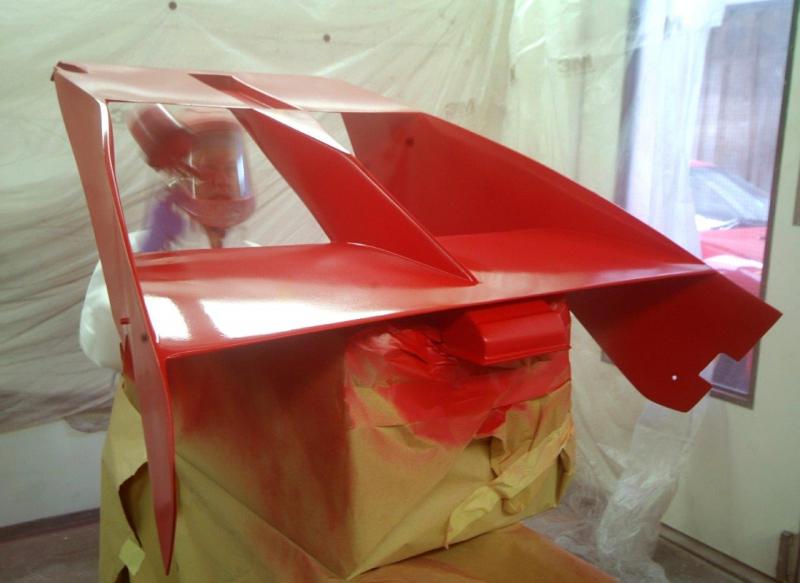
Revealed. Visited the shop today and the red is perfect 300/12 Rosso Corsa, deep and beautiful, the one with the least orange albeit does not show well in the pics.Masking off now the roof and pillars are in colour, finishing to be done later. Next up we strip the suspension and front assembly, yet again but for the last time, and start wrapping up my present in preparation for chassis paint. This is a moment I have been waiting 6 long months for.This is the last time the car will look a mess. Silver by Monday and then a big week next week…..
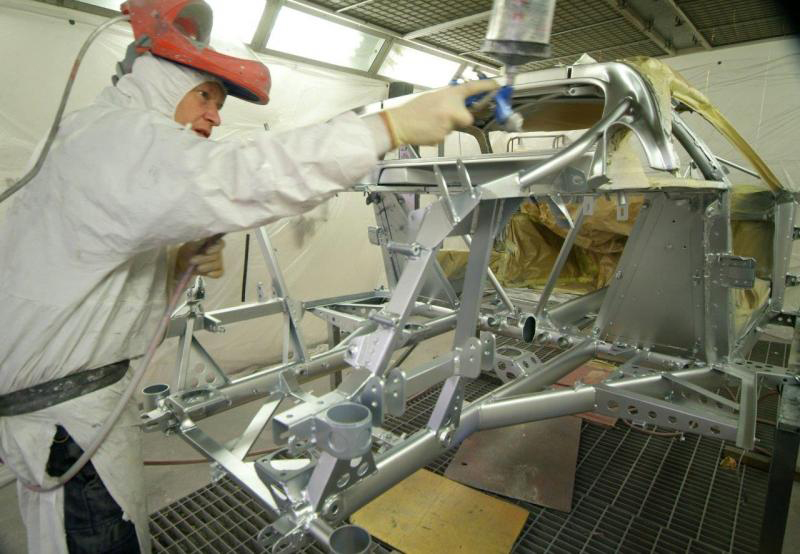
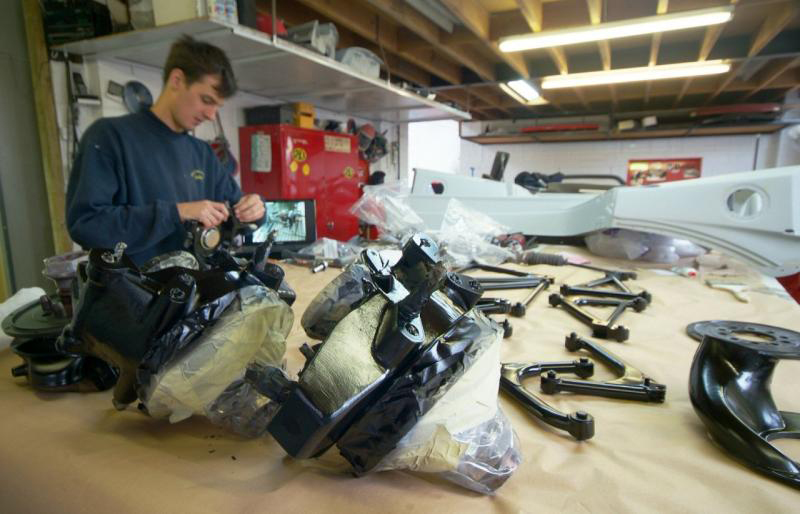
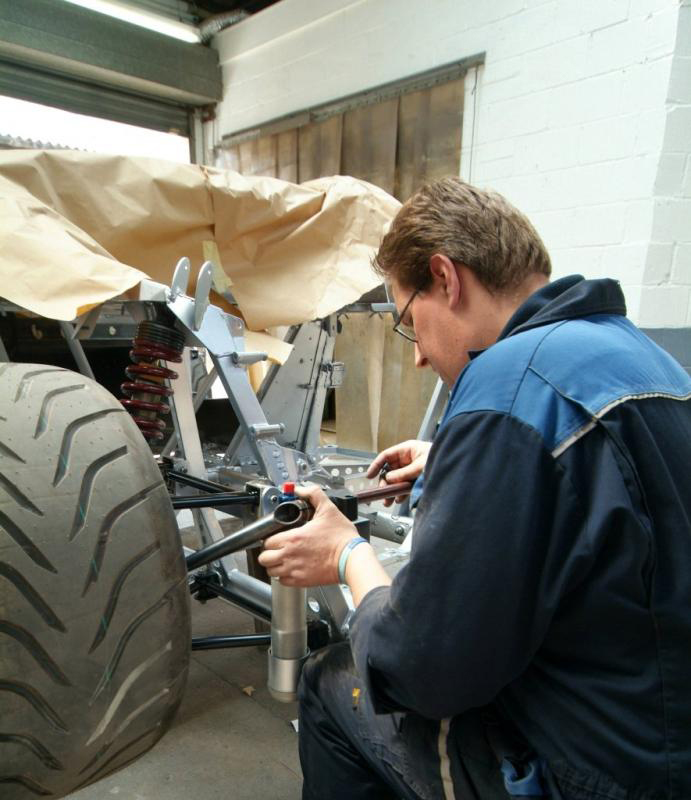
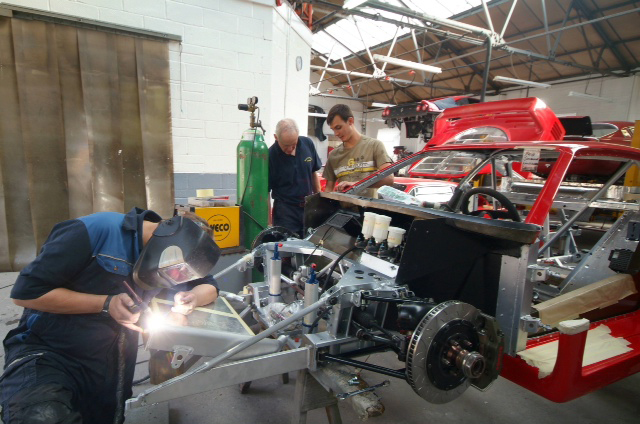
The first ‘hit’ of 5 days of major progress. Up until now either we have been stripping everything, preparing the chassis, bodywork, having replacement items manufactured off site but finally now we can try to bring all the elements together and start to fit them for hopefully the last time.Frame is now finally in silver, not just any silver but a paint whose code took endless, and I do mean endless, calls to Michelotto to reveal, and it is indeed a rather wondrous colour with a lustre that will be seen later this week. When seen against the Rosso Corsa, it is quite stunning. Typically Italian to pay such attention to the aesthetics.Meanwhile all the suspension has been stripped down to their individual component parts, and is in the process of being primed and painted as, being race parts, they were not really suitable for road use in their naked, unprotected condition. Tomorrow, we start to reassemble ready for installation.So the plan this week is silver today, suspension painting and reassembly tomorrow, and then all being well start to mount on the chassis Wednesday.
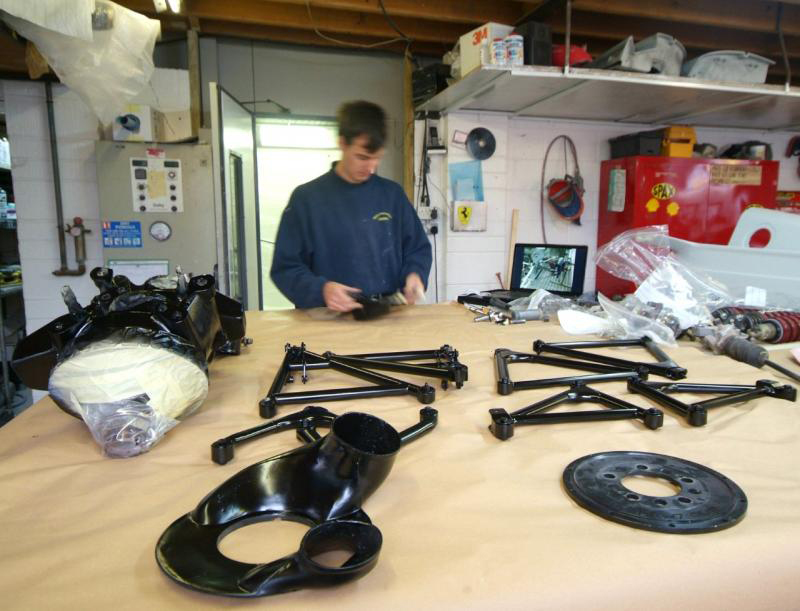
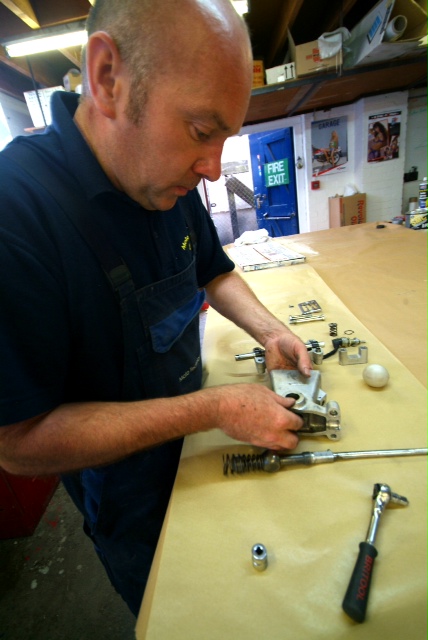
The start of reassembly of the suspension parts after two pack treatment.
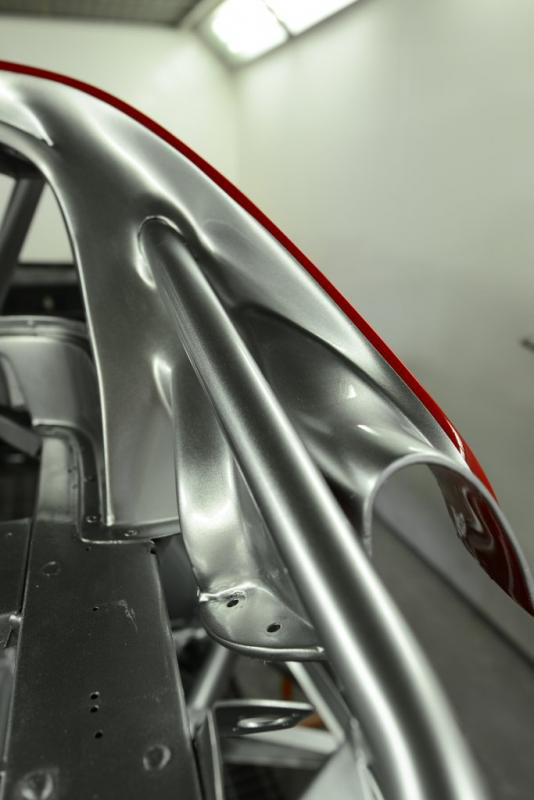
The first delicious detail for this week which better shows the luster of this silver finish..On this thread, there has been discussion about not over restoring and so for comparison I attach a standard F40 detail. I don’t remember them being this bad, but this area never had much attention paid to it and was certainly rough, whereas personally I love the direction of our work and would never wish to recreate some of the factory effort. When you look at the restorations carried out today on Daytonas, 275’s, and especially the earlier cars, they never ever left the factory in that sort of condition.

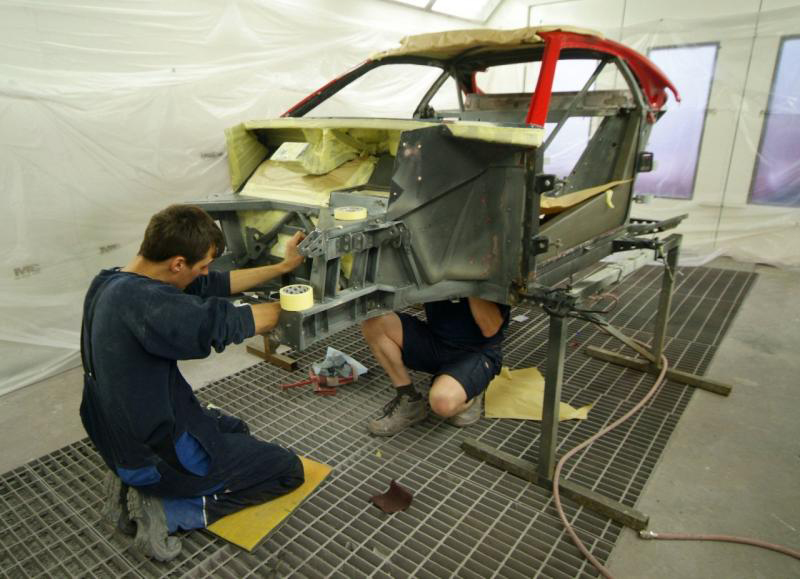
Meanwhile a few additional pics from today. All the suspension units have now been 2 pack epoxy painted so as to avoid corrosion (told by CM not to powder coat or apply any heat to them) and reassembled and should start to be mounted tomorrow. Exciting times as we start to pull things together and fit them ‘for real’.

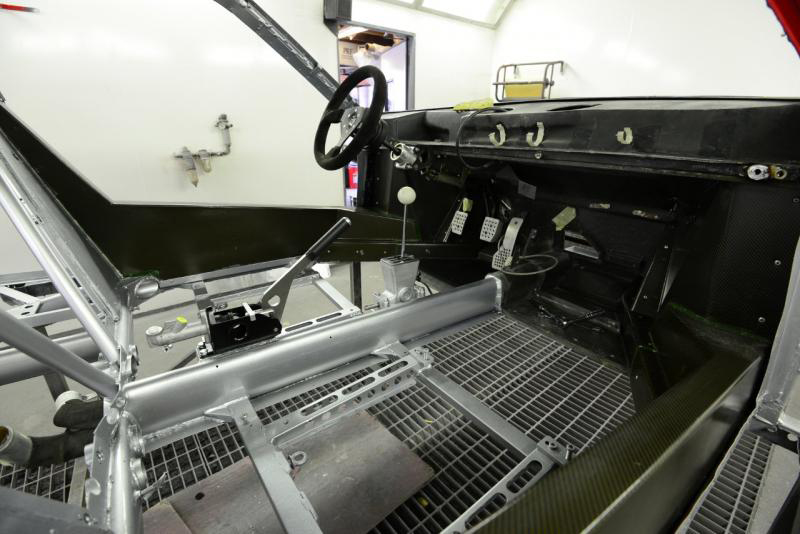
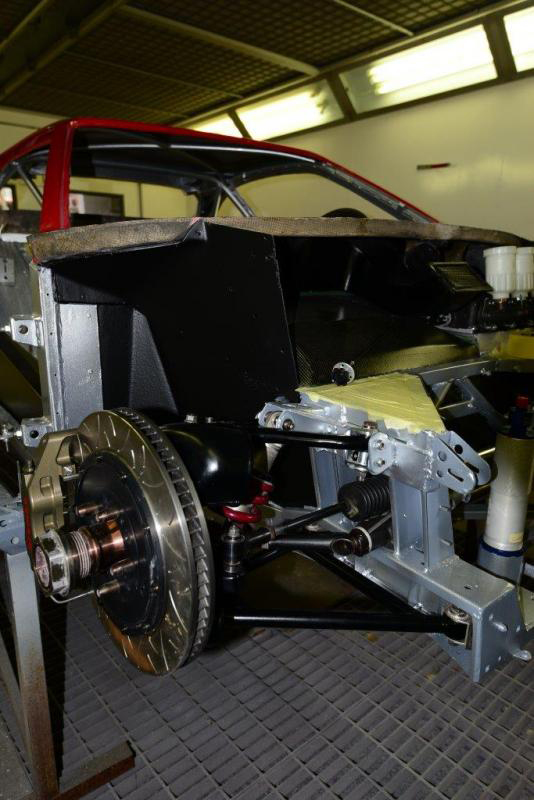
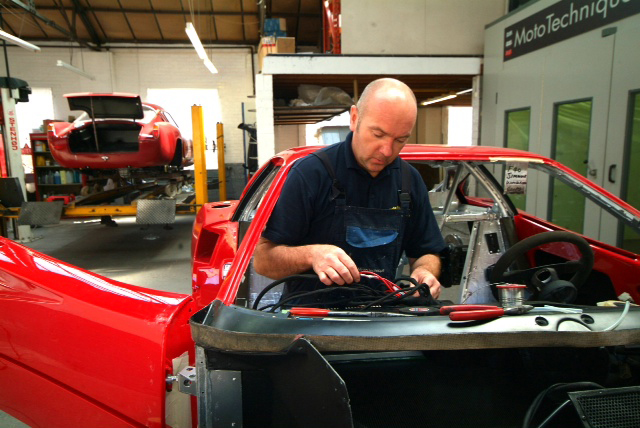
Handbrake in so as to pass MOT (UK rules to enable the car to be road registered). Magnesium pedal box in temporarily but will come out for protective paint as we don’t want this grossly expensive item going the way of The Sultan of Brunei’s.This is a week of major visible progress as all being well we should have the suspension on for good and then next week will be slower as we start to work on the wiring and plumbing which, I am afraid is less exciting to see and report. Meanwhile it looks like we are going to need a new cabin floor-never ending.
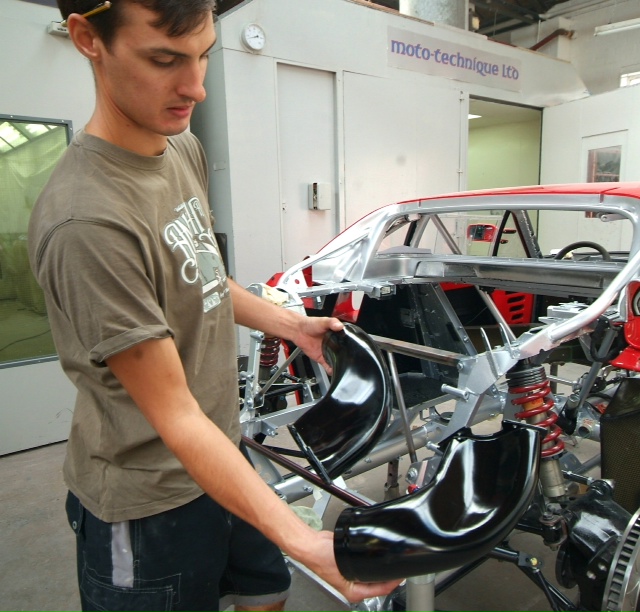
A teaser of what is to come-finally all this industrial art starts to find its functional home.

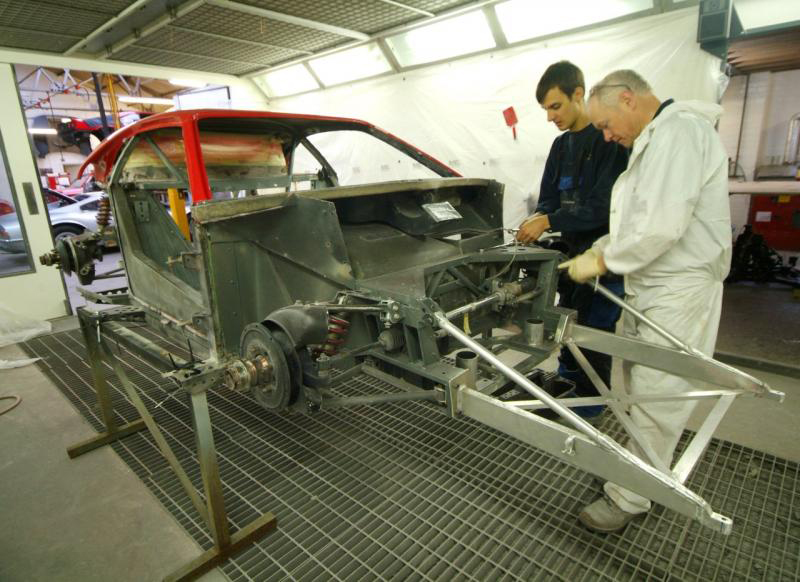
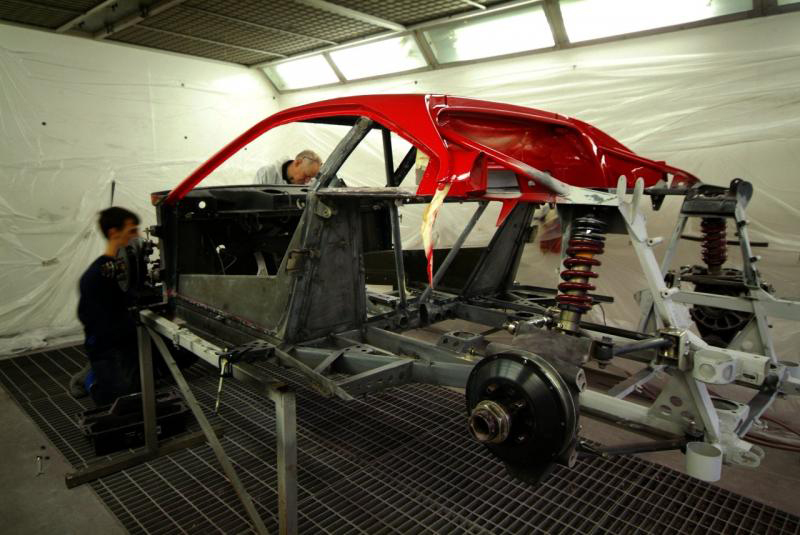
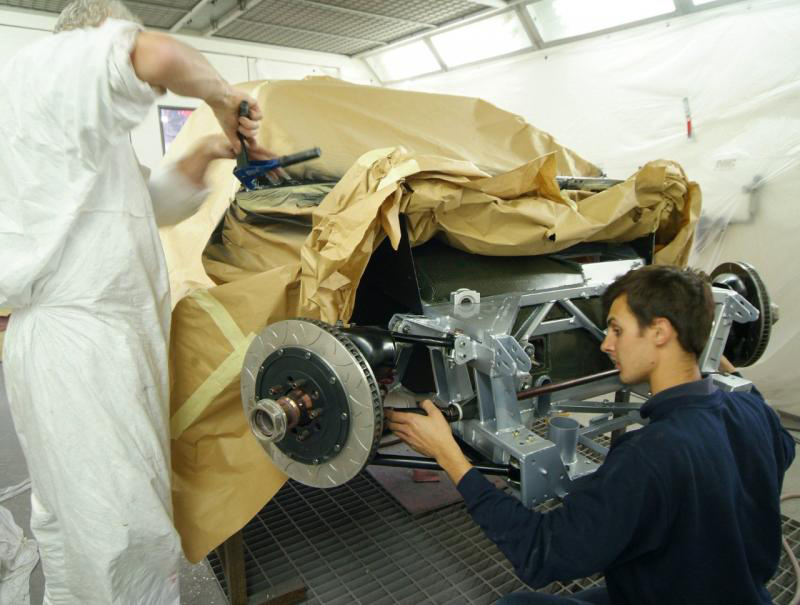
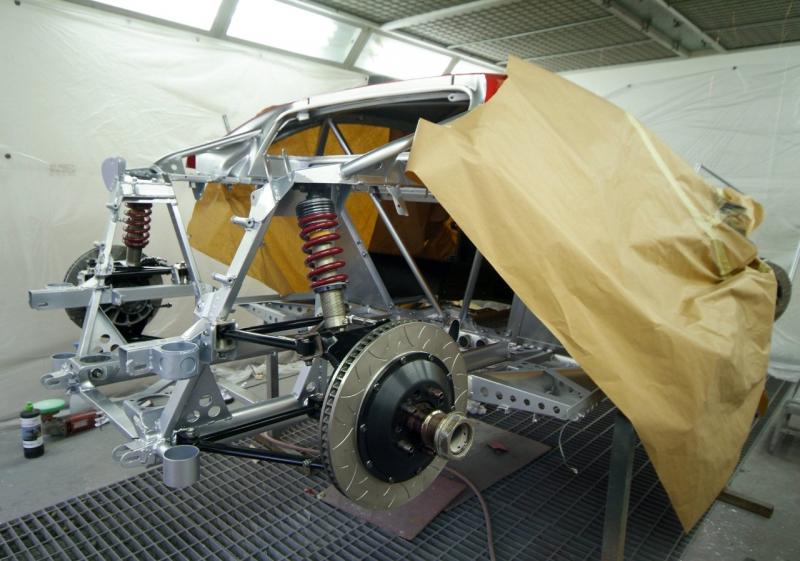
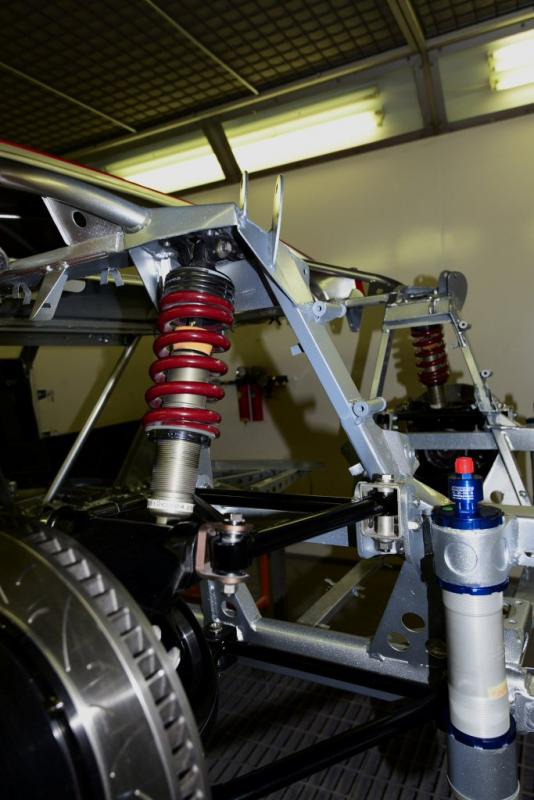
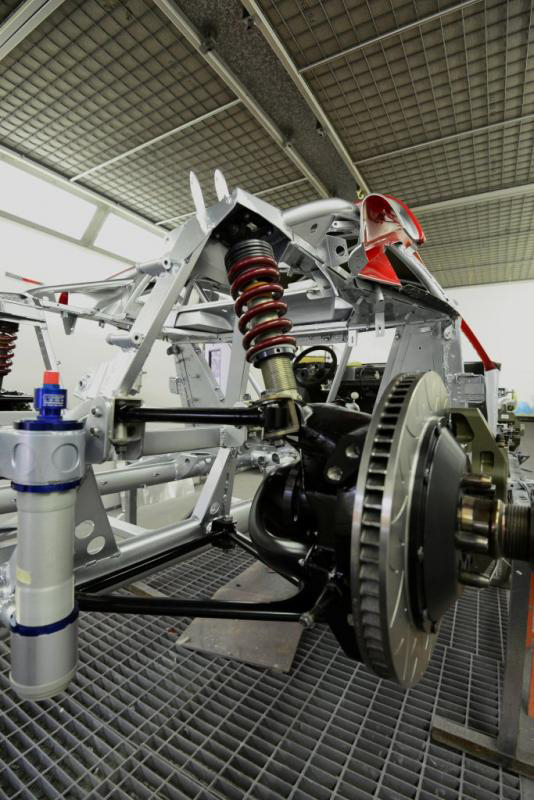
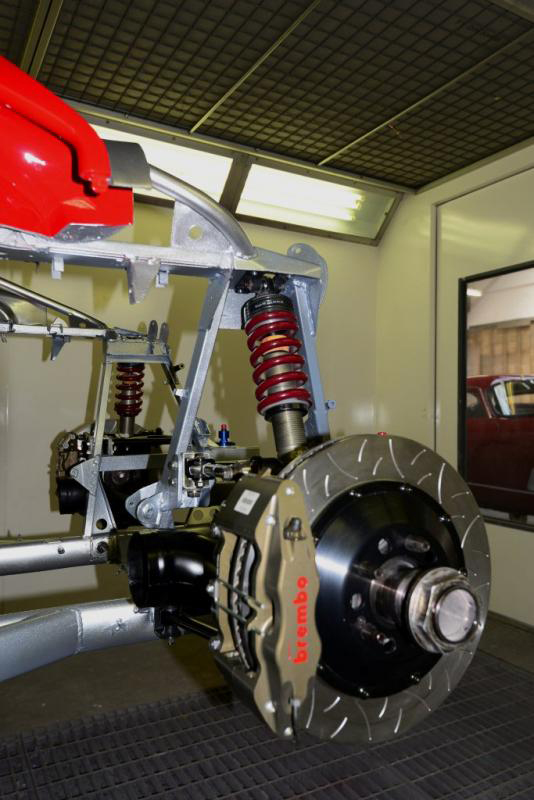
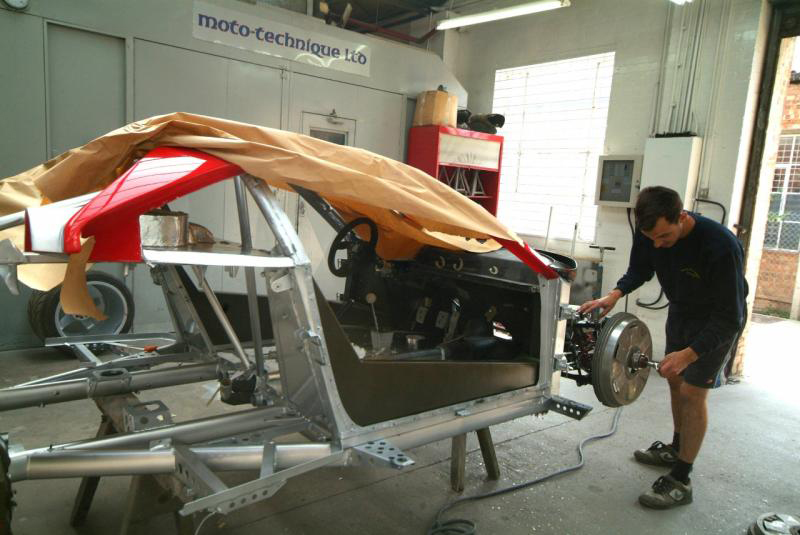
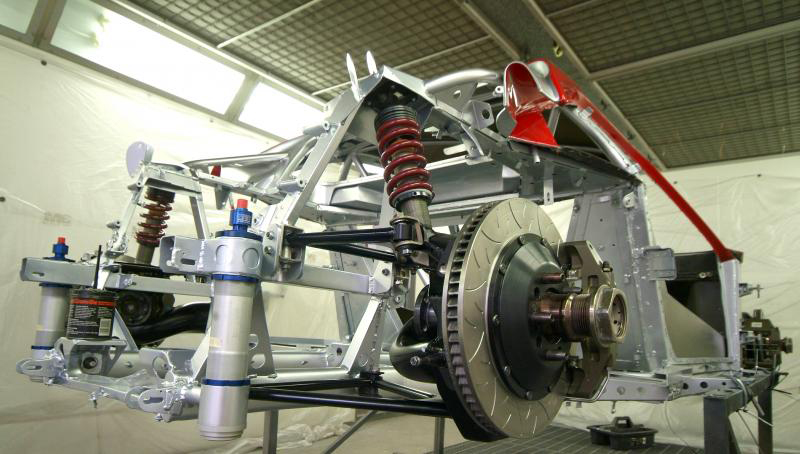
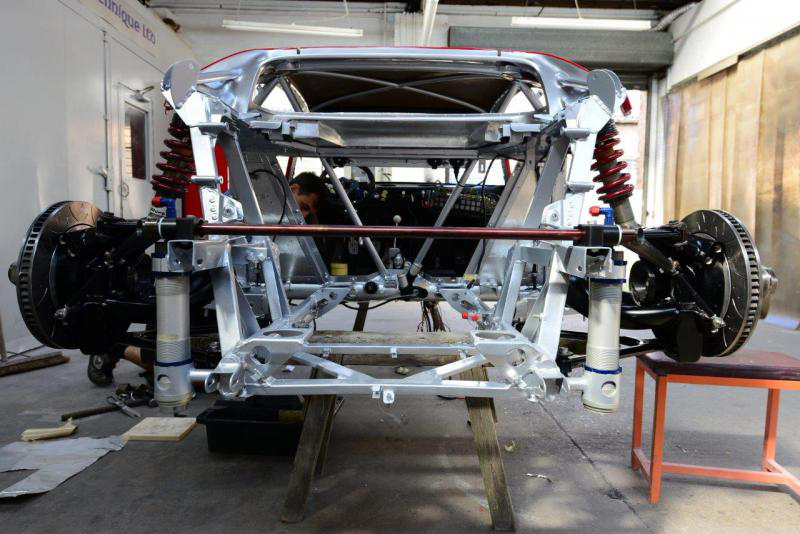
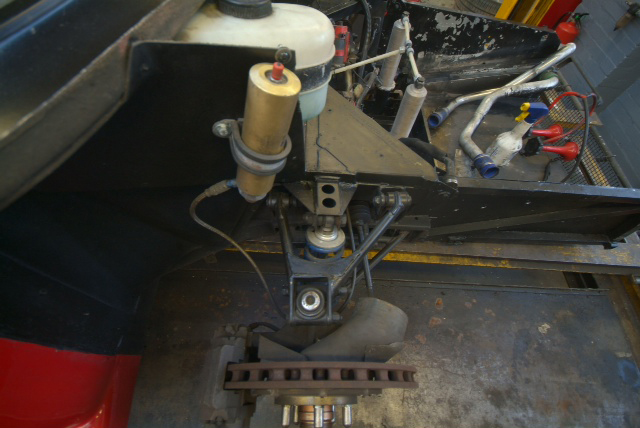
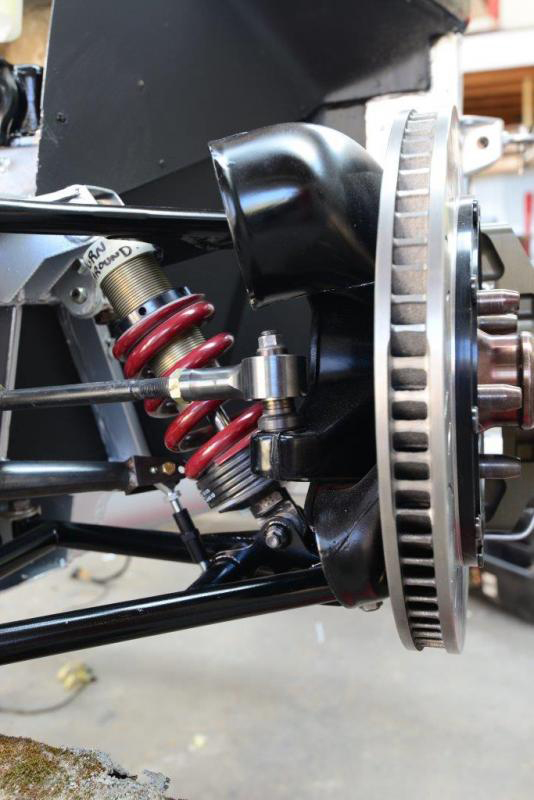
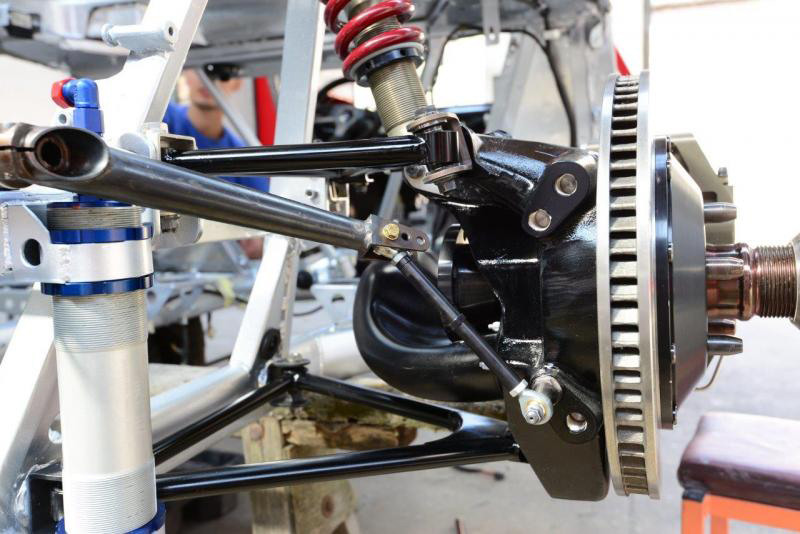
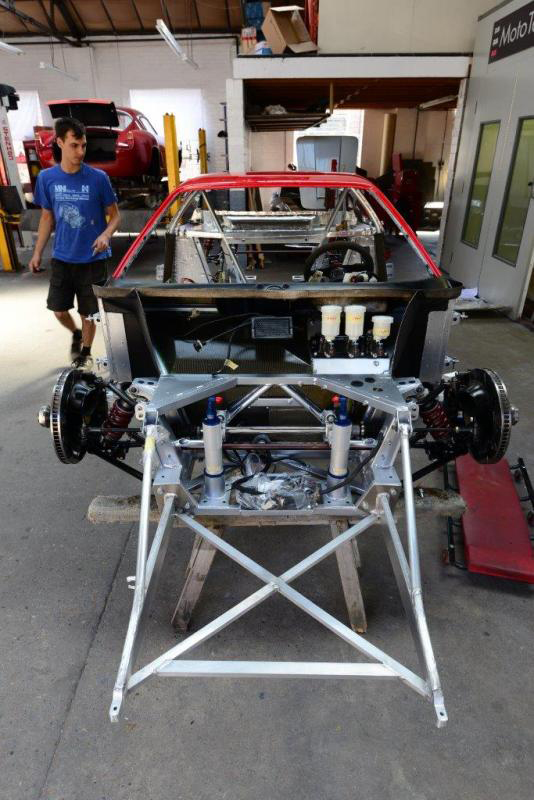
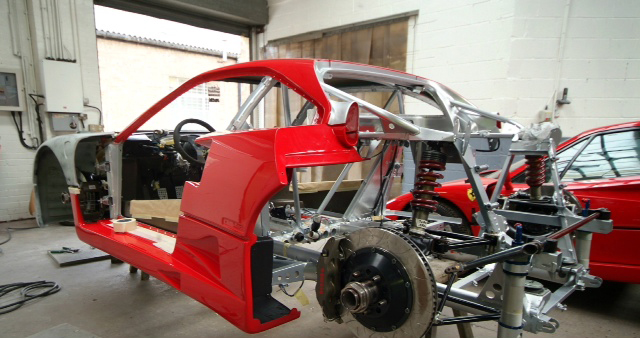
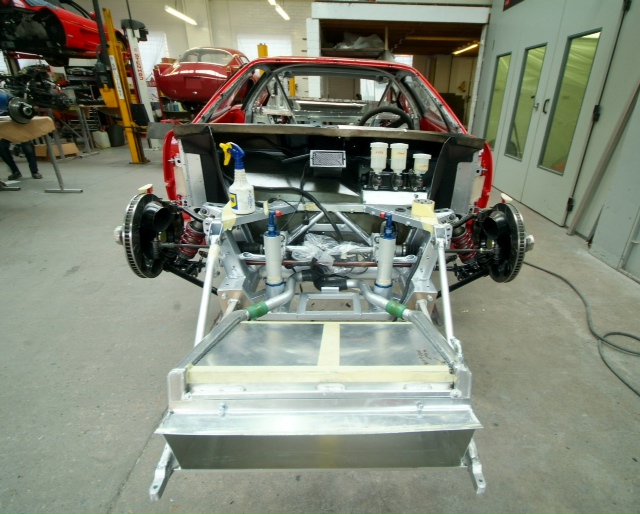
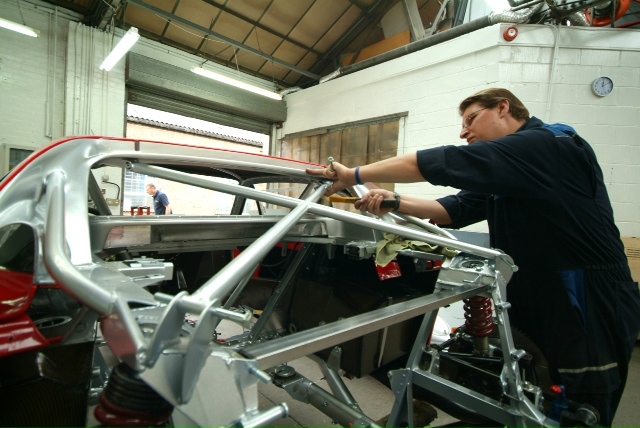
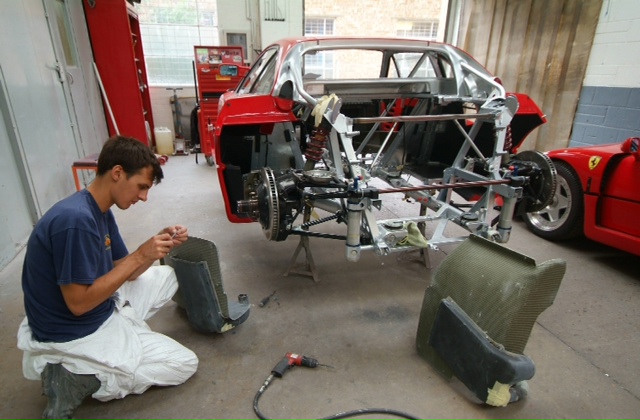
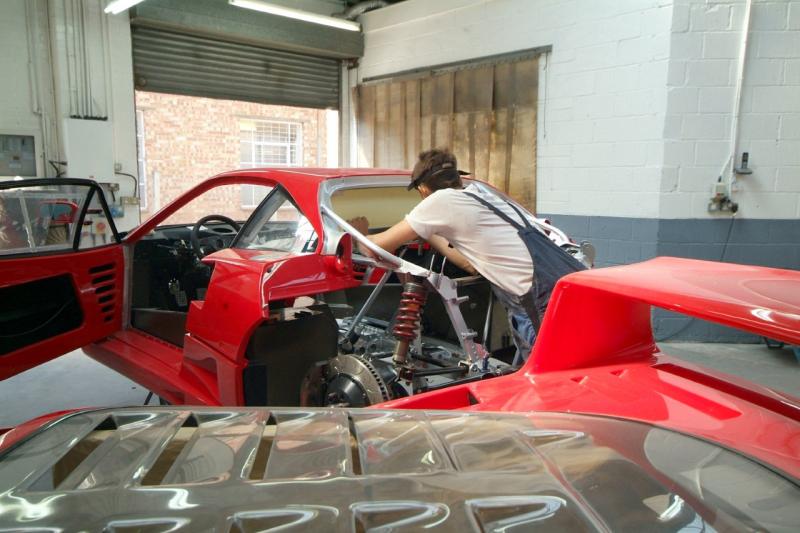
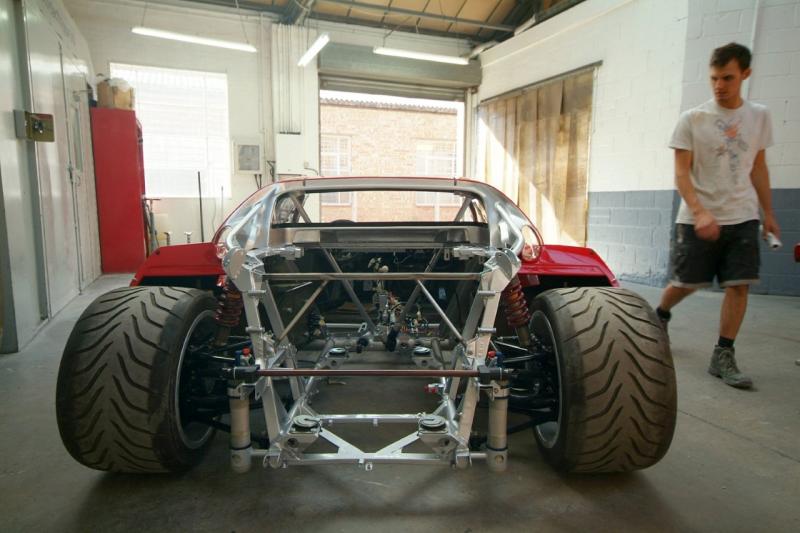
The first genuine glimmer of hope as the front suspension and anti roll bar go on, hopefully for the last time. Later today, hopefully the rear.Interesting to see how far we have come versus where we were and it at least begins to explain the past 6 months. And the cost.
Well the rears are on but I think the discs are back to front-fronts are good. Finally just beginning to look like a car and again see where we came from. What a change and just beginning to look a little tasty?

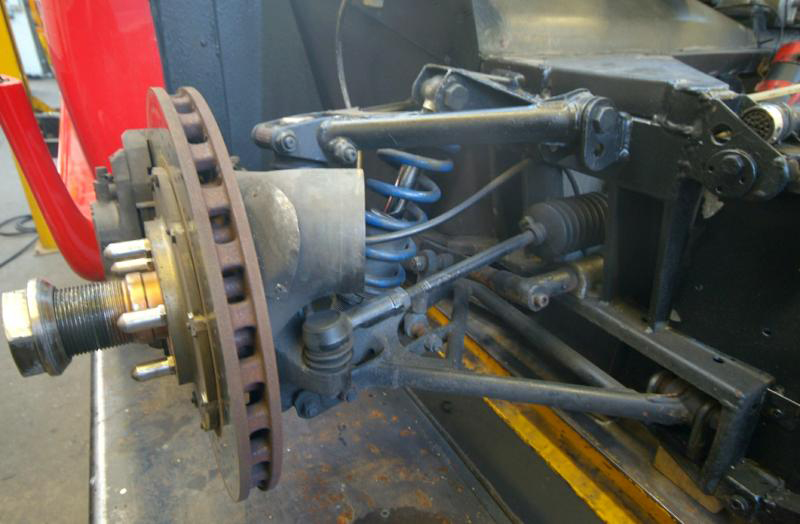
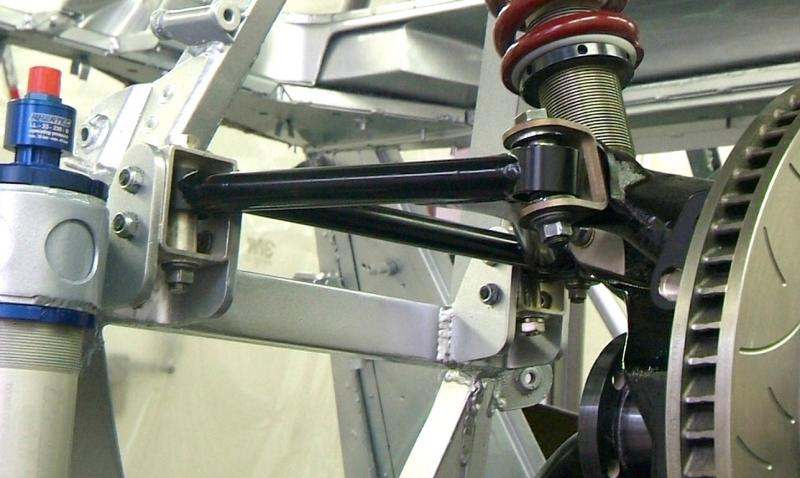
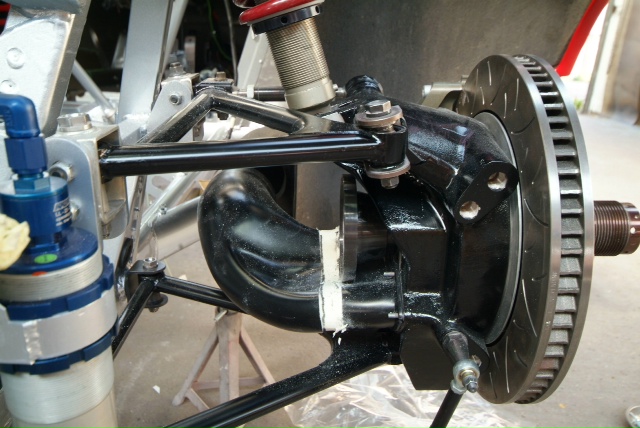
Front jacks now on, rear to follow later today. Note the little additional support from the bottom of the steering rack to the frame and also we now have the Michelotto front anti roll bar mounted just beneath.
And now the rears. In answer to an earlier question from NurScud, the jack mounting position may have moved very slightly-not much room back there as the anti roll bar has to also fit.Monday will give us brakes.
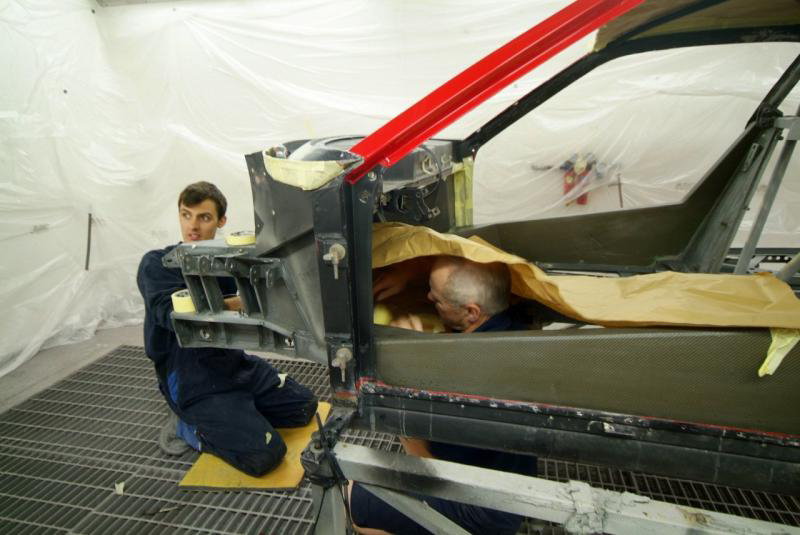
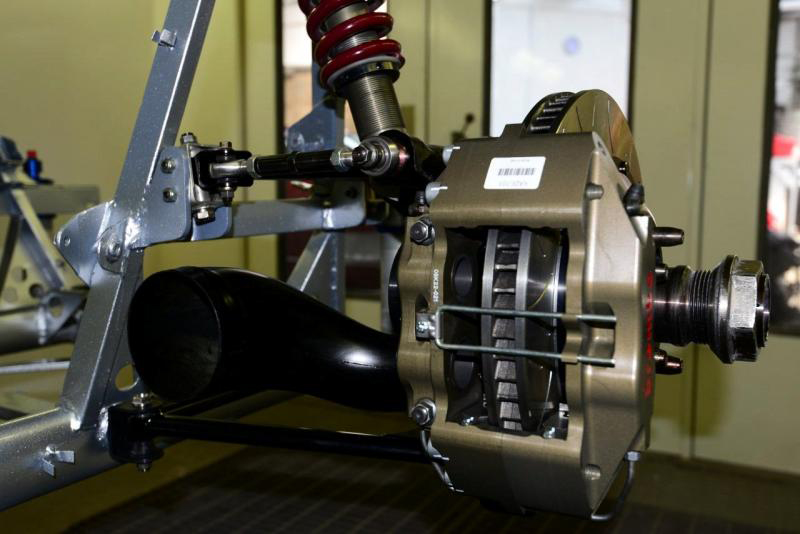
And here it is being fitted but then will come back off again. Almost the last of the Michelotto parts.Next week, brakes.
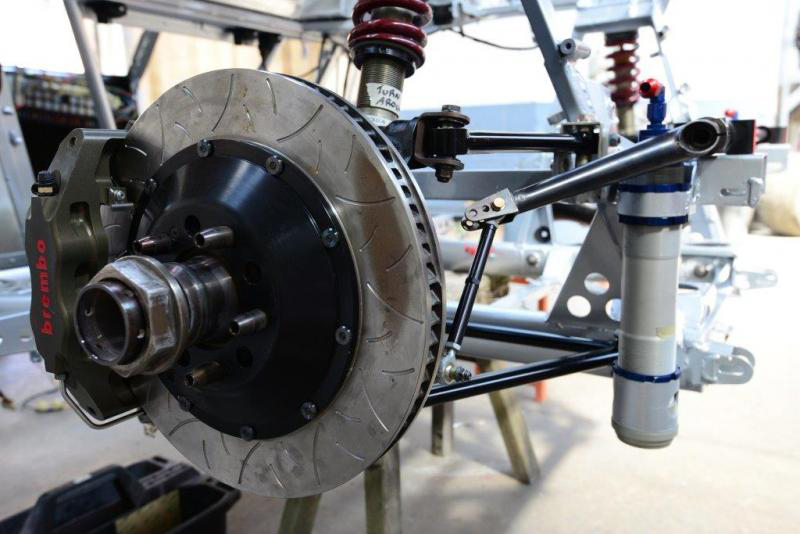
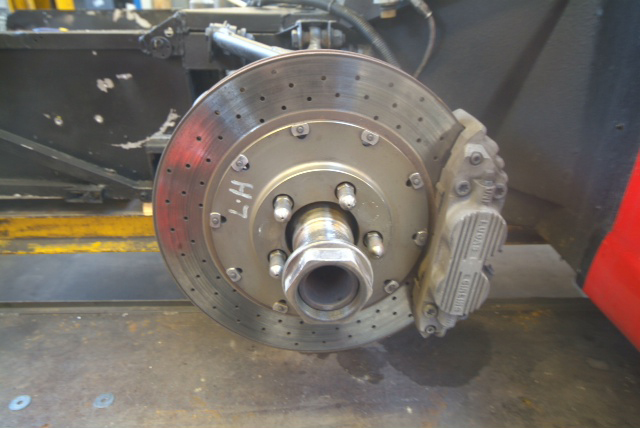
Rear brakes now on and with the French Horn shaped inlet, just adds to the artistry. Fronts up next.
And now the fronts, yes, discs yet to be reversed….and yes Kevlar on front scuttle yet to be sorted.
Time for that brake swap….
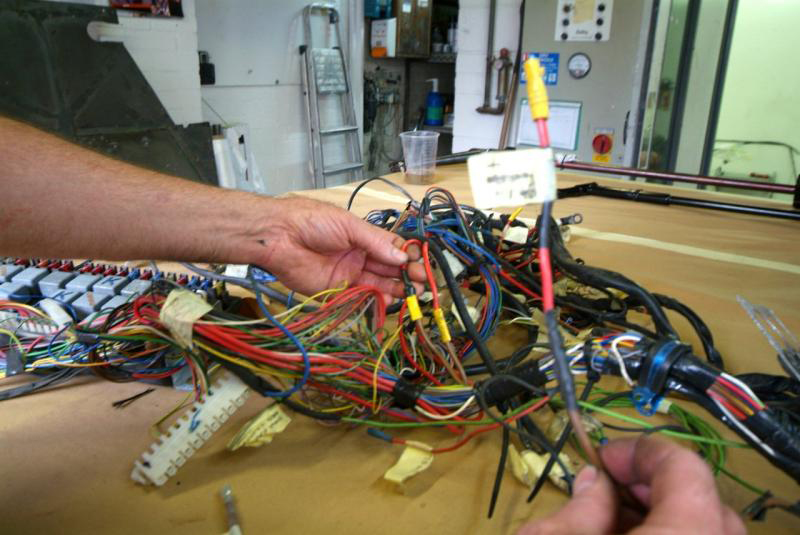
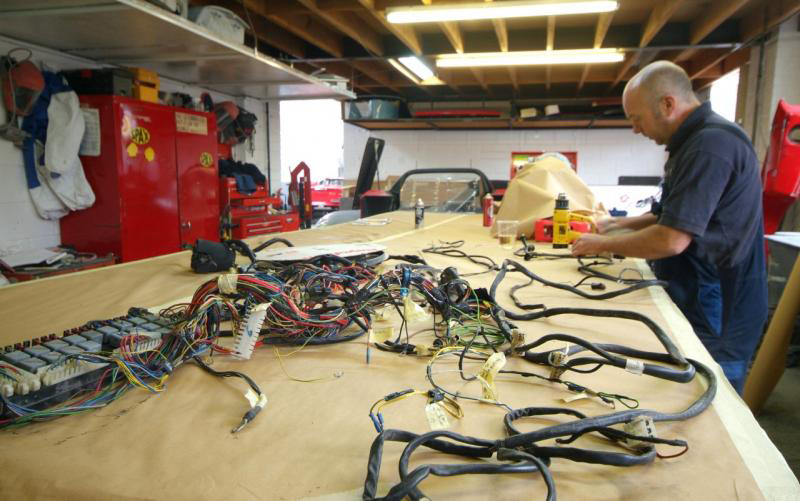
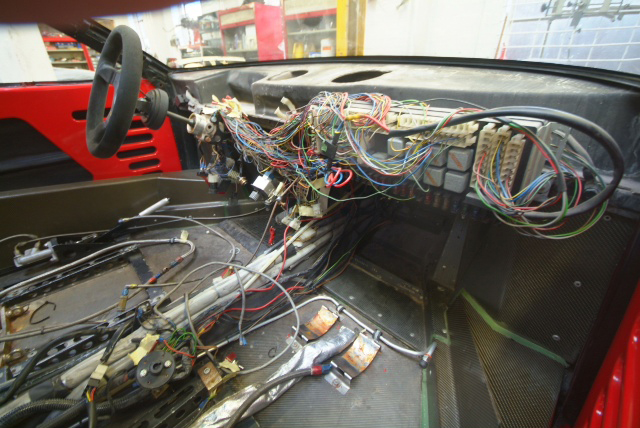
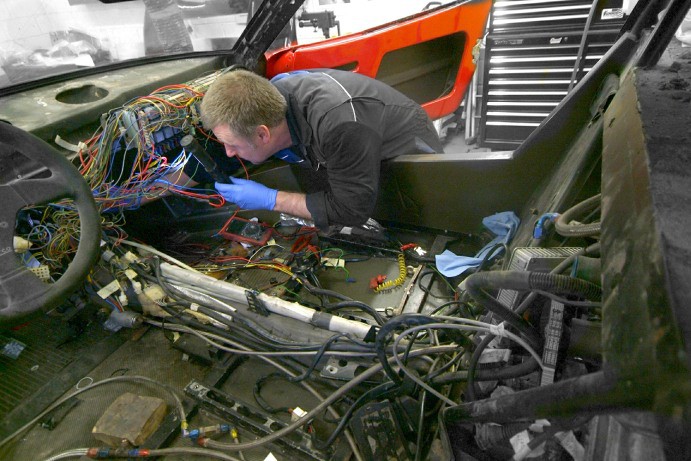
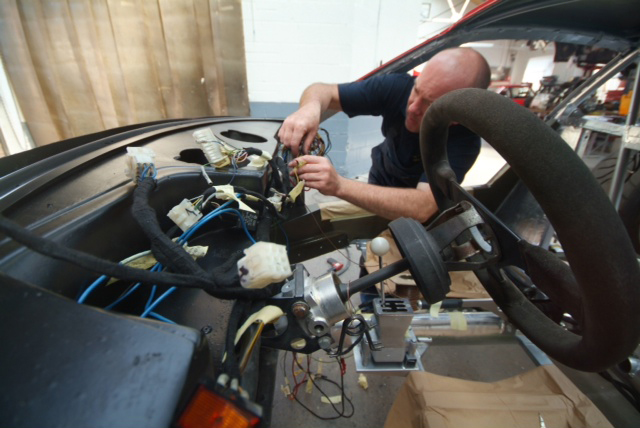
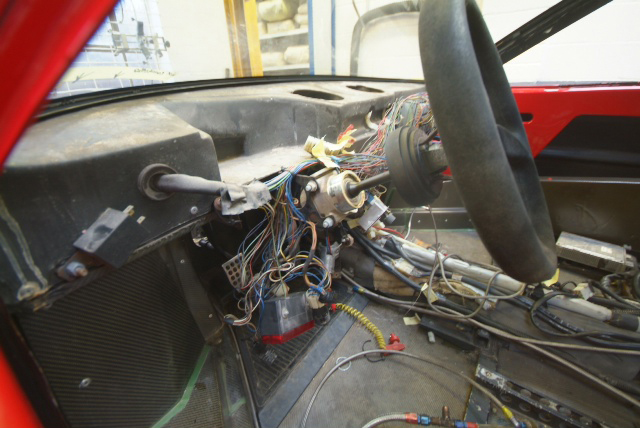
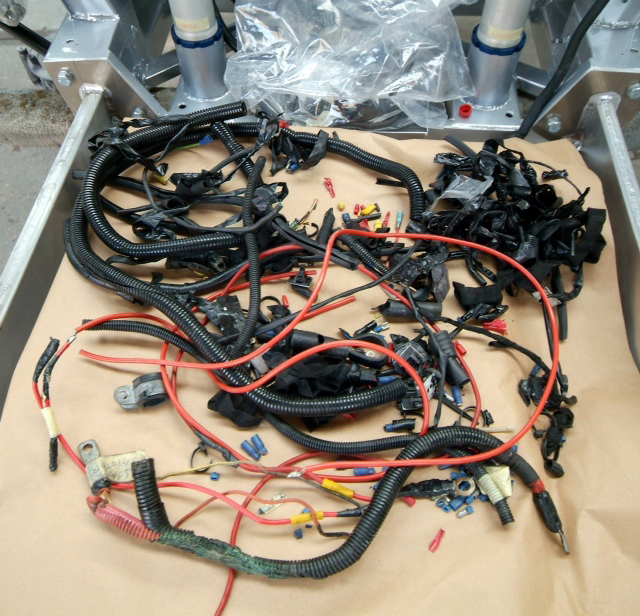
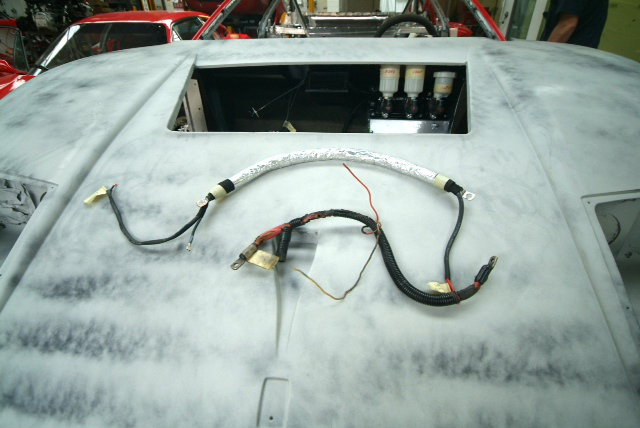
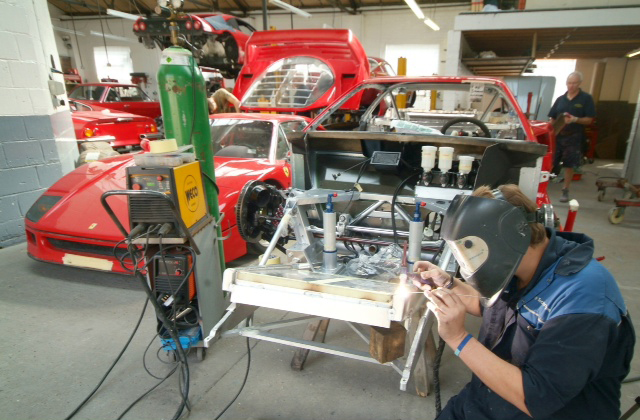
OK, game over and well spotted Mike, took over 200 views before the bell went off! They are actually the drums off a Tour De France that is in there for a rebuild and the boys were just messing around-shows how braking has progressed.Meanwhile a bit of work on the wiring loom, boring, not very photographic but very essential, all dodgy connectors replaced and questionable wiring sorted, all rebound and now ready for installation.
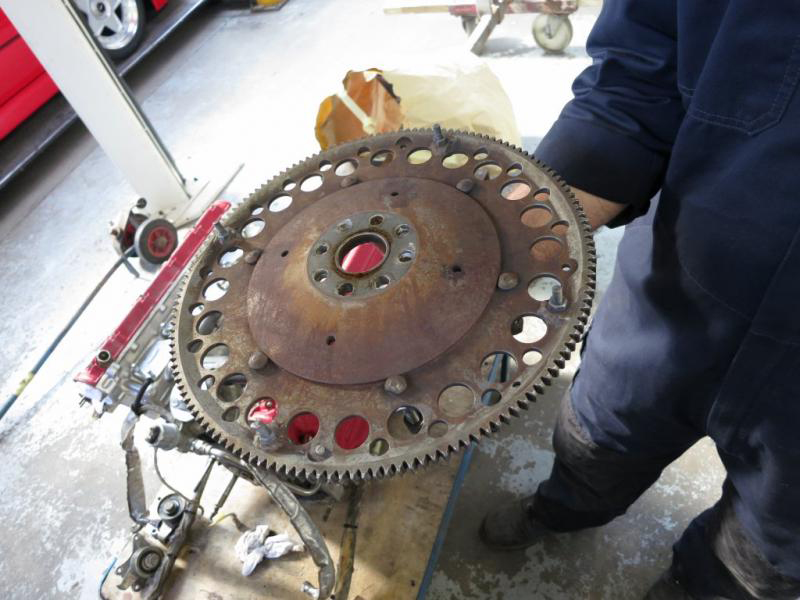
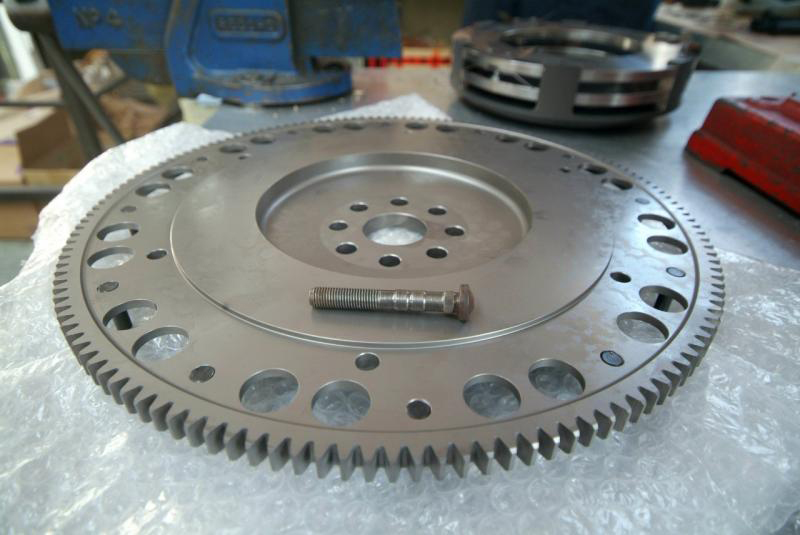
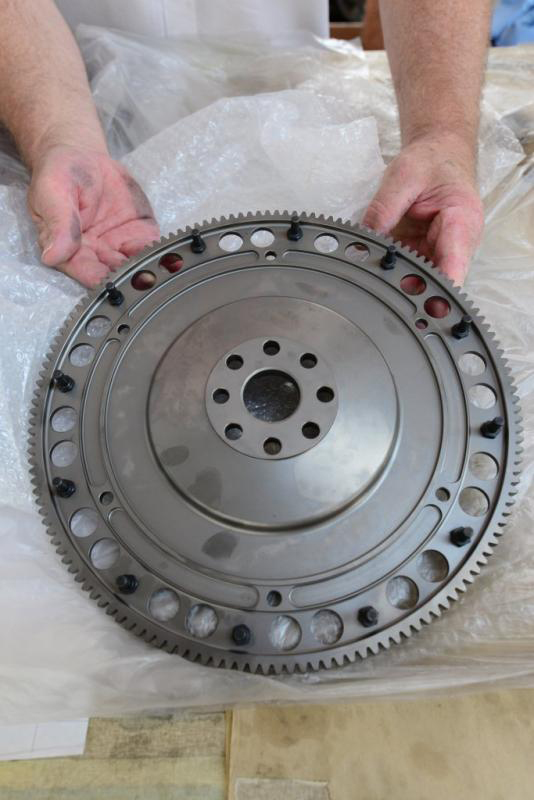
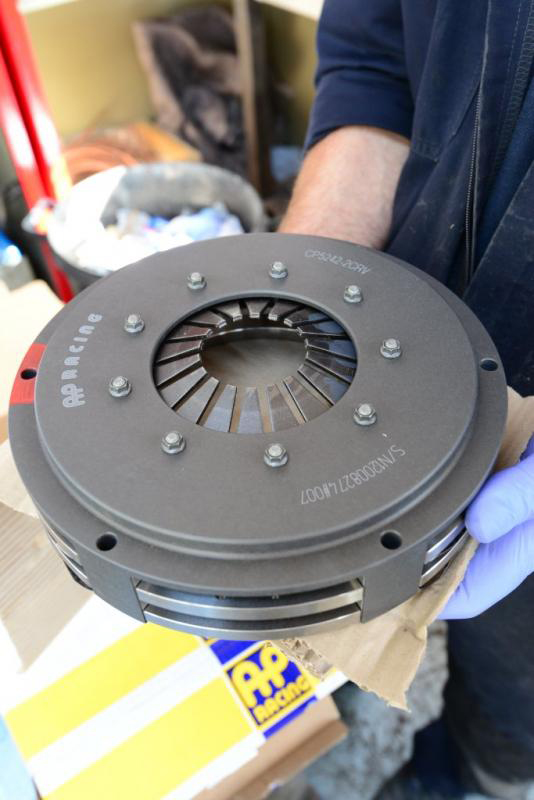
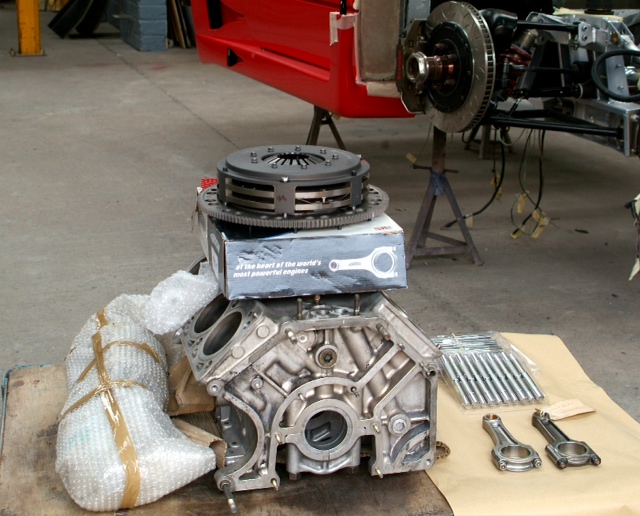
Well, after a few months and much discussions on timing pins, Postie (UPS) finally delivered our new lightweight flywheel from Nick Beere Racing. Almost identical to the old one but of a higher quality and strength and with more accurate timing pins to be able to take advantage of the Motec engine management system and give us far more accuracy and control than what we had before where the timing pins were actually rattling in their locations (You can just see them held in place by bolts on the first shot). The new version is also the same weight as the outgoing version.Behind, just visible, is our new clutch, and together make up just about the very first few pieces of our restored drivetrain.
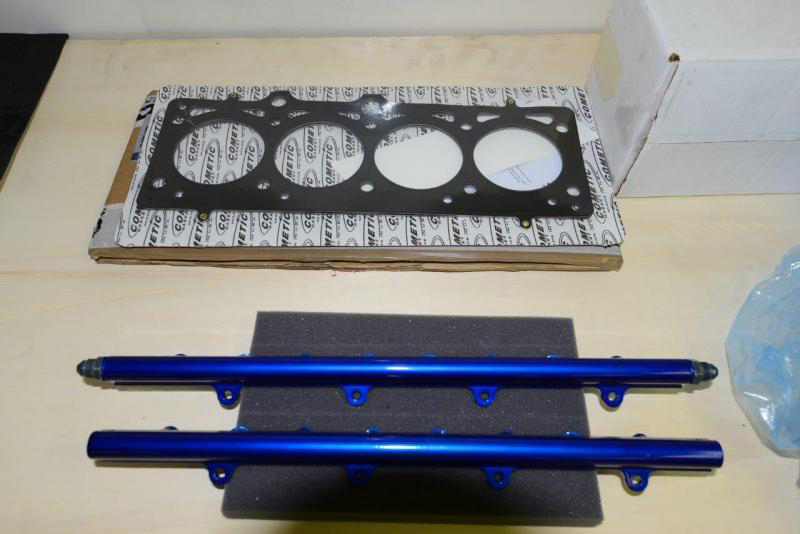
My cup runneth over – another arrival today, bad snap of the newly anodised fuel rails and our new high performance gaskets. A reminder of where we are coming from…..
A few more bits to deal with. Old lightweight Lexan rear screen needs replacing, oil tank will get the full overhaul.

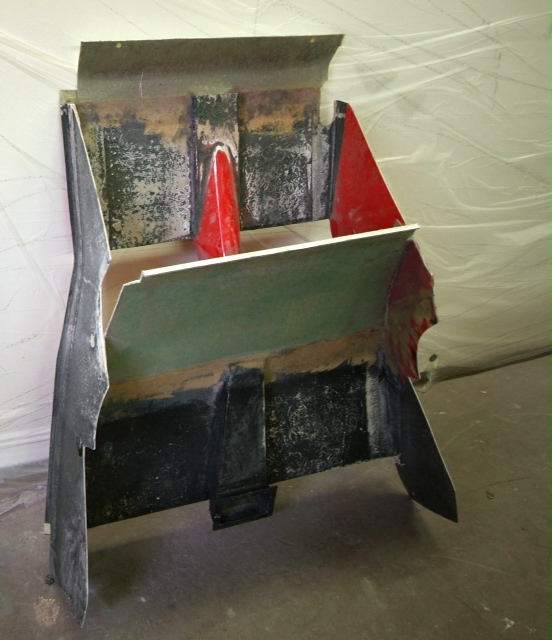
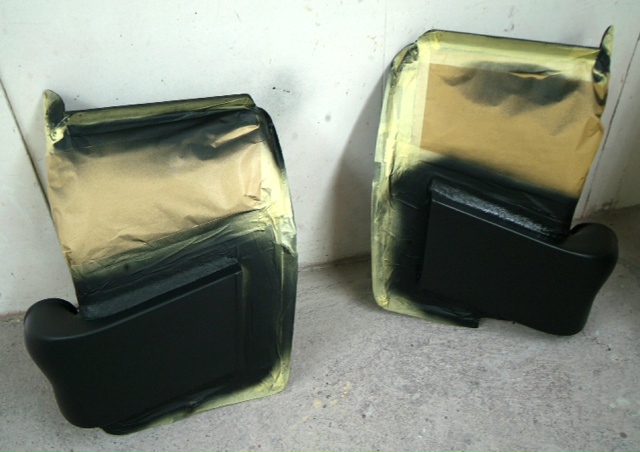
Off to the shop tomorrow and see if I can bring back anything else of similar quality, although I find that view of the rear with the shapes, curves and colours, very appealing.Attached a couple of shots showing a bit of detail work on those had to get bits, even though they will be covered up in due course.
Here is a better shot of the flywheel which the pics cannot do justice, absolutely delicious and also now the AP clutch in detail-a handsome couple, albeit that these shots make them look the same size; rest assured they are not and were provided as a single unit.
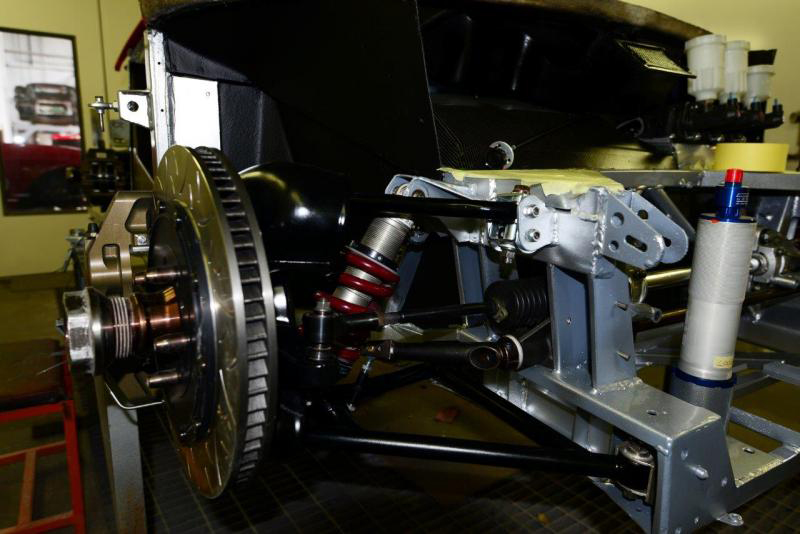
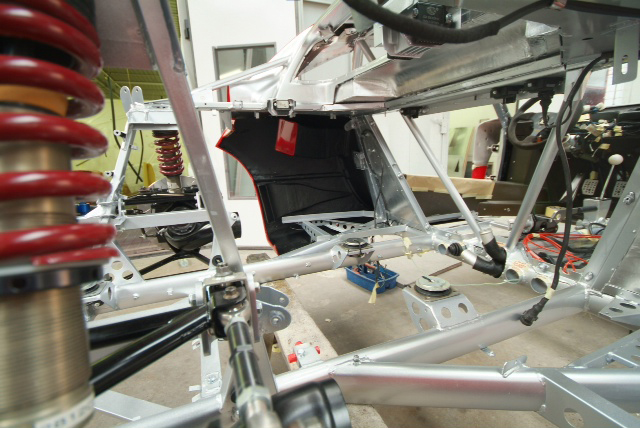
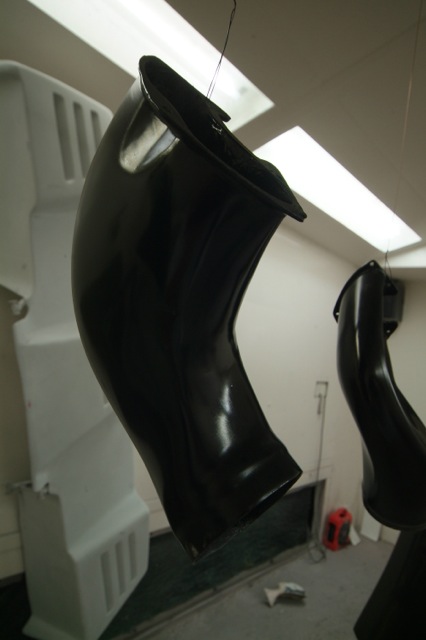
Another suspension shot with more to follow.
Spot the difference this time?
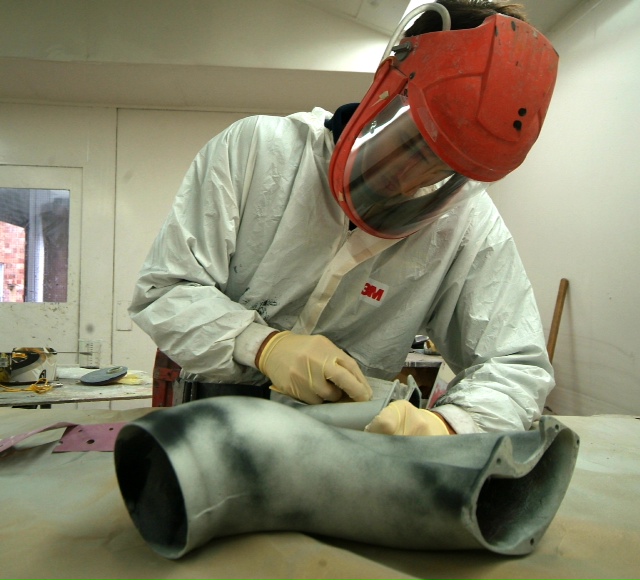
I told you these guys were highly trained, skilled craftsmen….
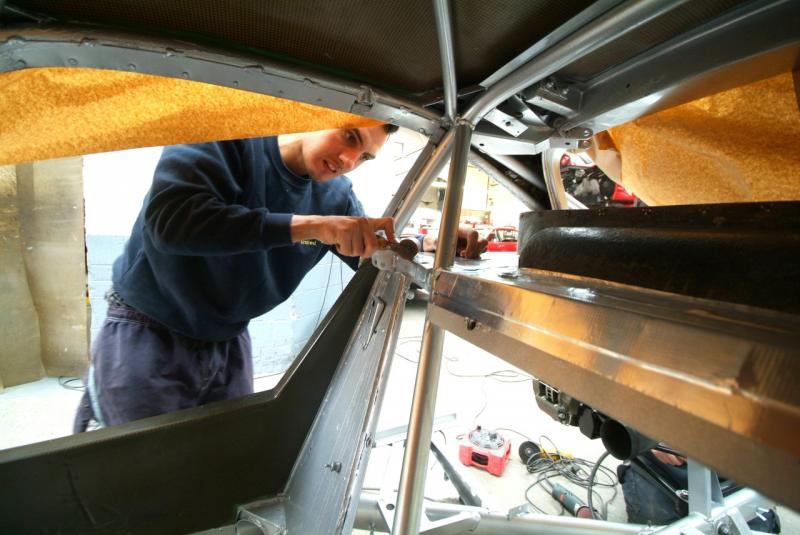
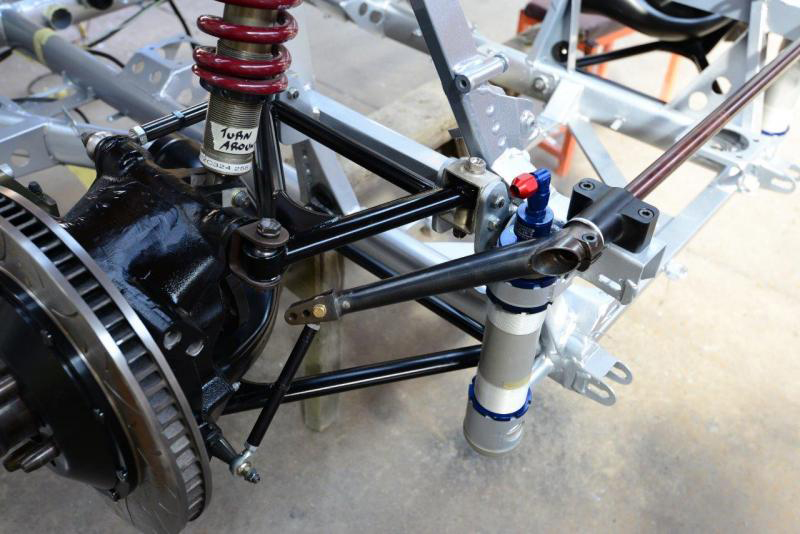
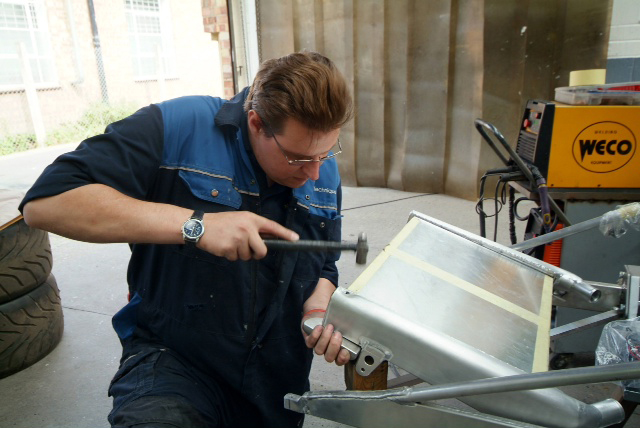
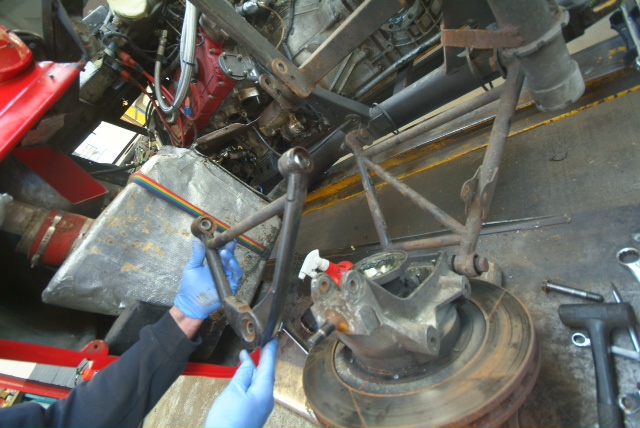
With the rear anti roll bar now mounted you can get some idea of just how tight things get back there with the pick up points and jacks. Interesting geometry going on with the links.
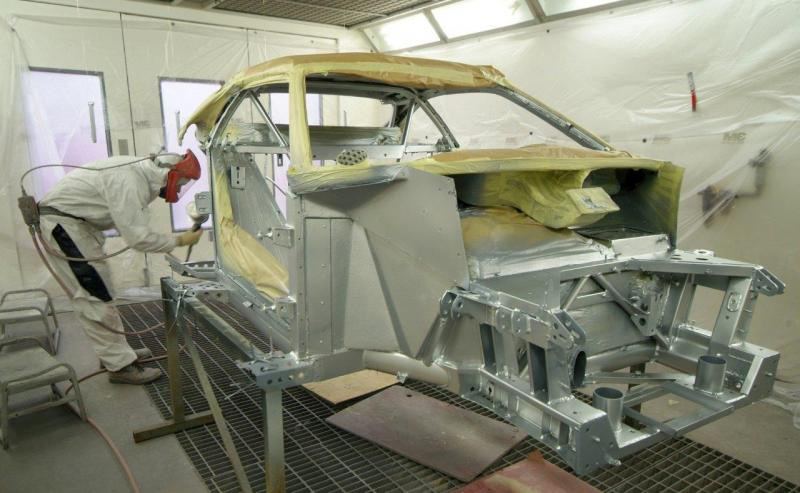
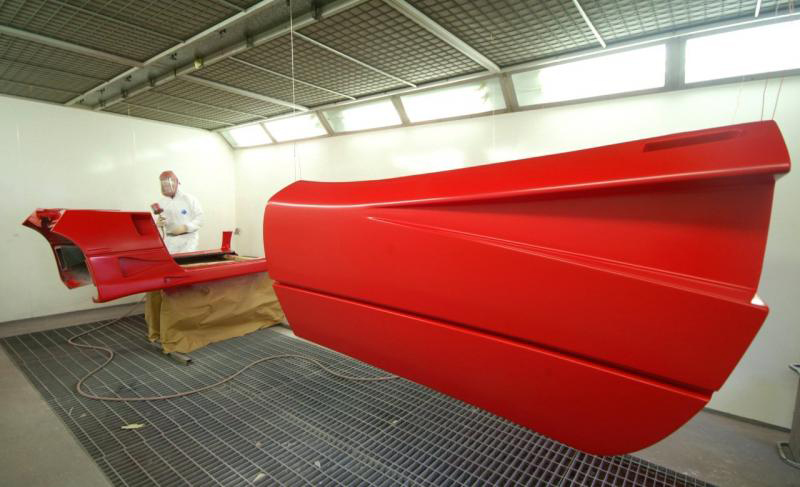
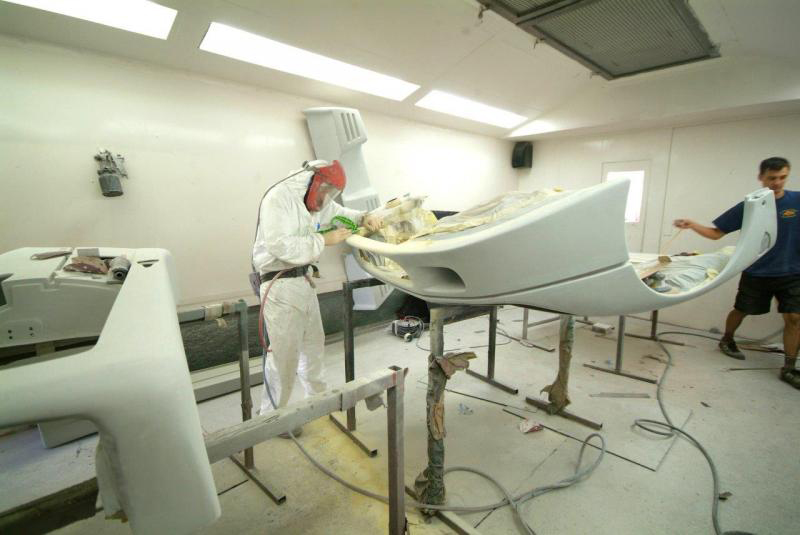
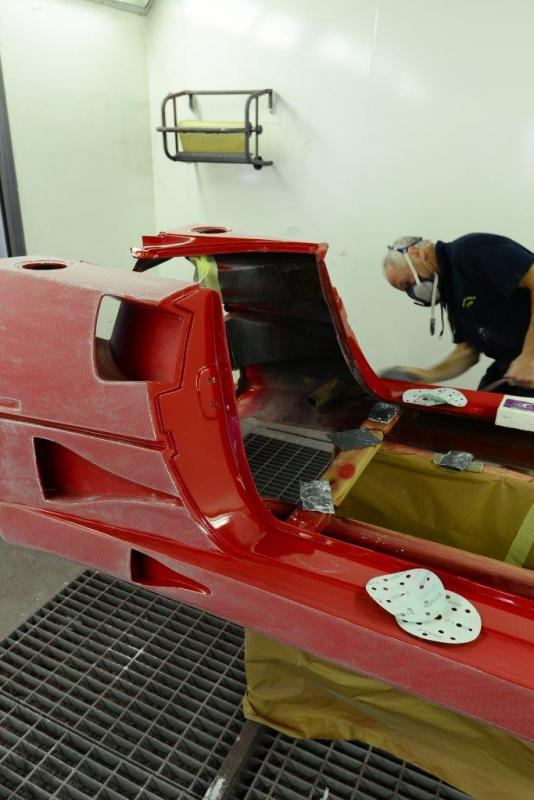
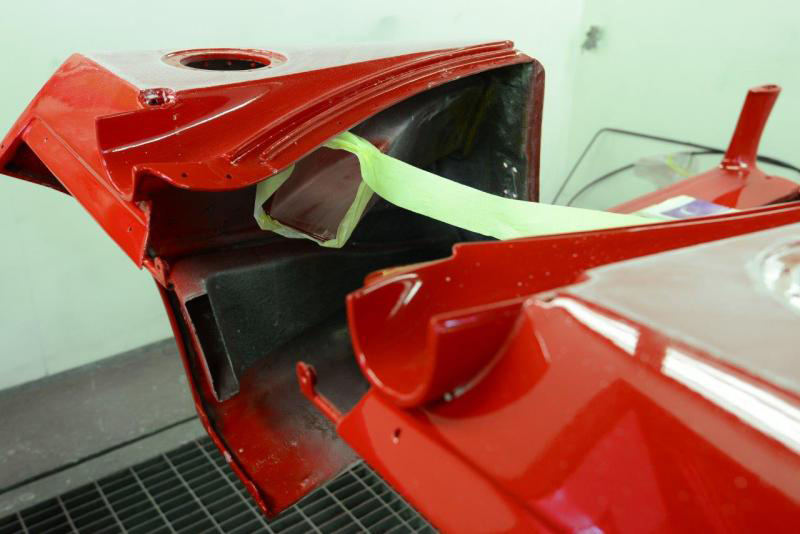
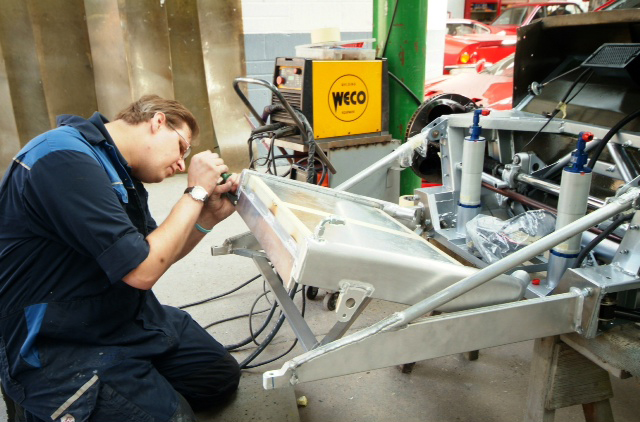
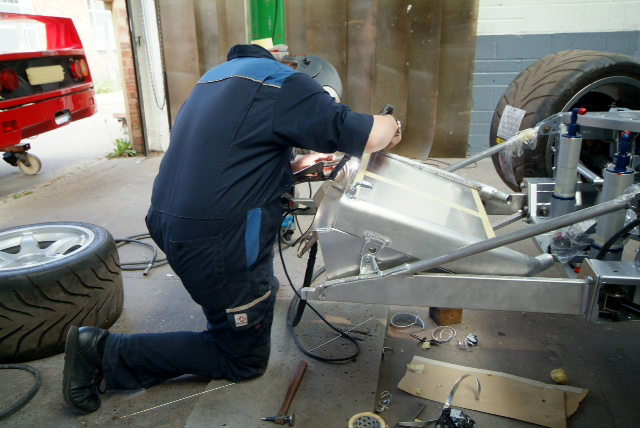
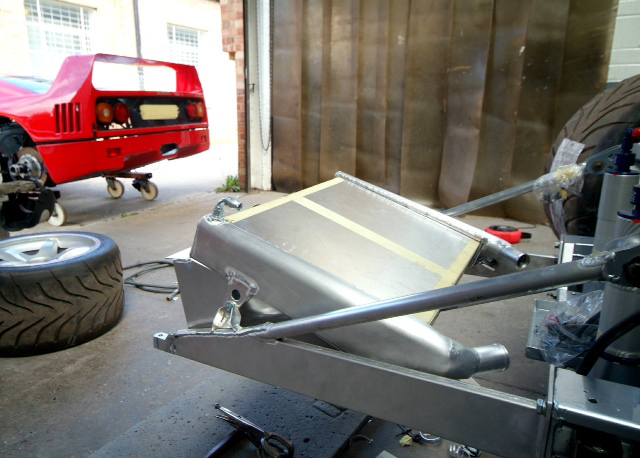
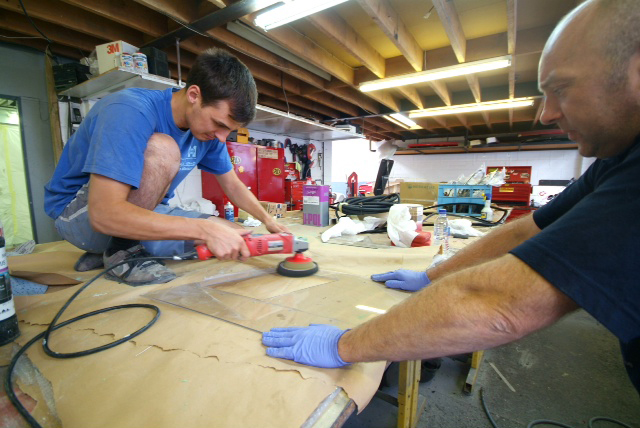
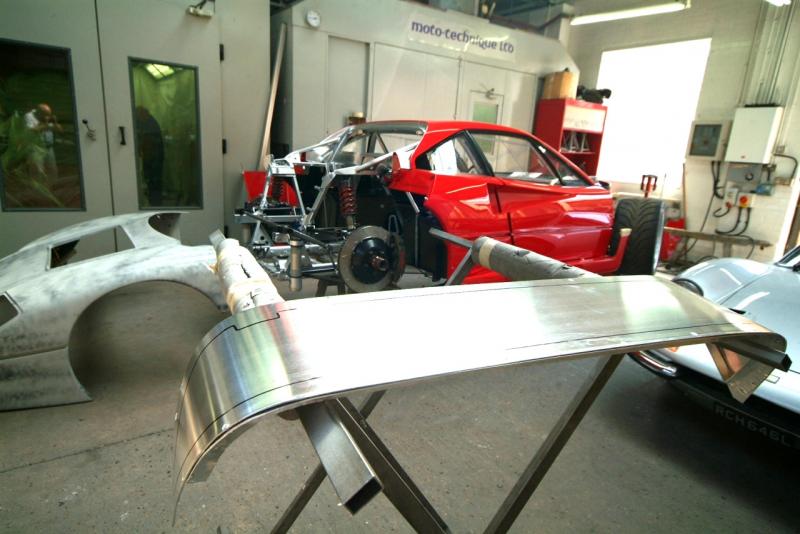
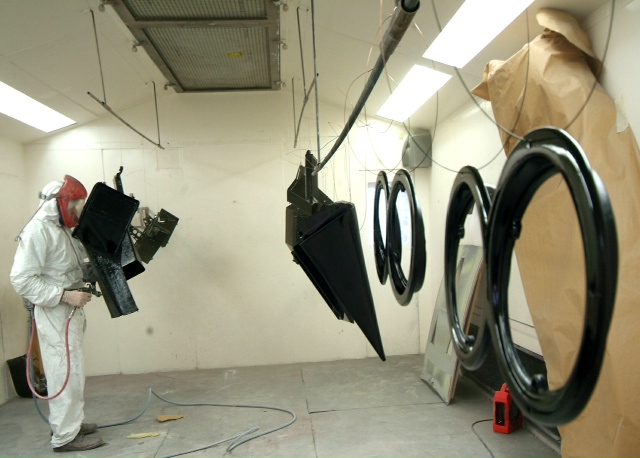
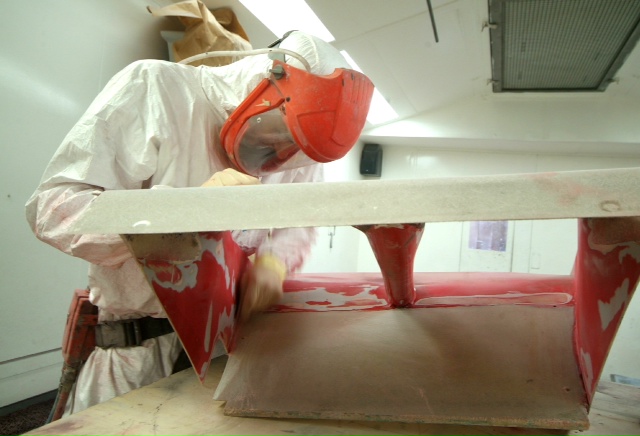
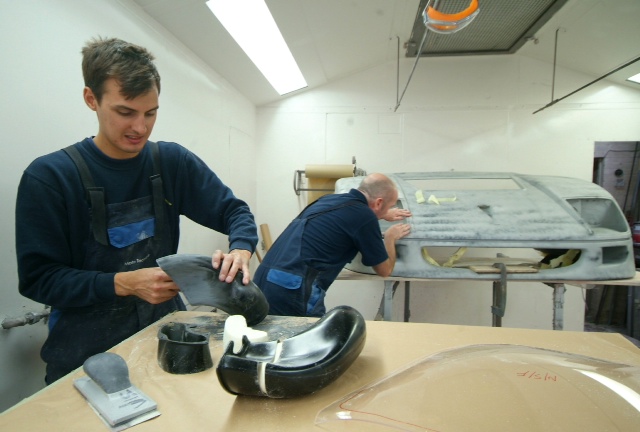
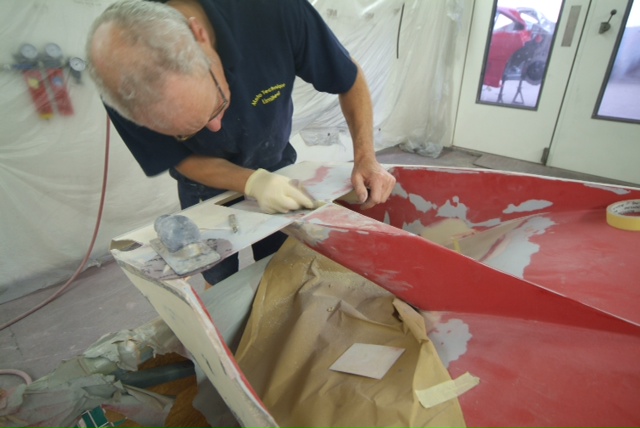
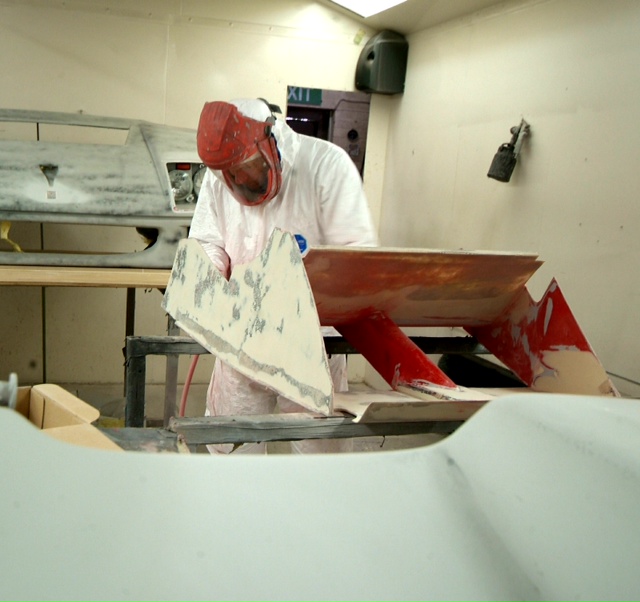
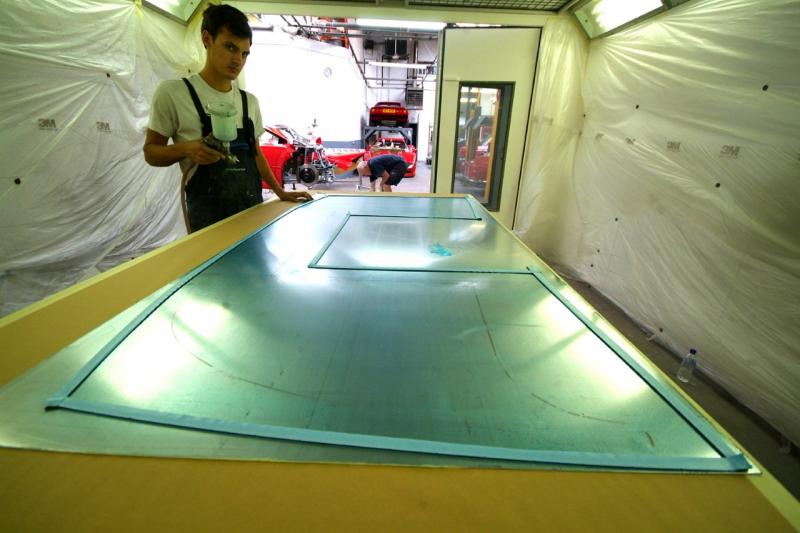
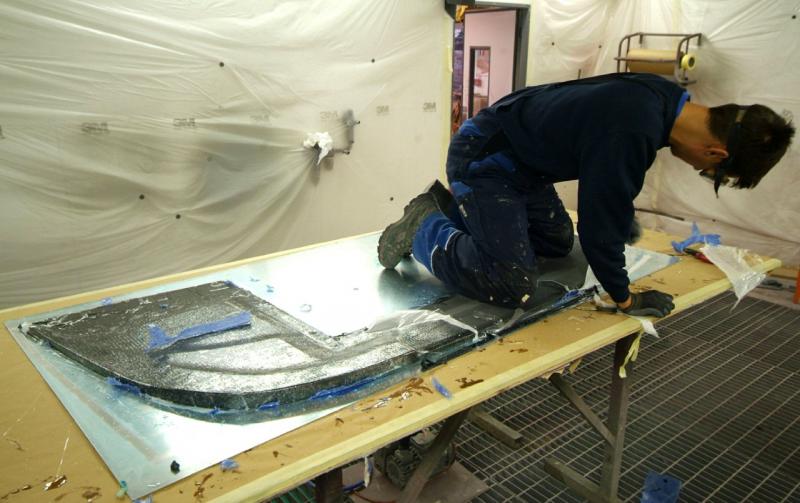
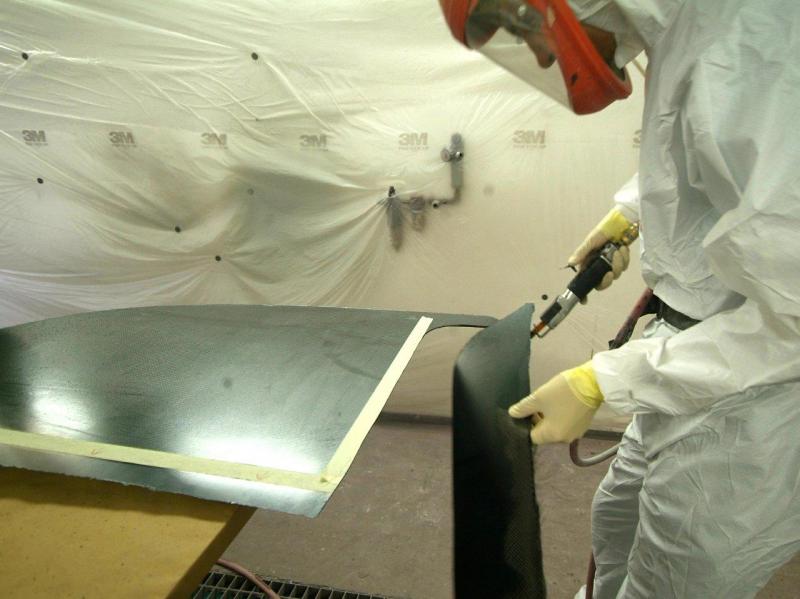
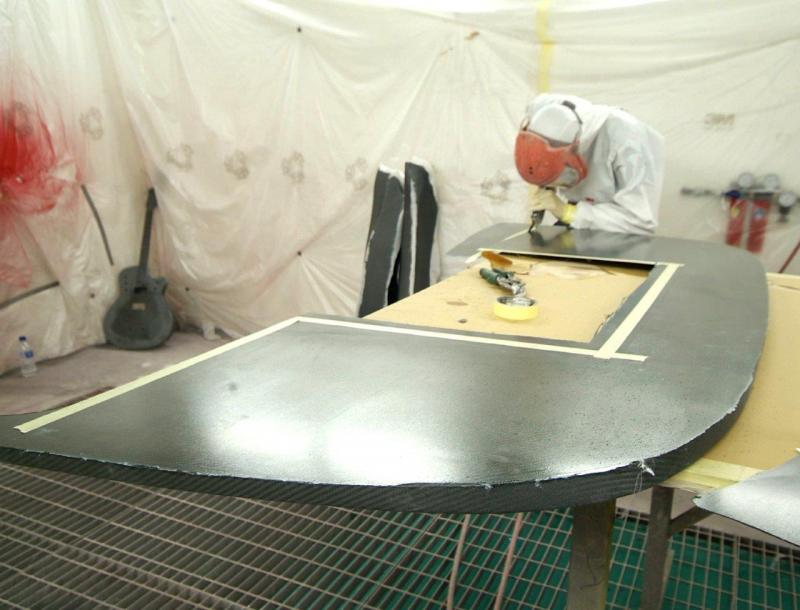
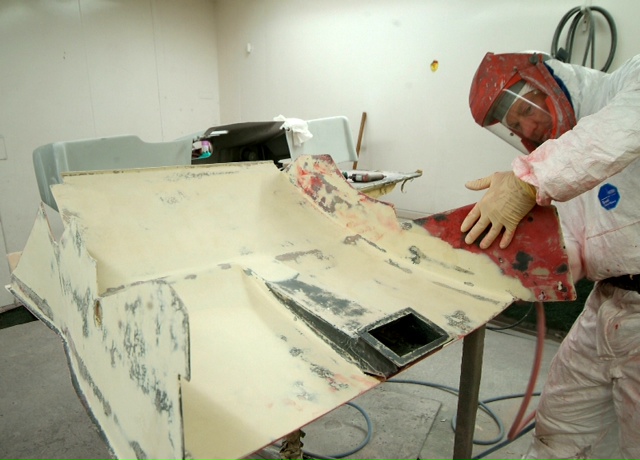
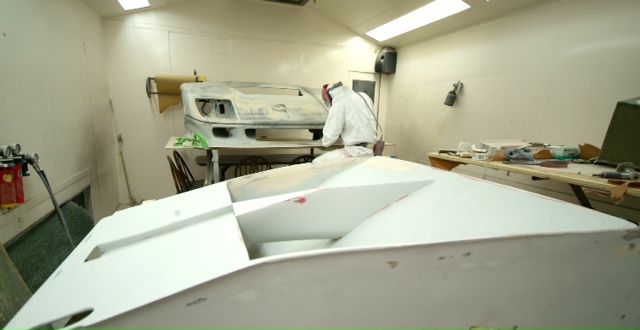
Time for a break from the rear suspension and into the paint shop. Panels undergoing their final prep and then first coats of colour before the clear coat. Side panels are on the critical path so they will be finished up first as we hope to get them fitted as a next milestone. Front clam still in final prep and will be the last panel to get colour, still needing to have further ductwork fitted which can only be done once our radiator is in position as, yet again, clearances are tight.
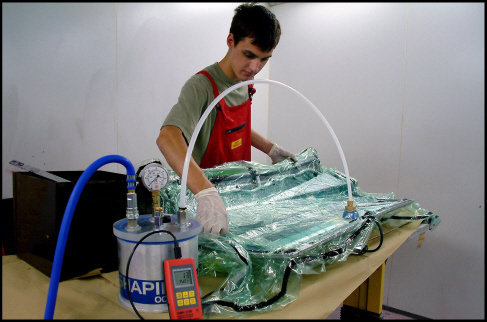
An interesting addition we are making. We are lining the firewall with a very lightweight Zircotec product, Zircoflex 3, a thin highly effective insulation foil to try and keep the cabin temperature more bearable as well as insulate the tunnel through the cockpit which carries the radiator pipes. Hopefully in this way we can minimise heat absorption into the cabin, given we have no A/C it could be a useful bonus. Invisible but effective.

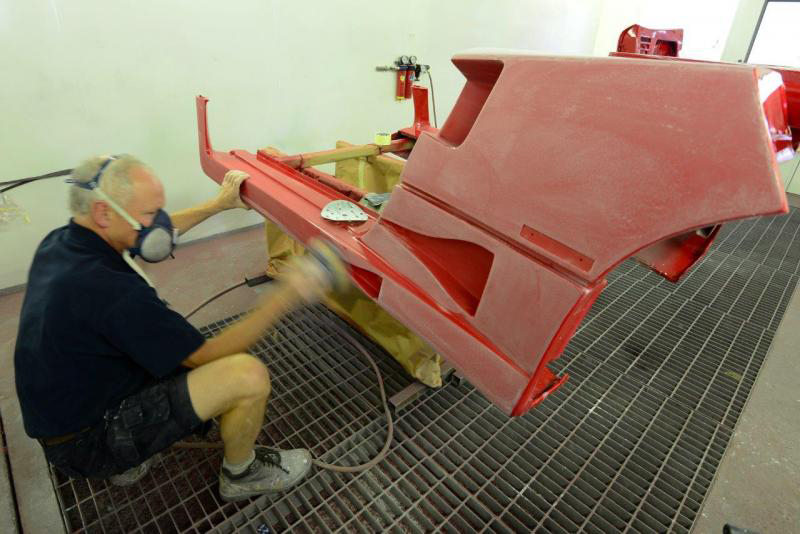
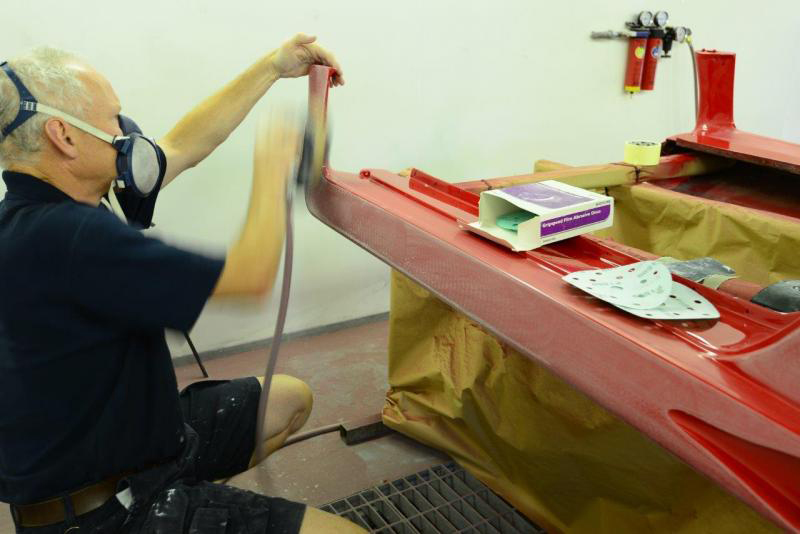
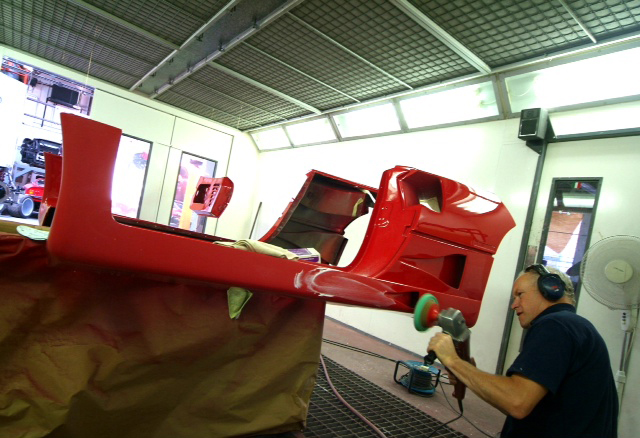
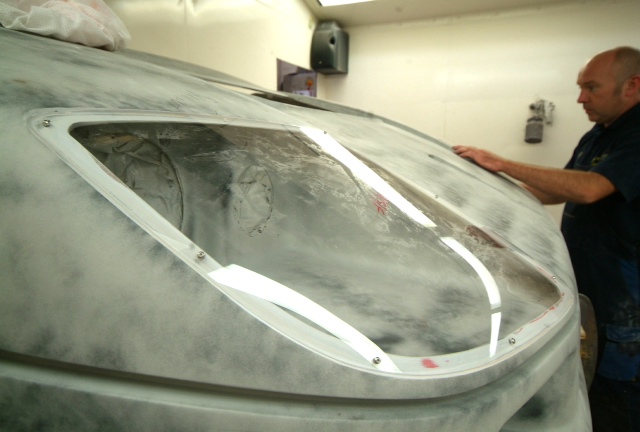
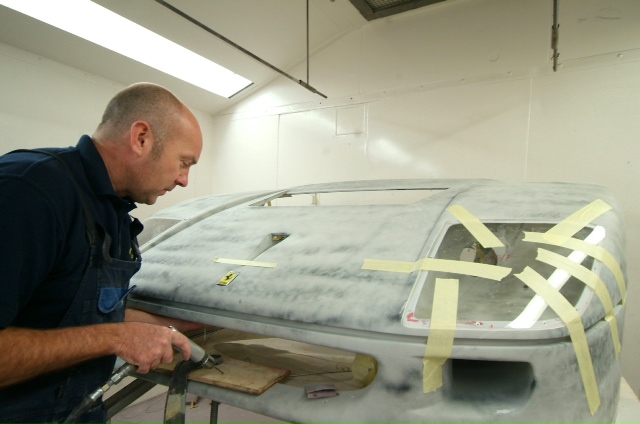
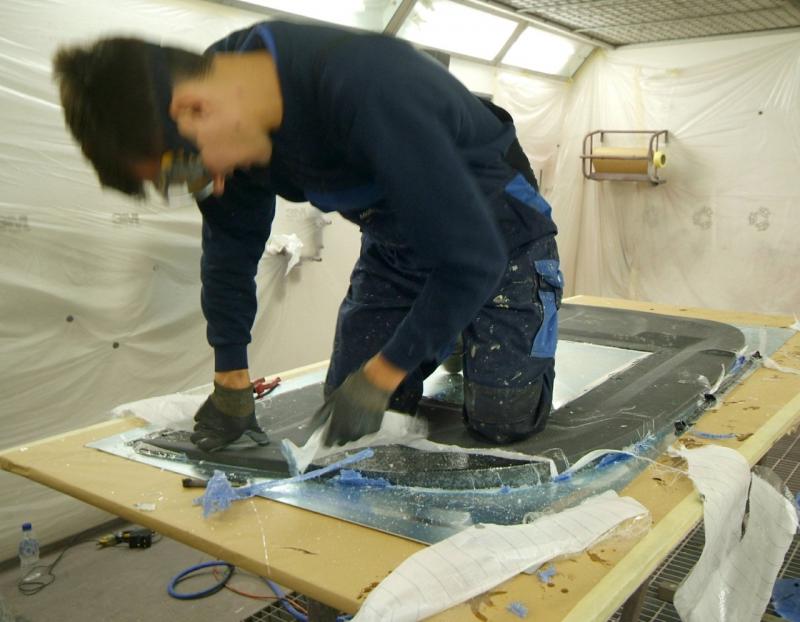
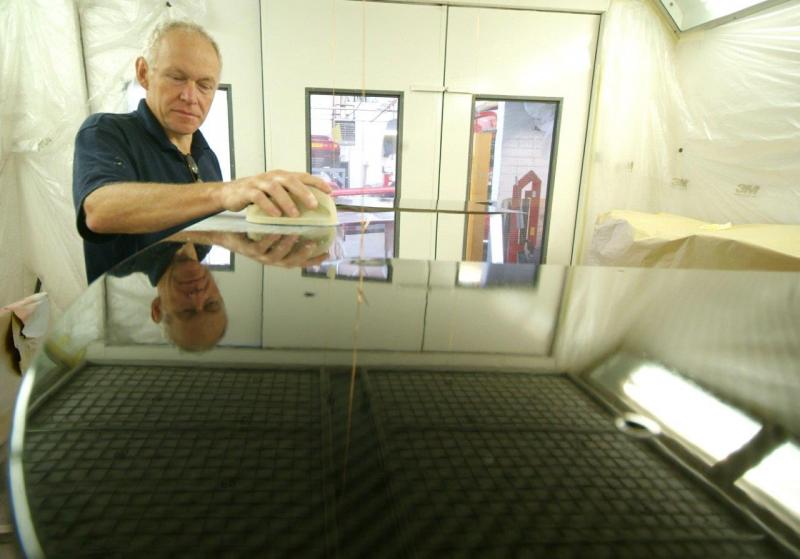
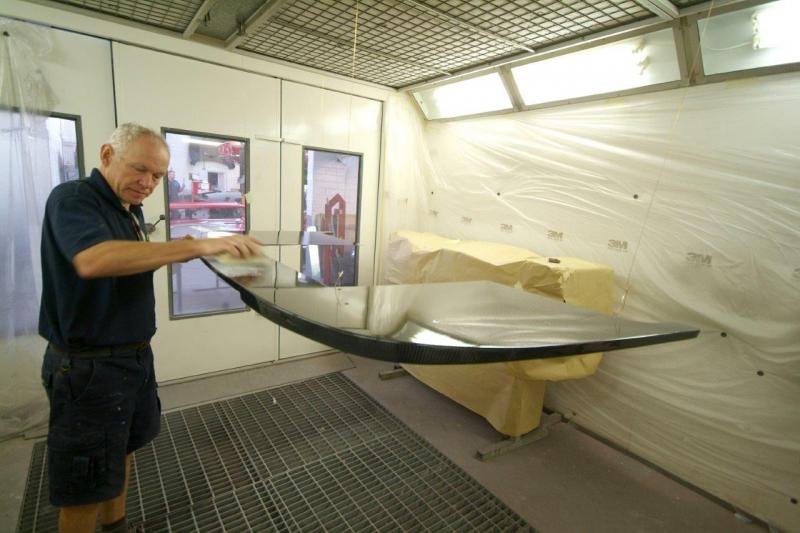
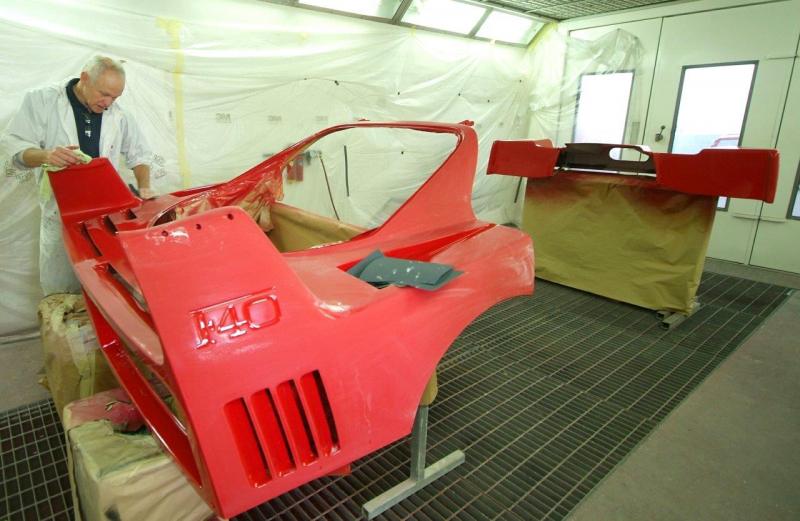
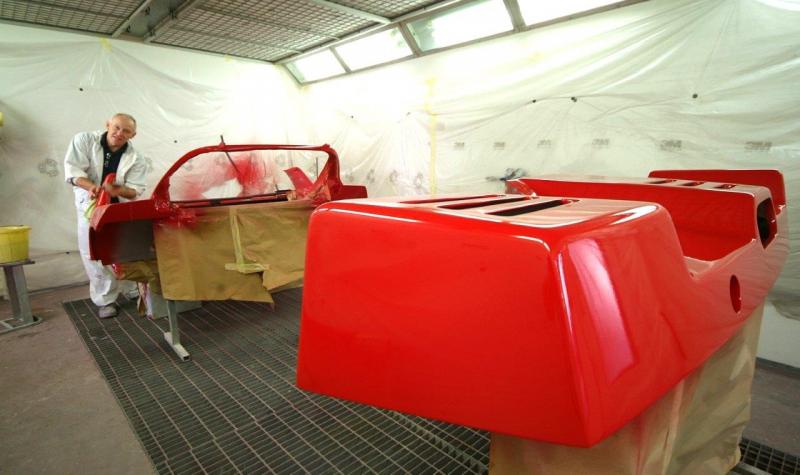
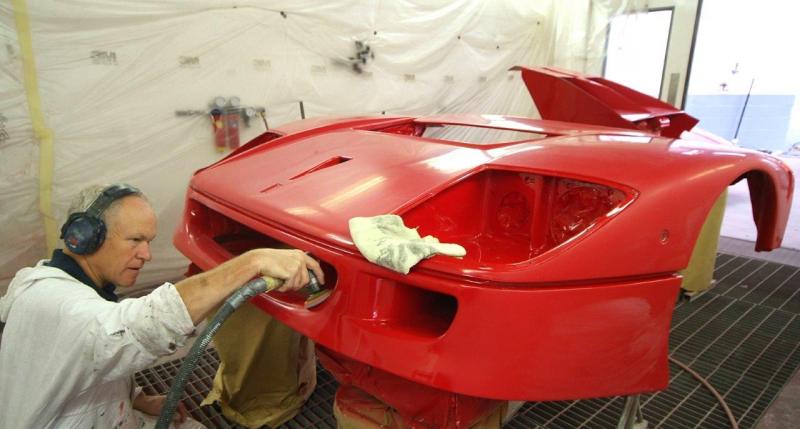
And so it continues. Back in the body shop we have now applied the clear coat and the sanding starts working our way down through varying degrees of coarseness to something you could almost polish you face with, yet is still mildly abrasive.You can see the start of the finish in the reflection in the last image where they are working in the vents, areas that never interested the factory. Some might say non original, I say I want it as good as it can be and how the factory would like to be turning out all their cars if they were not so focused on the bottom line-I can assure you if I was to respray my Spider, I would not want to duplicate the factory finish! Traditional Ferrari orange peel has no place here.
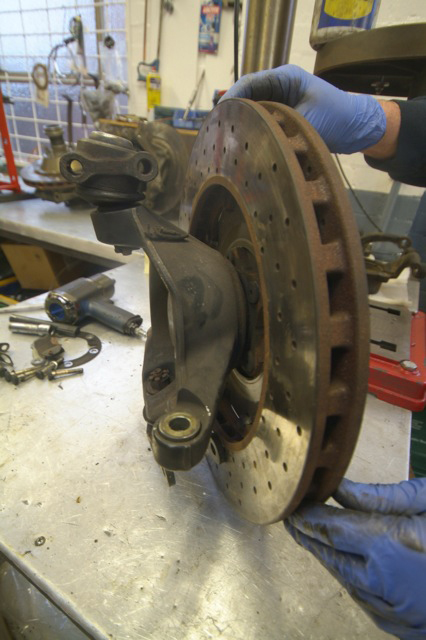
The last of the suspension detail for now unless someone has not had enough of it. Love the small cross brace from the steering rack back to the chassis, I assume to help deal with increased strain from the ridiculous front wheels. Also another reminder of where we came from with the front brakes. It was found that drilled brakes wore badly and spider cracking started between the holes resulting in potential failure. Early LM’s had drilled discs and later they were replaced with what we have.Trying my hardest to get CM, when I manage to reach him which on average takes weeks now rather than days, to supply us with new wheel nuts but he does not appear to understand they are different from a standard car despite making them! Anyone out there have any genuine spare LM wheel nuts?


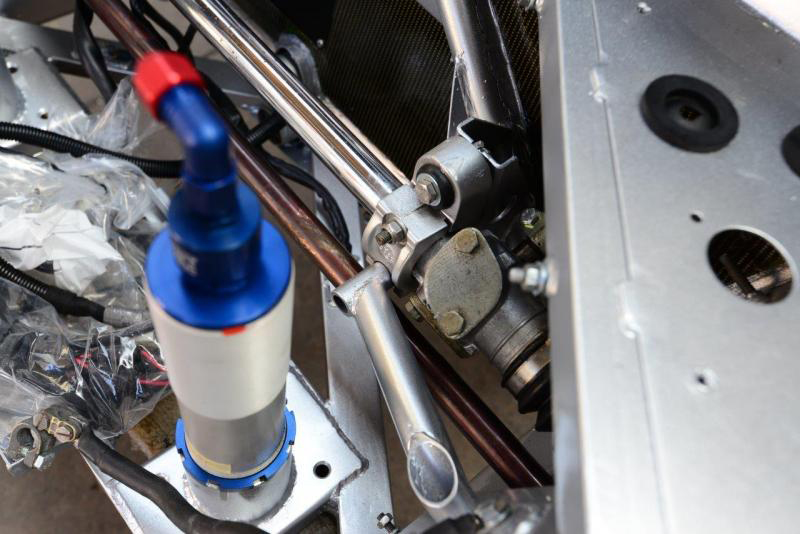
Work has also been progressing on the new radiator as, like everything else on the car, the old one had had it. New high performance core fitted but invisible due to temporary alloy protection panels. I think we may have to also fit electric fans again so as to make the car acceptable for very limited road use and also all that hanging around the pit lane etc.Collector box to channel the air also fabricated and fitted, and aside from the major exception of the motor, this must be one of the last large parts to be readied. Next week will be a truly transformational one with body panels actually being fitted as it starts to come together and by the end of it we will definitely have something that looks like a car.
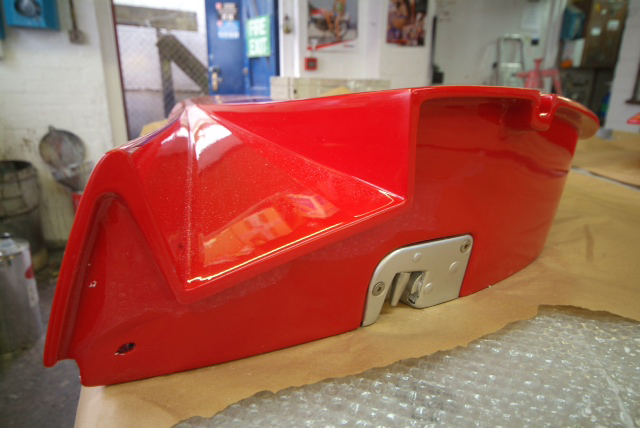
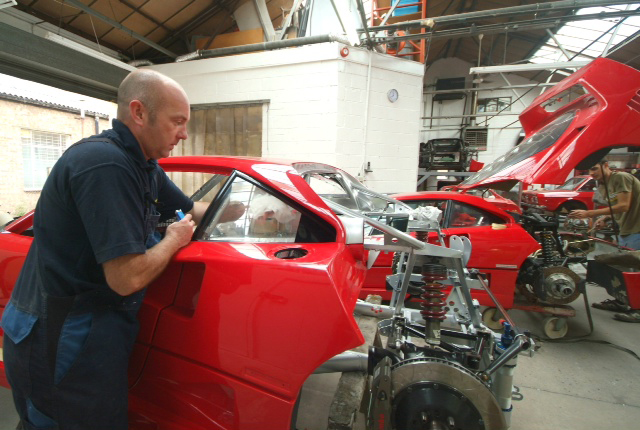
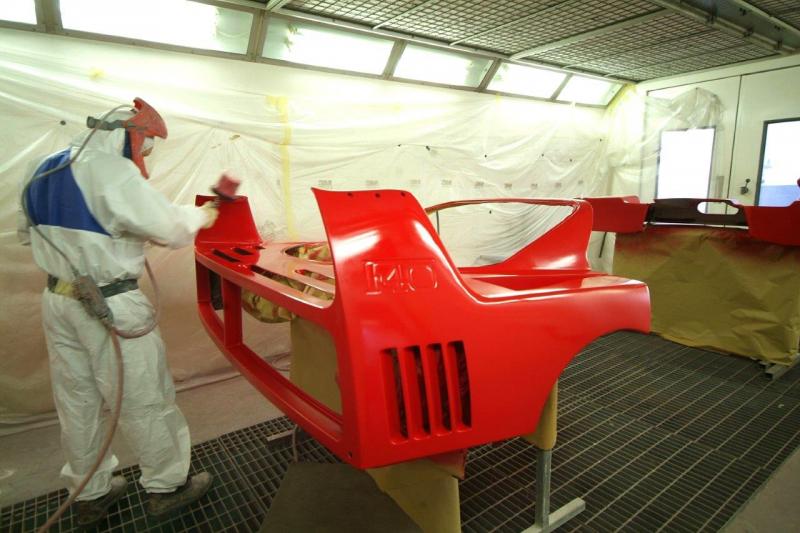
Back to the paint shop and Cills and doors now finished and ready for installation! This week will see major move forward as we finally return some of the panels to their rightful home. Note the rebuilt and refinished door catches.As mentioned before, the paint on the F40’s changed during the production run and we have gone with 300/12 which we find to be the darkest Rosso Corsa with least orange whereas I note in another thread here on Fchat someone said the total opposite. Having seen the two together, we have the right result whatever it may be called! Starting to get really exciting now, we just need some engine parts back from Crosthwaites as within the not too distant future, we are going to need to start thinking engine.
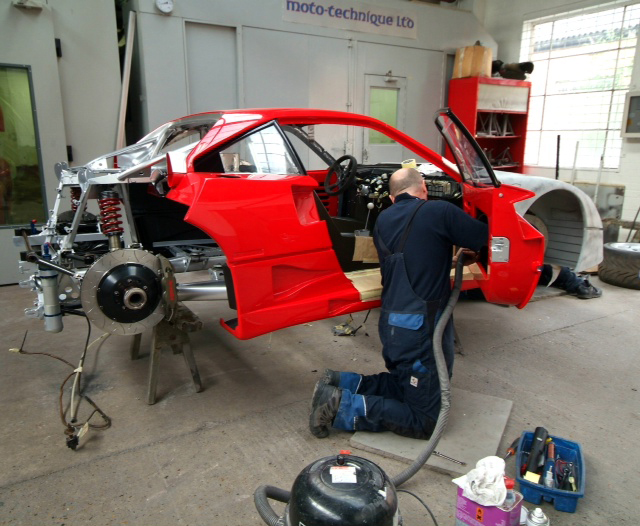
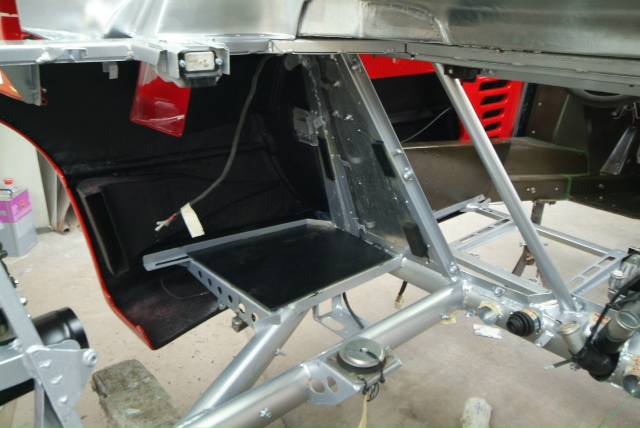
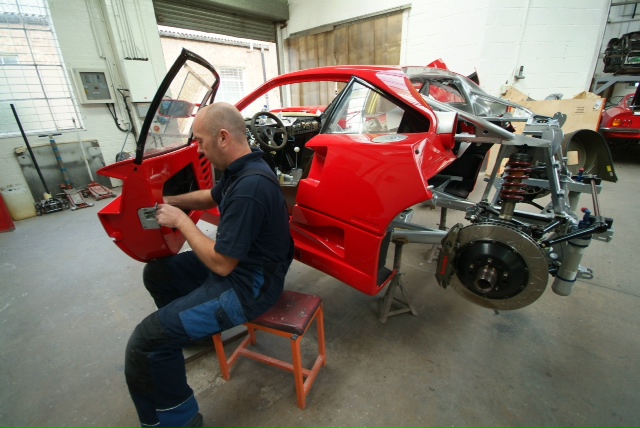
Another reminder of where we came from with the old cill with possible evidence of what looks like a small fire.Now how about this, one cill finally installed, inside cleaned up and painted! Look closer and you will also find new engine mounts and a bit of plumbing. Real progress as everything starts to come together, or in the case of the radiator, apart again as it needs to go off for pressure testing.When undertaking a project such as this, it is amazing how draining the first months are, not just financially but emotionally as you keep on getting bills, big ones, and yet all you seem to have for it is collection of clapped out parts in varying shades of repair or restoration spread across the countryside and it does not even look like a car anymore; yet the bills, not small ones, keep coming and you keep posting cheques and seeing – not much. and you wonder if you can afford to carry on like this, the job having exploded in reach.Then, as more and more unexpected work is revealed, you begin to wonder if you will ever get your fingers on the lip of the pit, and finally after seven months it is only really in the past two weeks or so that I now feel confident that I am over the edge and the whole unexpected saga makes sense and is beginning to shape up to how I had envisaged it. It also helps when you are supported, in my case, by Kevin and his amazing team for whom no obstacle appears insurmountable. If you are contemplating a project like this, chose your shop very very carefully, they need to offer a lot more than a smart reception, something Mototechnique certainly do not have! They invest in their team
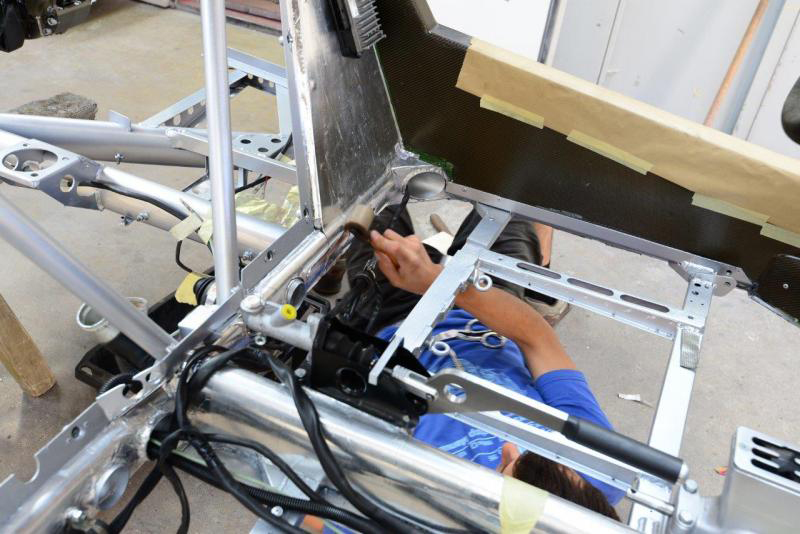
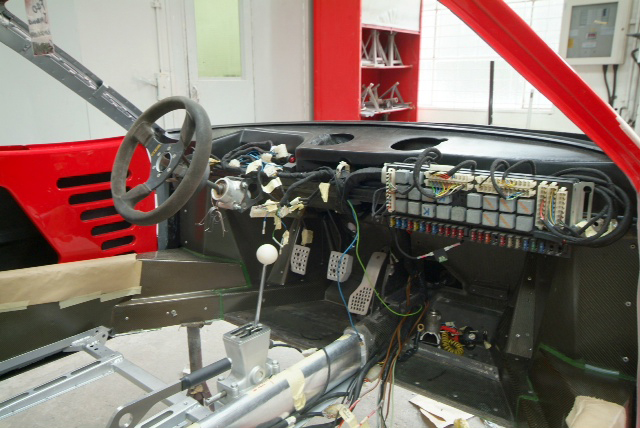
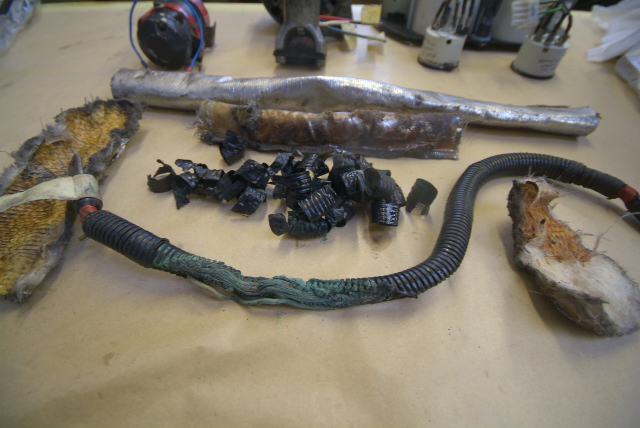
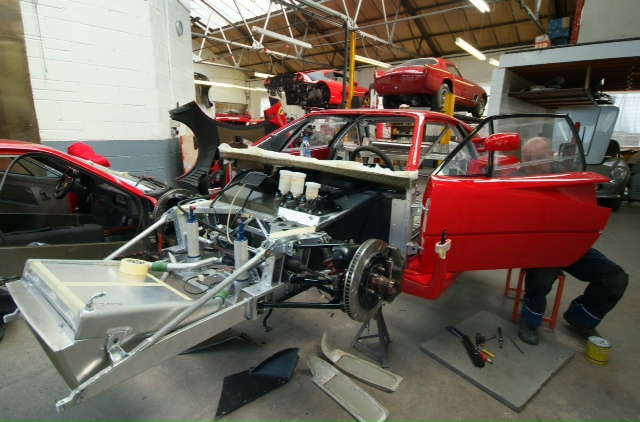
Work on the wiring now well underway. Love being reminded of how far we have come by these shots of the cabin a few months ago and just what a mess she was. Hopefully you can see what is pre and what is post!On the brown paper you can see what we stripped out of the car, a mass of loose connectors and most importantly a totally frayed through main battery line; untouched, a major fire was in this cars future. Some of the wires also had evidence of heat damage so as posted earlier, all dodgy connectors and frayed wiring out, new in, all rewrapped and now being installed. Hopefully it is clear what is pre and what is post!Towards the bottom you can see the old battery cable, amazingly totally worn through and copper wire exposed, against our new version, properly insulated, sitting on the front clam whose speckled appearance is a witness coat so the guys can make sure they have dealt with every nook. Much more work on this entire front clam, plumbing, ductwork integration needed, a complex area on an LM
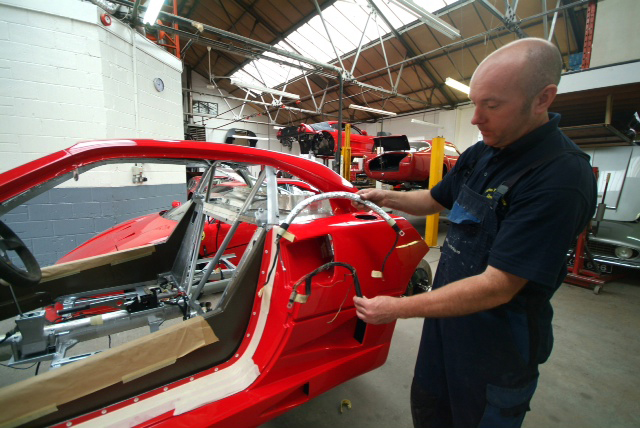
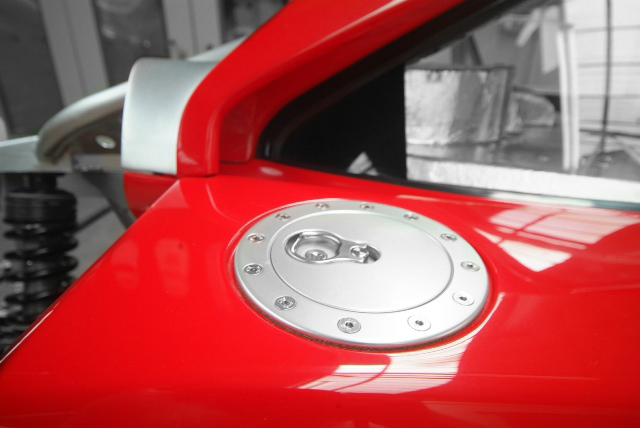
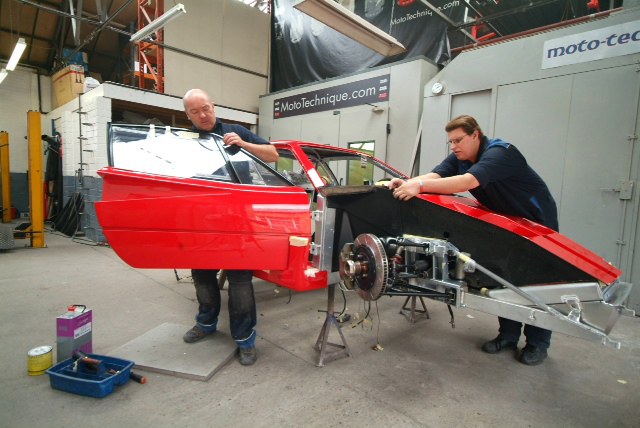
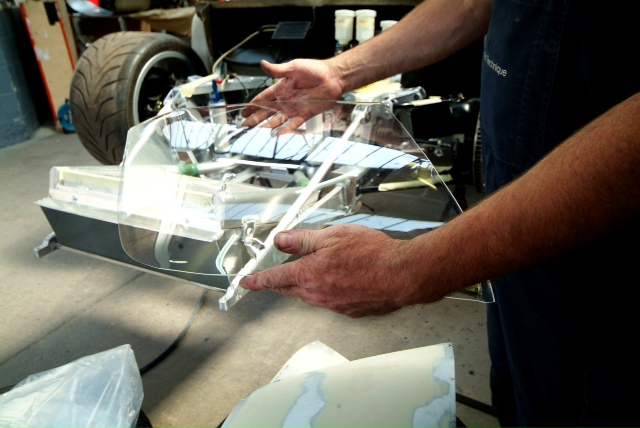
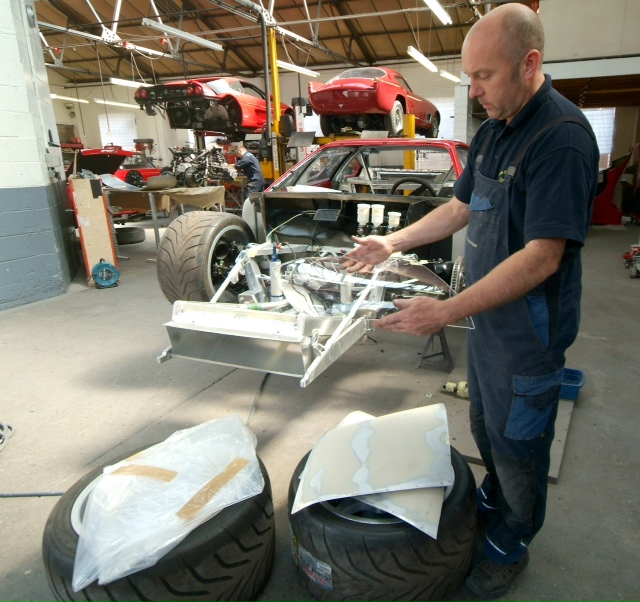
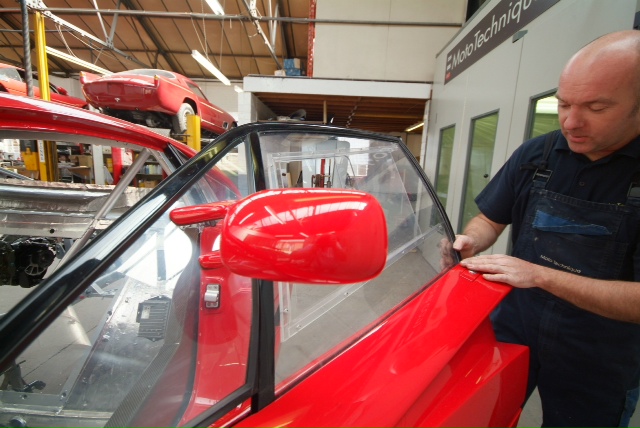
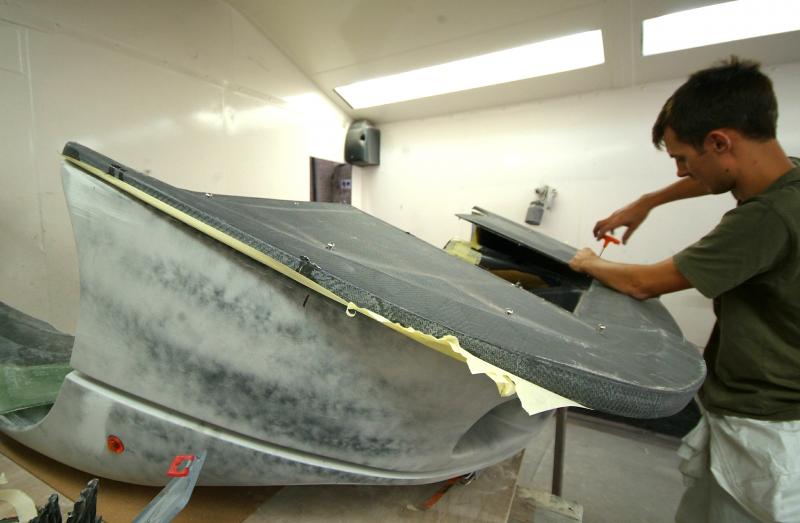
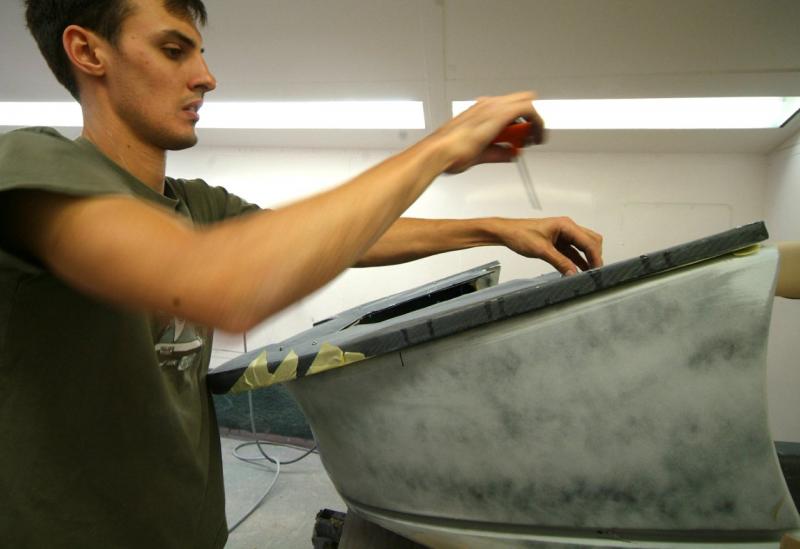
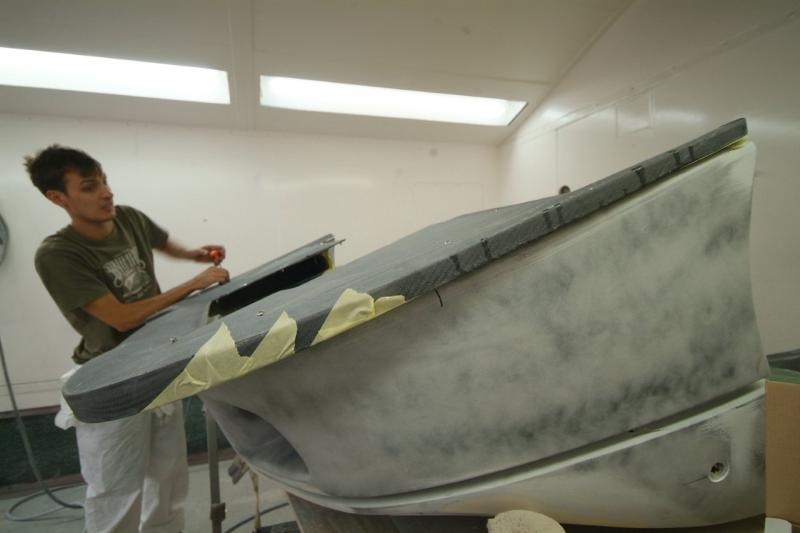
Fuel filler caps now fitted. All the windows are Perspex with the exception of the windscreen but were all in a sorry state. The rear screen is being renewed in Lexan as that was beyond redemption but all the side panels have now been buffed up, the frames repainted and now actually fitted. Nice to have elements being fitted for real, not just for trial.
A few general shots to show where we are finishing up the week. All Windows and window frames in and next week we hope to dry fit our fuel tanks and are scheduled to receive all our engine parts back from Crosthwaites. Too late to start saving for that one, newly honed cylinders, new exhaust valves, polished crank, reverse gear, titanium rods, pistons with new rings and together with our new flywheel all parts as necessary dynamically balanced. That will be yet another monster milestone. And bill.Front air conveyor being dry fitted as yet to be restored and painted but this front end is just very busy underneath.

Forgot to mention, just dry fitted our new cabin floor here which we will leave out until later to avoid messing it up. Last one had more holes than floor.

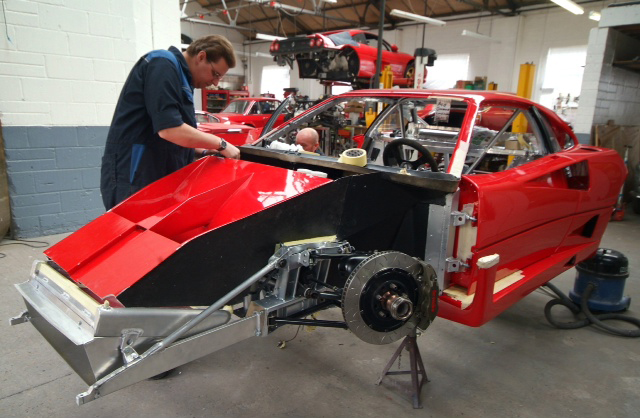
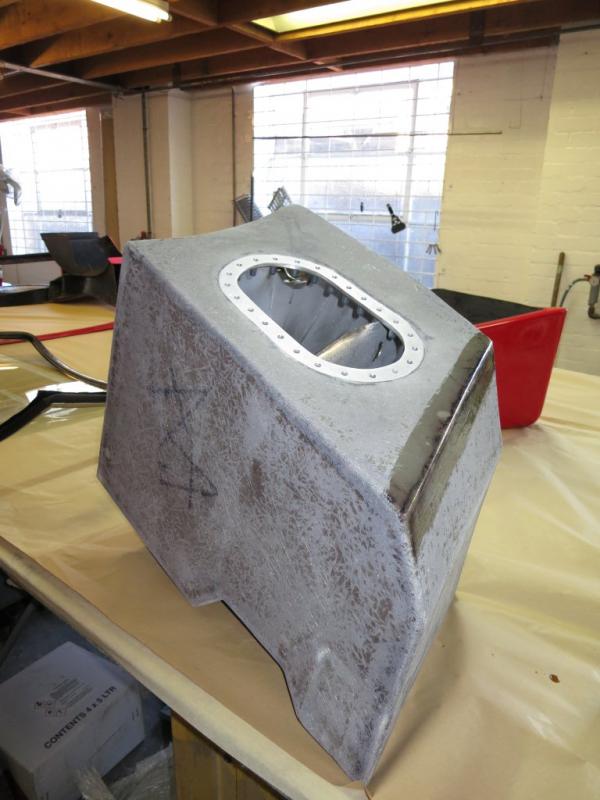
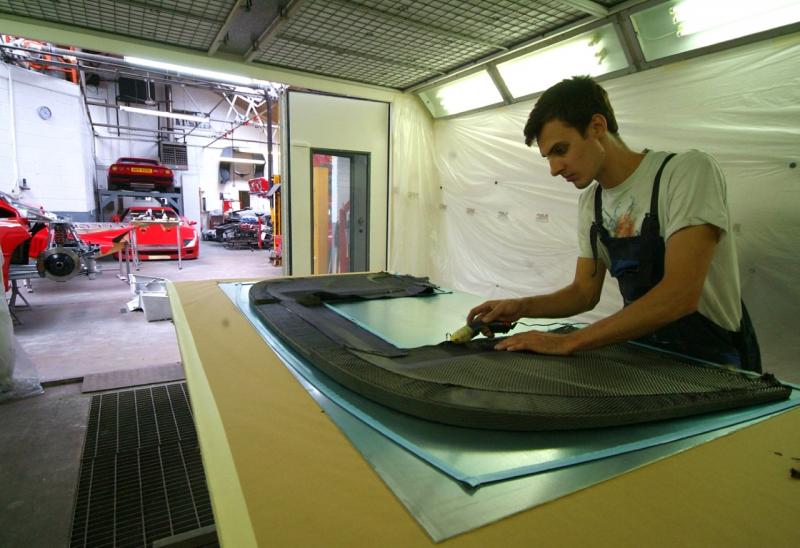
More detailed resto work on ducting, diffuser, rear grill, tanks etc. This is the problem, when you start down this path the last part you fit has to be as good as the first. Wish it would stop.

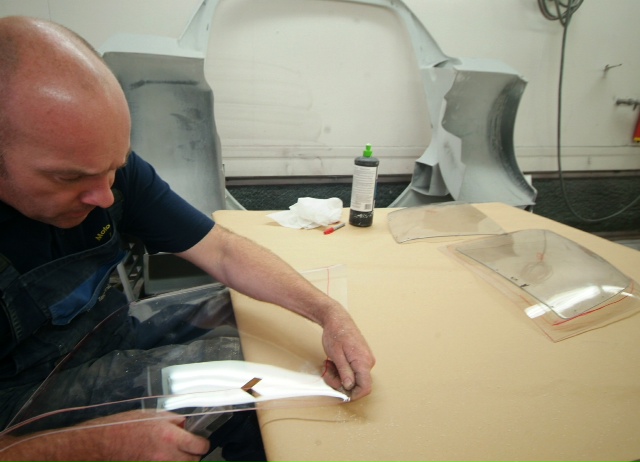
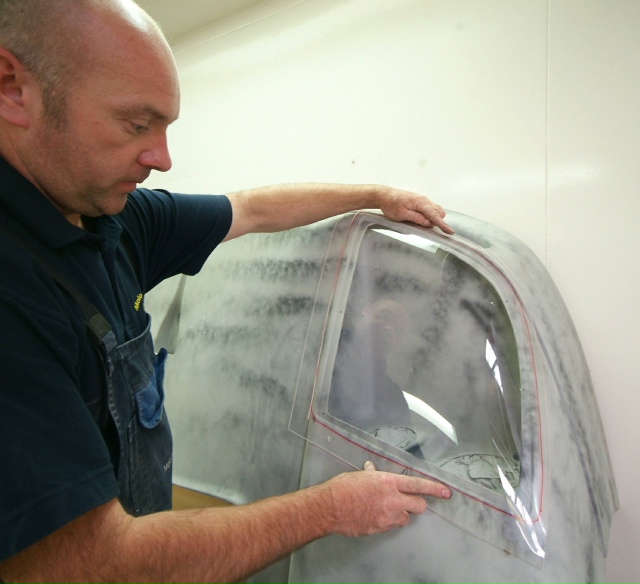
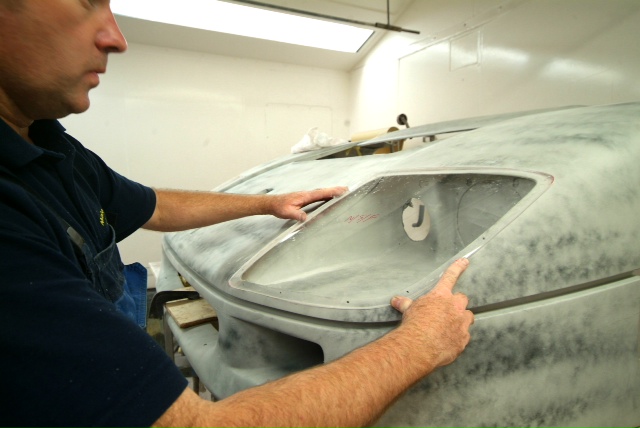
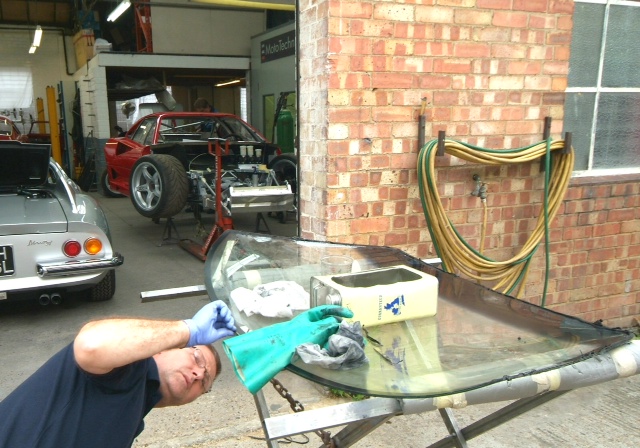
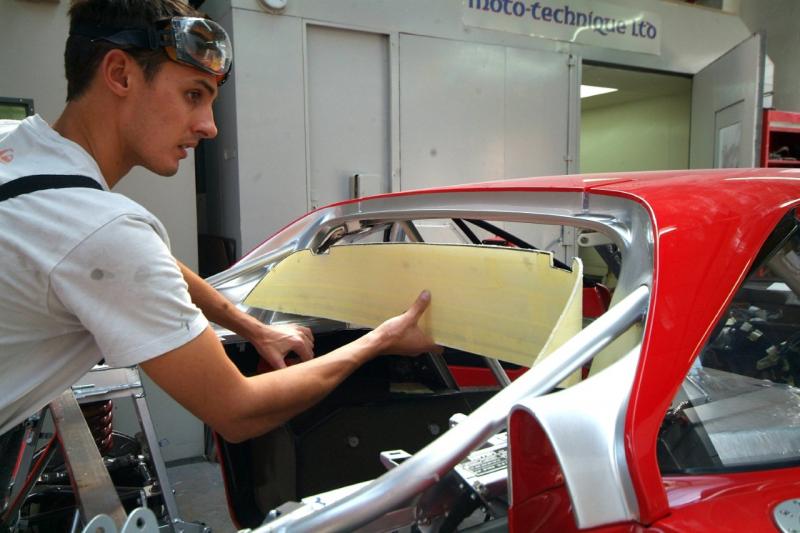
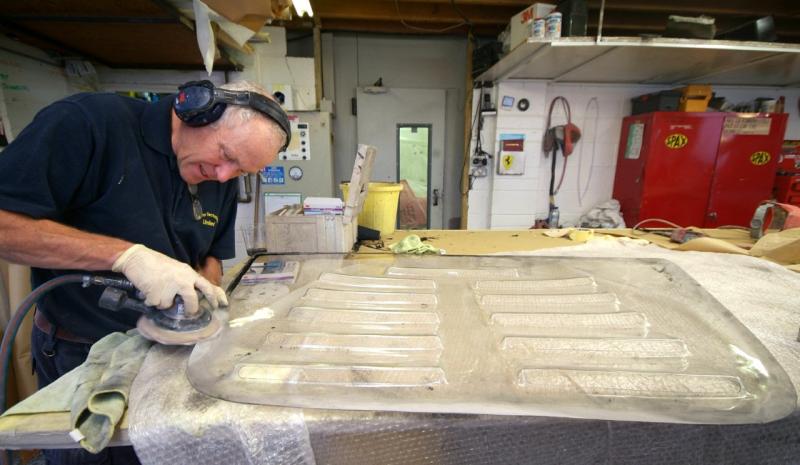
A small insight as to what goes into even the apparently simplest repair, the rear Lexan screen, which as you can see was trashed. Clearly you cannot just pop out and buy one but in my nativity I thought you simply bought some Lexan sheet, bent it to your will and whacked it in. Wrong.Firstly, the screen is bonded into place (no old fashioned rubber seal to take up the slack) so it has to be a very accurate fit to the car. To form the correct bend in the right places which conforms to the window aperture we first made an over size former in alloy and braced it against heat distortion and it is then sent off to a specialist company who place the sheet of Lexan over our Alloy former and then it goes into an oven which has an even temperature (no hot or cold areas). The heated Lexan material then wilts over the former and it clamped around the edges until cool, we then trim it to fit and bond it into place. And that is just this tiny item which I gave little consideration to and now every time I look at the rear view mirror, I will be reminded.It will look nice though.
Bit of detail work going on in the background. Old parts constantly being restored and resprayed and now the radiator being attached to the logditudinal pipe work runs. While we are at it, no stone unturned, gear shift and linkage all being stripped, overhauled and rebuilt.Second shot shows rad with all newly finished pipes now in situ and fully connected to the engine bay and finally another startling shot from Kevin’s Everest.
All the myriad pieces that need to be checked over, prepared, cleaned and refinished which I keep on forgetting about and sort of hoping they might do as they were. As I have said before every piece has to be as good as the last and as the very first were those truly beautiful fuel tanks, that set the bar pretty high. I thought they were expensive items at the time but had no idea they would lead me to this which now makes them appear outrageous! Looking back I am suspicious that was Kevin’s plan all the long to get me hooked. No going back now

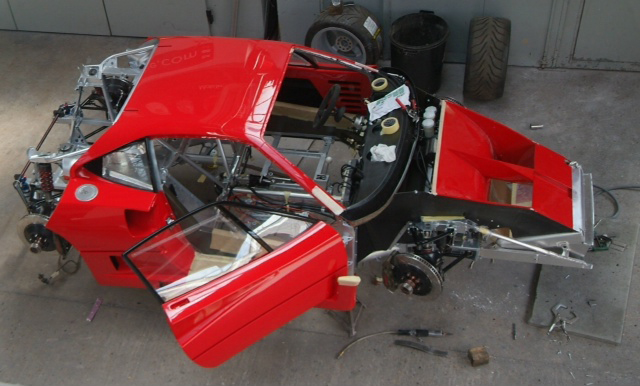
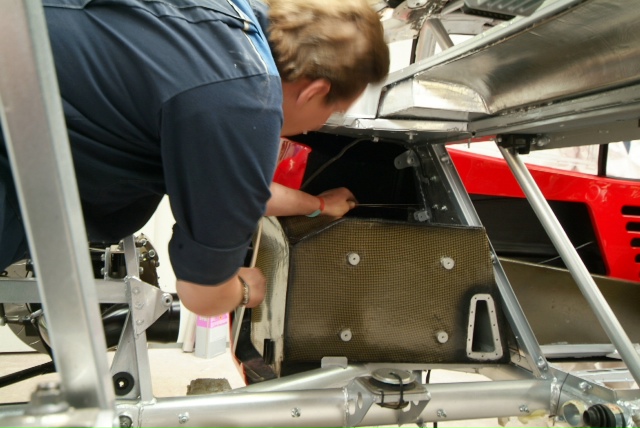
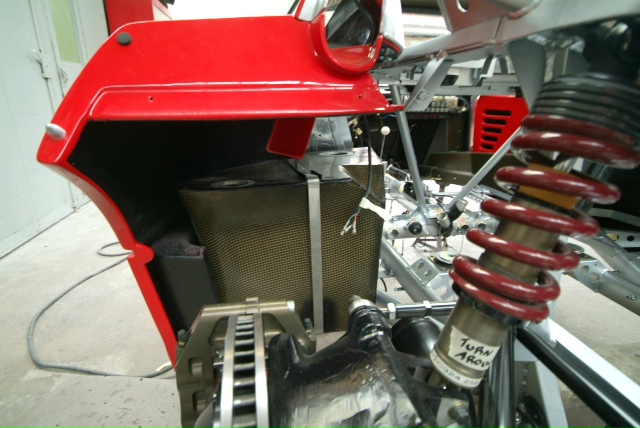
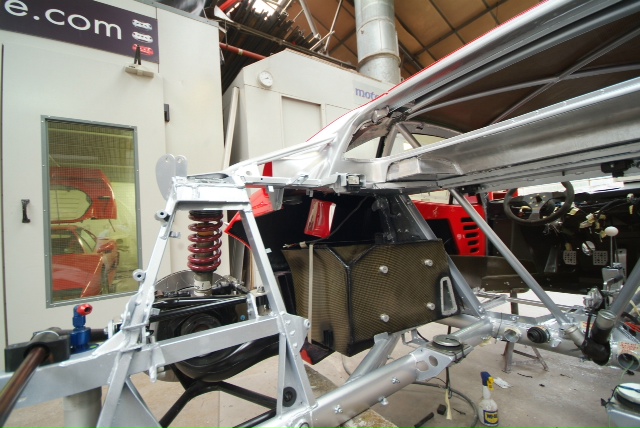
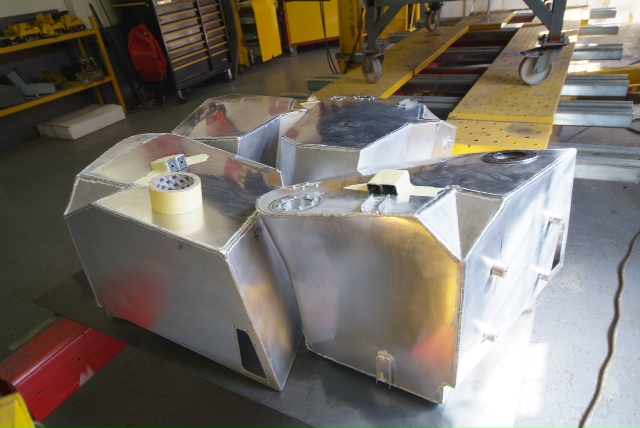
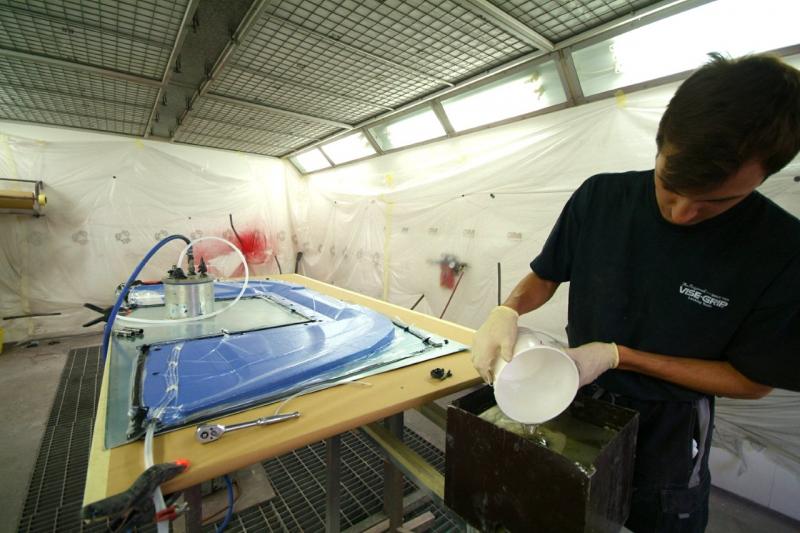
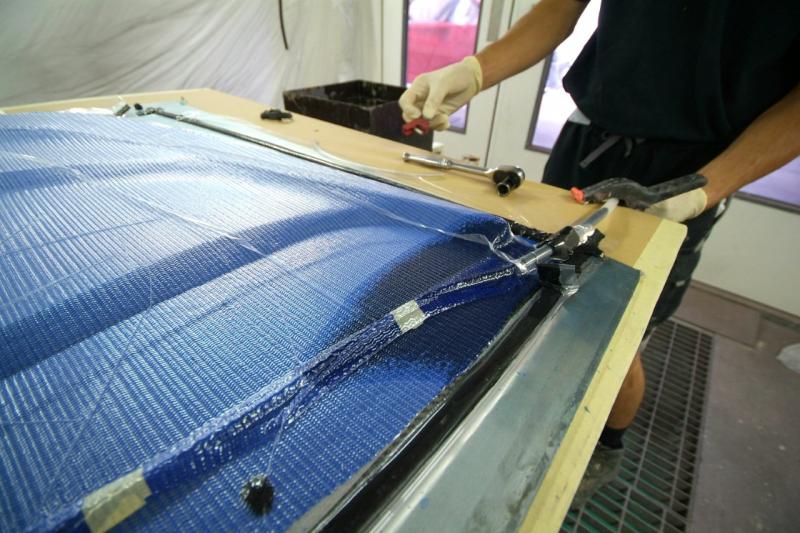
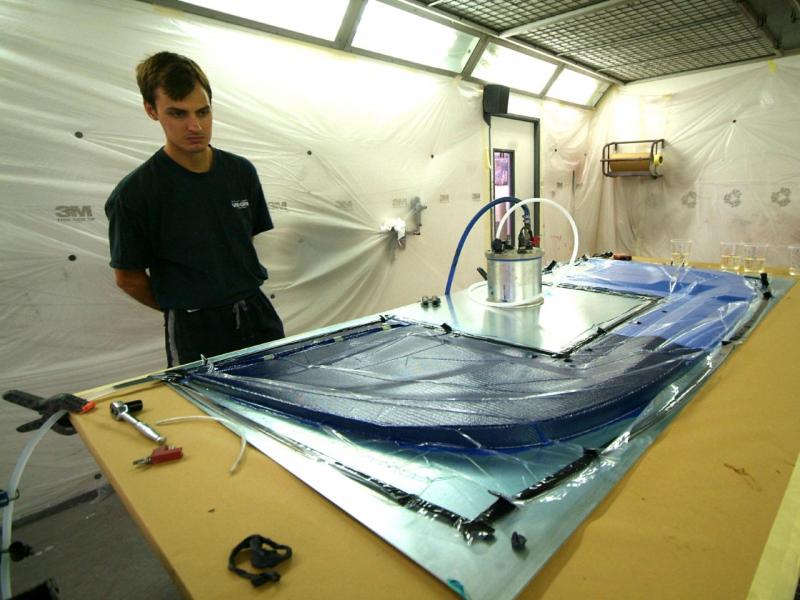
This is now almost overkill. To the industrial art that is the silver framed, Michelotto clad chassis, we now add our fuel tanks, albeit only soft fitted for now. For those who joined the thread late, we built these beauties months ago, works of art in their own right. We did not want to have to take this car apart every five years to replace the old bags and so sought a more long lasting FIA approved alternative using a bit of modern tech. Taking the proven route of alloy tanks as fitted to US cars (these we actually custom built as being racing tanks there are a few differences in the fuel system) we lined them with sealant and filled with foam and then clad first in fibreglass to avoid galvanic corrosion, and then in Kevlar for added strength (and beauty). The various lugs you can see prodding from the tank are for the heat shields which will also be clad in Zircoflex so as to keep as much heat as possible away from them.Mirroring the exact shape of the old tanks, this is somewhat better solution than what we inherited and which you can see here in the first image with its secure professional strapping-not. Very light, very strong and very durable. Maybe we have stumbled on something here as hot off the ‘production line’ the last image shows two new pairs of the raw alloy tanks soon to be the recipients of their fibreglass vest and Kevlar overcoat, one set for the other F40 in the shop and another set for another customer, both of whom are fed up with constant replacement. Orders please!This first shot does a good job of reminding me how far we have travelled. What a mess.Also here you can see us making sure the new tanks will be comfortable in their new beds and ensure no shake rattle or roll, secured with a stainless steel strap a la Dino.

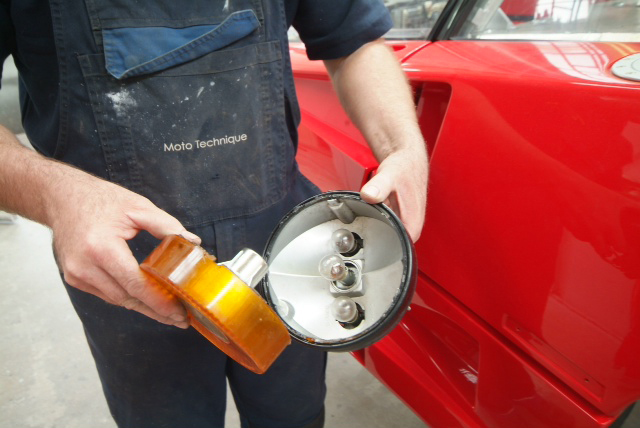
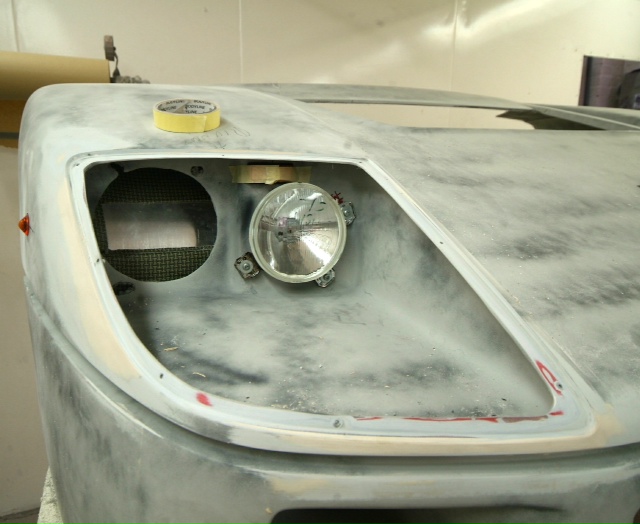
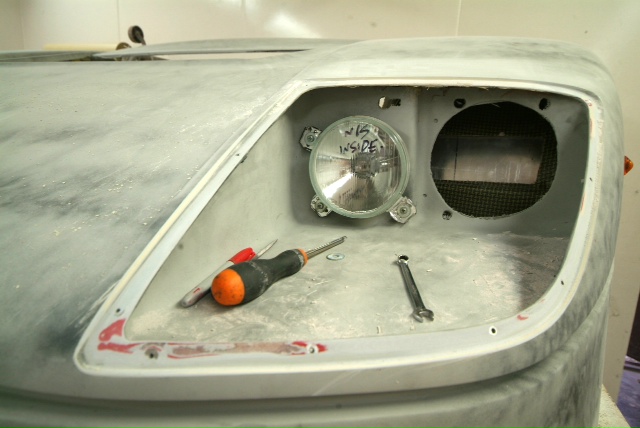
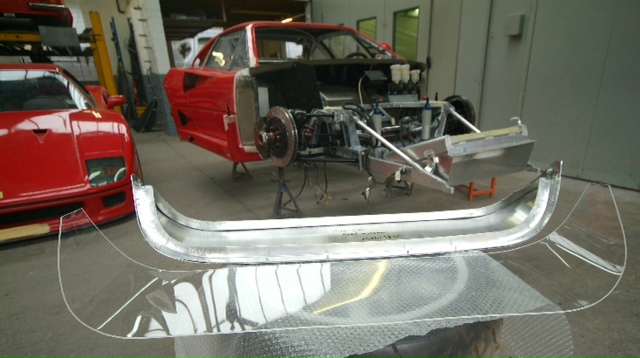
Another skill to be found at Mototechnique, in-house fabrication of our new plexi headlight lenses. It might look easy but this is an awkward material to work with requiring a delicate hand, more of a model makers job. They are so flat and clear that it is a problem getting a photo which does them justice.Note in the penultimate pic the dinky stainless Allen screws, the retaining bolts for which are set in the clam and the holes in the plexi have been slightly oversized so there is no resistance around the screw which might promote cracking. As I said earlier, a delicate material.
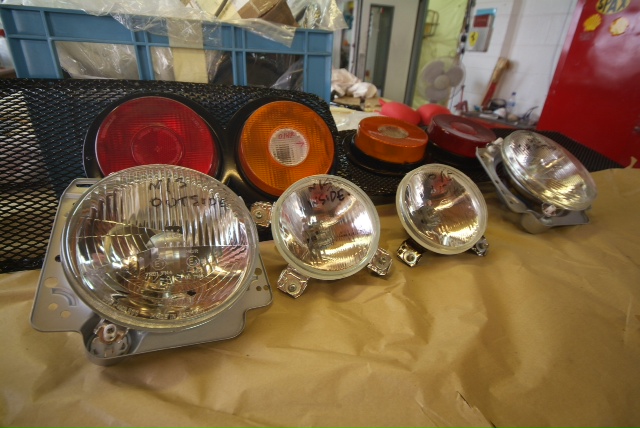
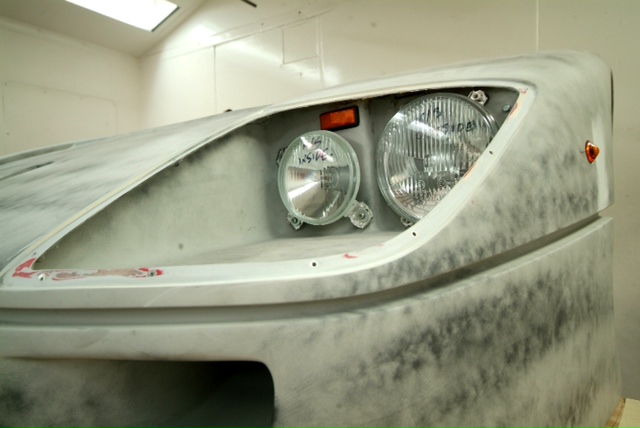
Windscreen being checked to make sure all heating elements are OK. Now sprayed Chassis X bar check fitted (makes life even more difficult when you have to treat the chassis like finished bodywork) and finally a few more ancillaries making their way off the restoration line. Headlights all cleaned up, rear lights all remounted in newly finished grilles.Tomorrow will being a change of emphasis as we finally begin to turn our attention to the engine which has been spread across the countryside until recently and is now all starting to come home to Mototechnique. The start of another major milestone, so long awaited.

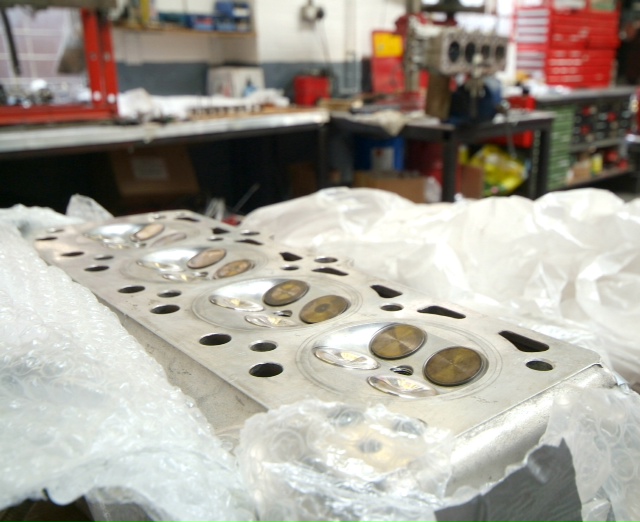
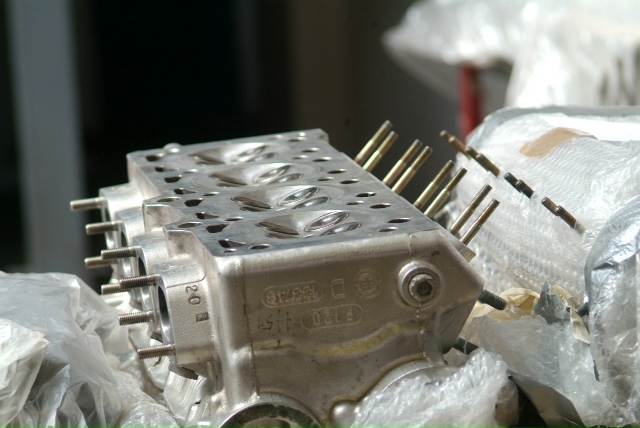
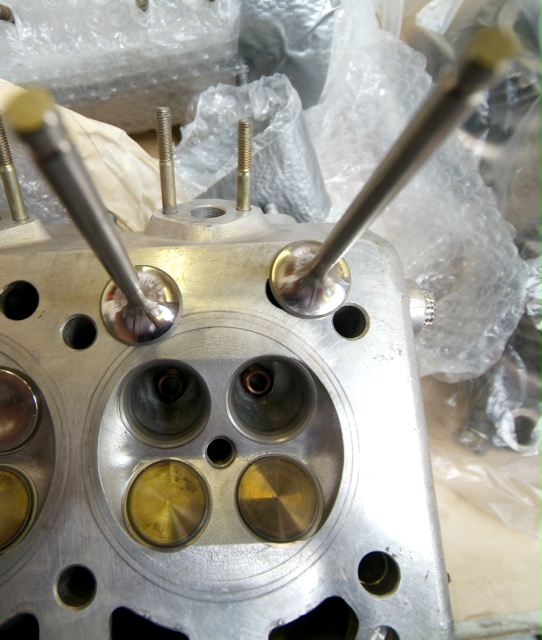
Well we haven’t seen any engine bits for a while and rather like buses, you wait forever and then more than one comes along as you will learn in the next few days.Finally,after many months in the queue at Crosthwaites, we are starting to get all our parts back; time and money is the price of dealing with the best. First up are our cylinder heads, both have been chemically dipped and deep cleaned, valve guides replaced and new inlet and exhaust valves fitted. Valve guides were changed as they were affecting seat alignment and a close inspection revealed that 50% of the valves had been roughly ground, breaking through the surface hardening to reduce the stem length, presumably to get around clearance issues. Consequently the valves were all replaced due to general age and condition and for good housekeeping. Valve seats were inspected and judged to be in good condition and so were recut to suit the new valves have had a light cut, but we will need to hand lap them in with elbow grease.More than we would have hoped to do but the alarm bells went off when disassembling as checking the clearances they were all over the shop, some alarmingly so.In effect new heads.

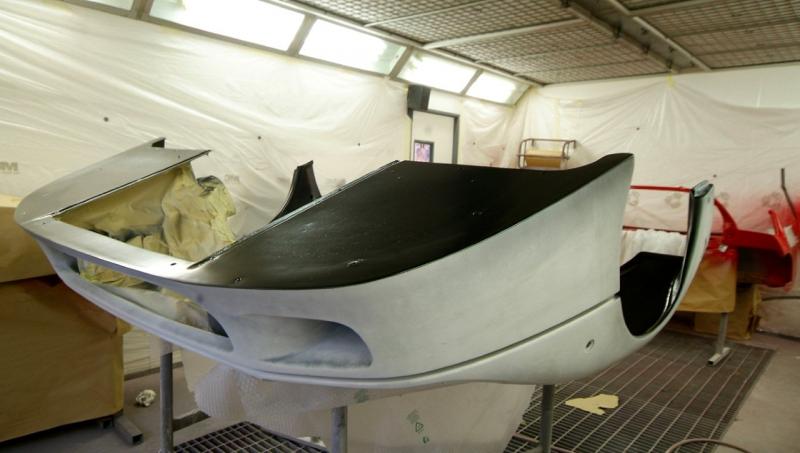
Here you can see our somewhat tatty front air conveyor which once adjusted for a perfect mate with the clam (as in one of the pics) will be stripped and restored. So much work to be done before these elements are ready for paint but we are slowly getting there. Just as I think we have almost reached a decisive point I am reminded we still don’t have a rear clam in paint, upper or lower, nor a front clam or air conveyor. In fact all we have is the roof and two cills!
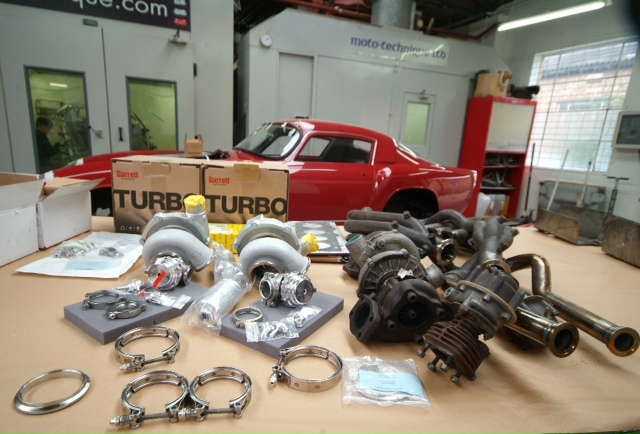
As I said, a change of focus this week. After the heads and conrods, now our new turbos and waste gates turned up.Earlier in the thread I was seeking opinions from everyone as to the right way to go as clearly we needed a nod at our history, so we keep the twin wastegates, but the twin KKK’s needed updating. From endless research on all options, finally the best route seemed to be Garrett and here was the thinking:1. They are currently used on some LM’s racing in the UK and are proving reliable and powerful.
2. As a result of 1 above, we know we can make the Motec gear work with them, the code has been developed and we don’t have to be a guinea pig.
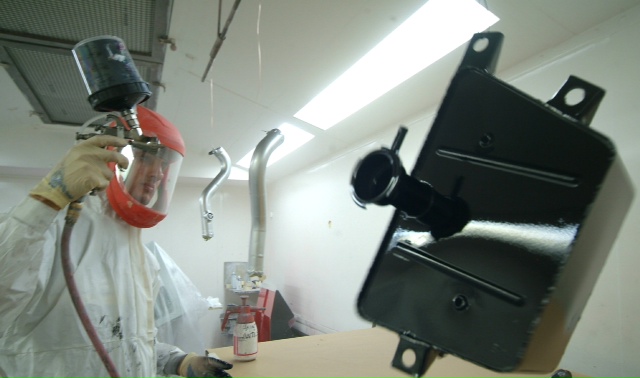
3. Being contemporary, they offer much reduced lag and are more reliable due to their dual ball bearing construction.In short, more efficient, more reliable, more powerful, less lag. Sounds good to me.Most important though is their track record, and we have support from a team currently running two of these LM’s and they in turn have support from Garrett. No other manufacturer was interested so either we had to start from square one developing code or even if we decided to revert to a single wastegate IHI system (which departed too far from the interesting and individual history of this particular car in our opinion), with it could come reliability issues and then where do wet get the code for the Motec gear? Again we wanted reliable power and a proven route with minimum developmental risks so Garret was the logical choice and a natural evolution of where we were.We are keeping our old bespoke exhaust manifold system, cleaning it up and then Zircotecing it to make sure more heat comes out of the back of the car than into the engine bay, and also keeping all the old turbos etc so if my heirs had a real hard on for originality, they could be refitted-meanwhile I want drivability and reliability. So, in short, still staying true to its racing heritage, unusually still running twin wastegates with its original manifold system, but just brought up to date for a better and more reliable driving experience. A comfortable compromise we think.We have also had the exhaust side of the turbos Zircipotec finished, so as to try and maintain as much of the exhaust gas heat inside which can apparently markedly assist spool up. You can see the different finish in the pics.Not great photos I am afraid but better will follow when we really turn our attention to them.
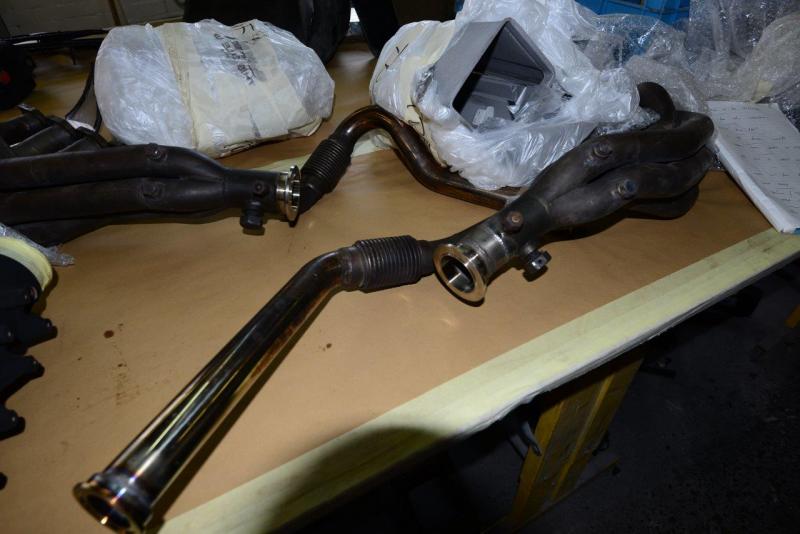
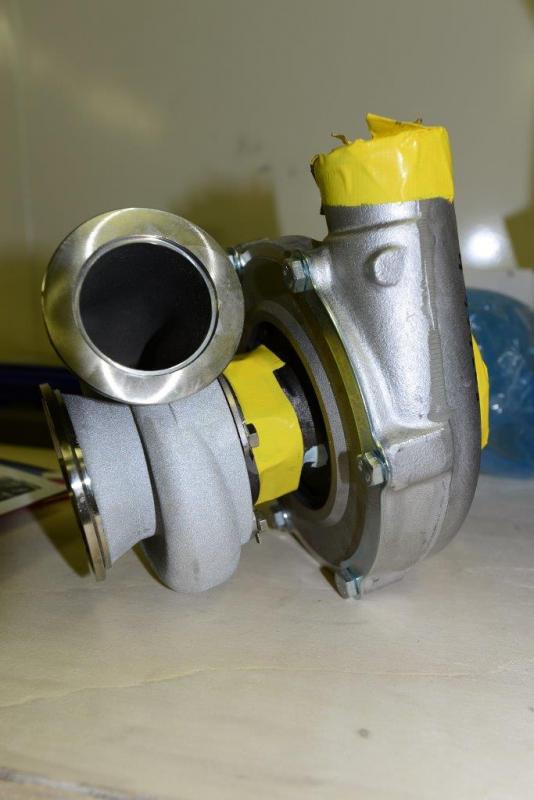
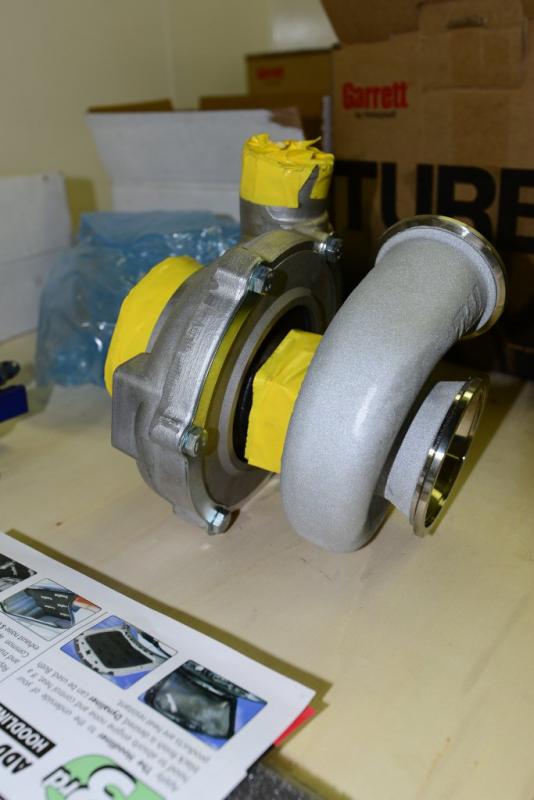
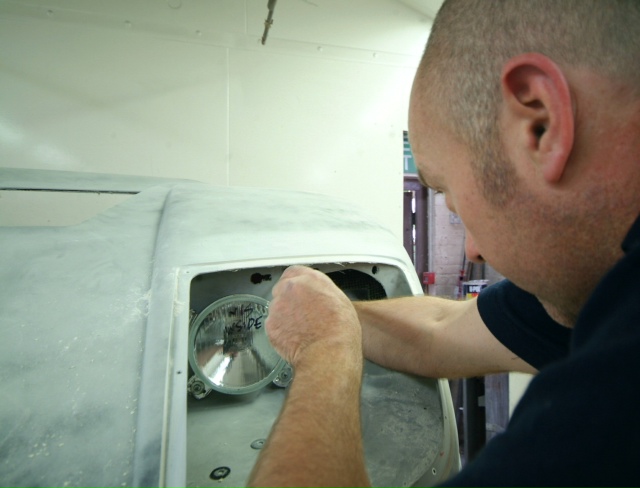
The Turbos are the the GTX3071r with inconel impeller and apparently used at Le Mans.Thanks Guys for the comments, always appreciated as this is my first foray into this restoration world and one understands why the Russians and Chinese are so cagey about broadcasting rocket launches etc as when things go wrong, it is all exposed, the good and the bad. So to have positive comments is very uplifting but then I also risk maybe making the wrong decisions which no doubt will attract negative comments, hopefully as i can learn from that too.Lenses now carefully set aside and fitting of headlights underway before stripping and then final prep. Also note that all important badge finally back where it belongs. Temporarily.Nice shot from Kevin at the bottom just to add a bit of colour to this post!Might we be looking at paint soon? That would be another milestone

Meanwhile a few shots from last week, small detailed issues such as fitting door handles, catches, wing mirrors etc.
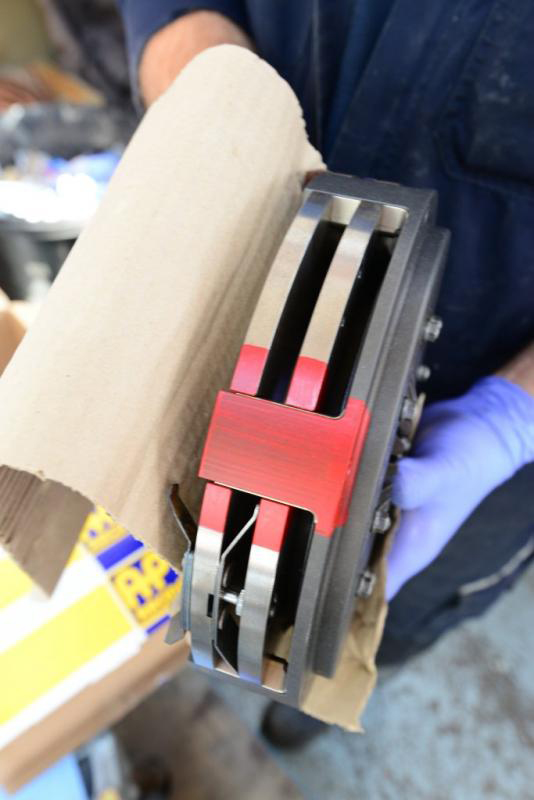
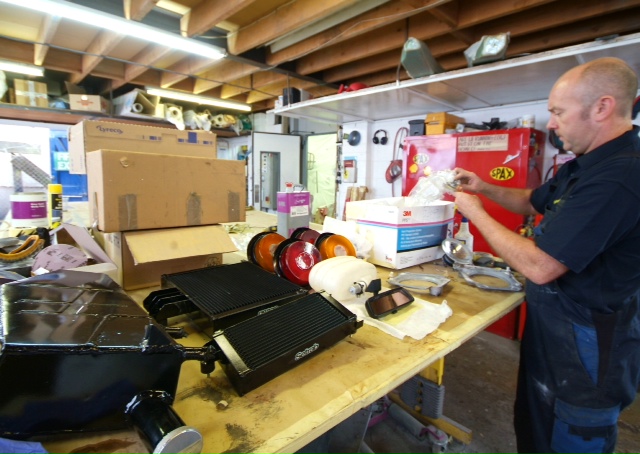
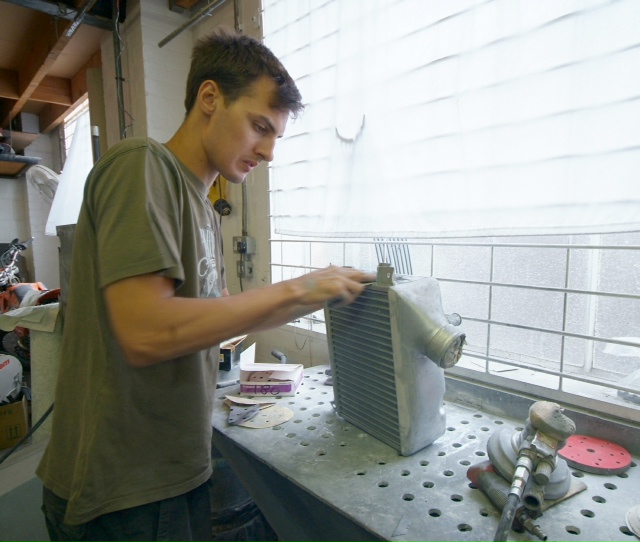
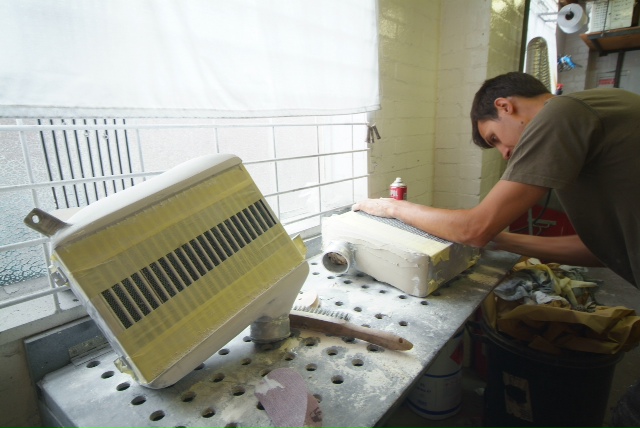
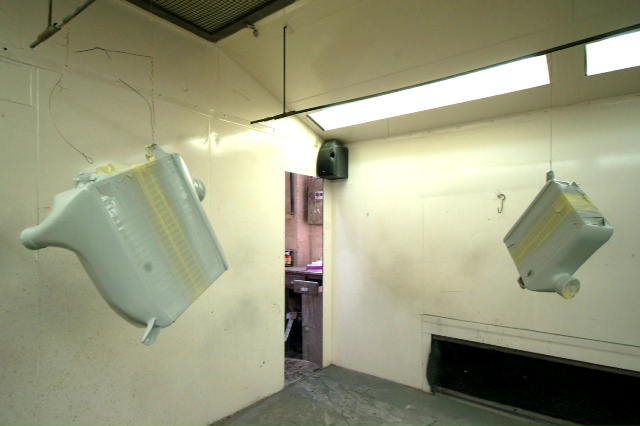
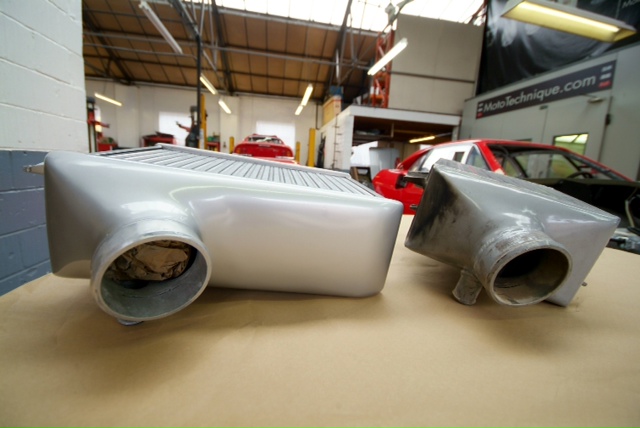
Whilst I ponder a small update on another element undergoing restoration, the intercoolers. These have been flushed with petrol to clean the internals and here James is prepping, masking and finally the finished product. The last image shows our restored one next to a standard F40 and it will be no surprise the ours provide approximately 50% more cooling area.
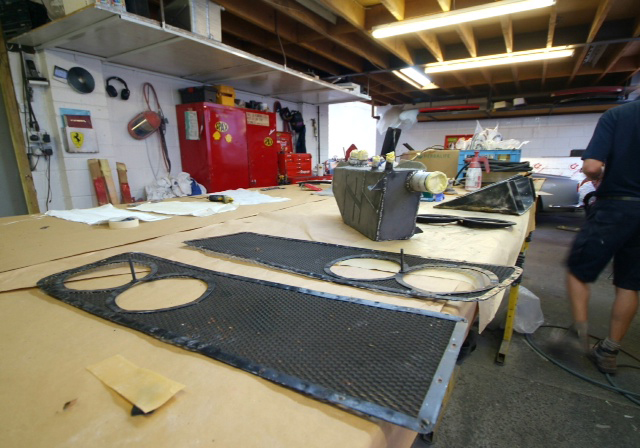
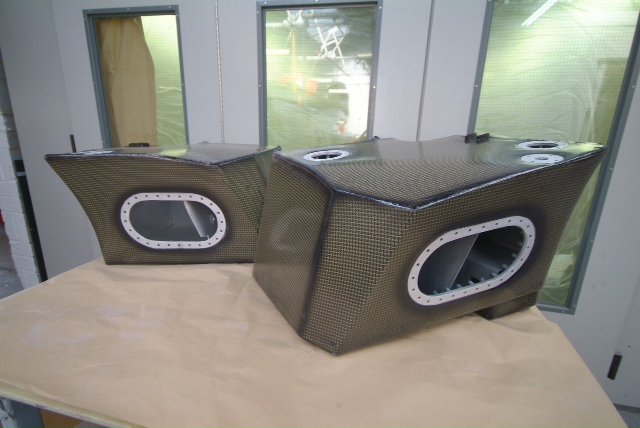
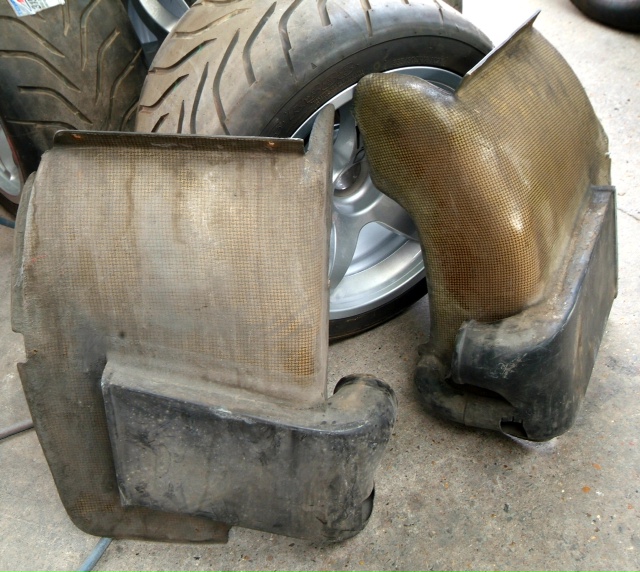
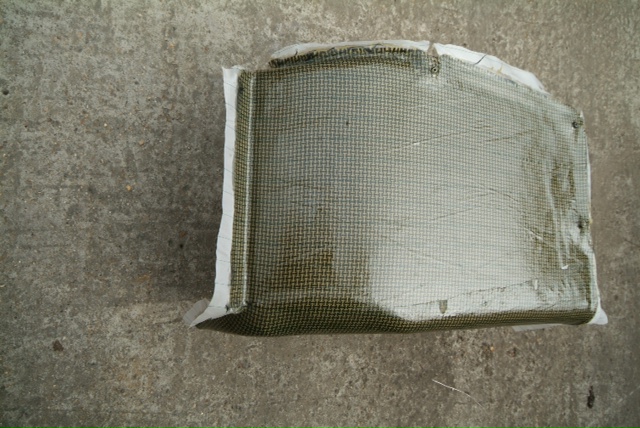
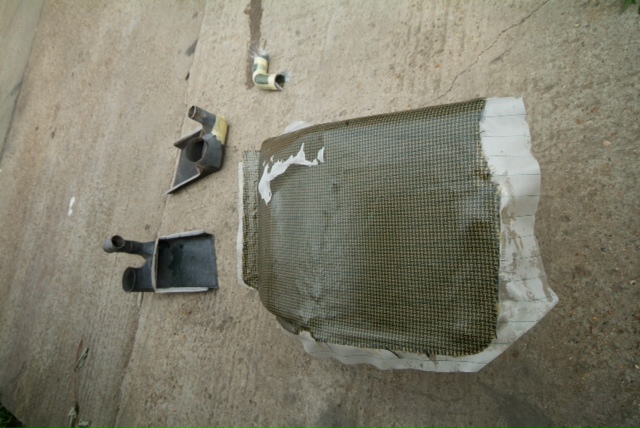
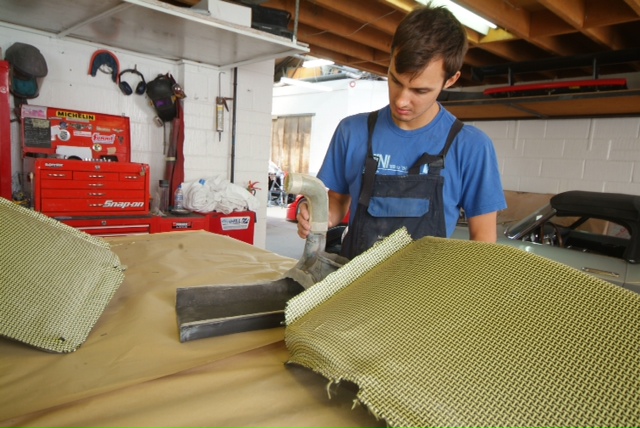
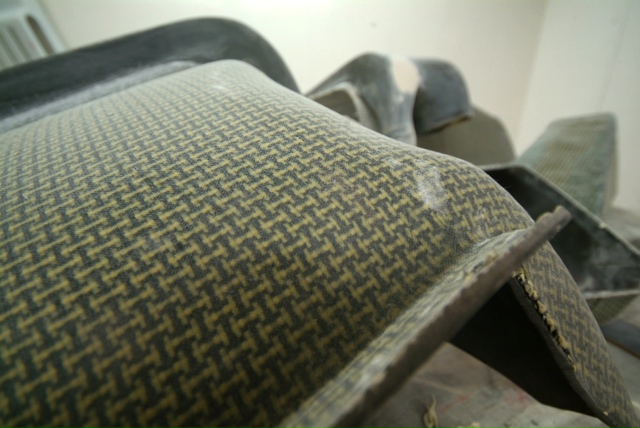
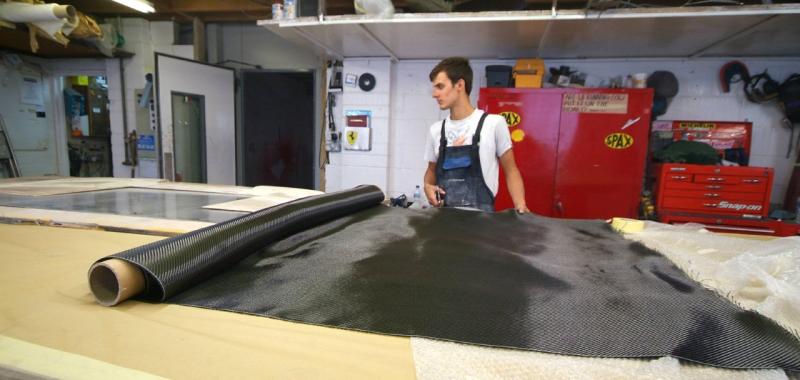
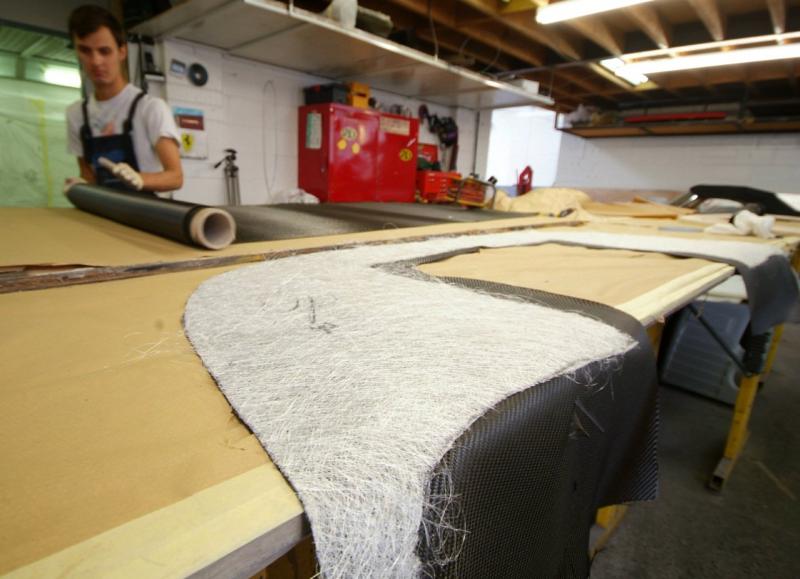
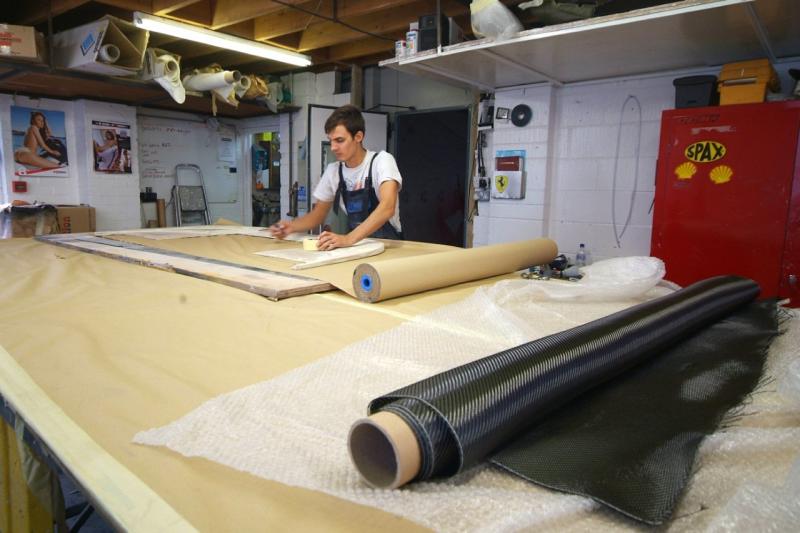
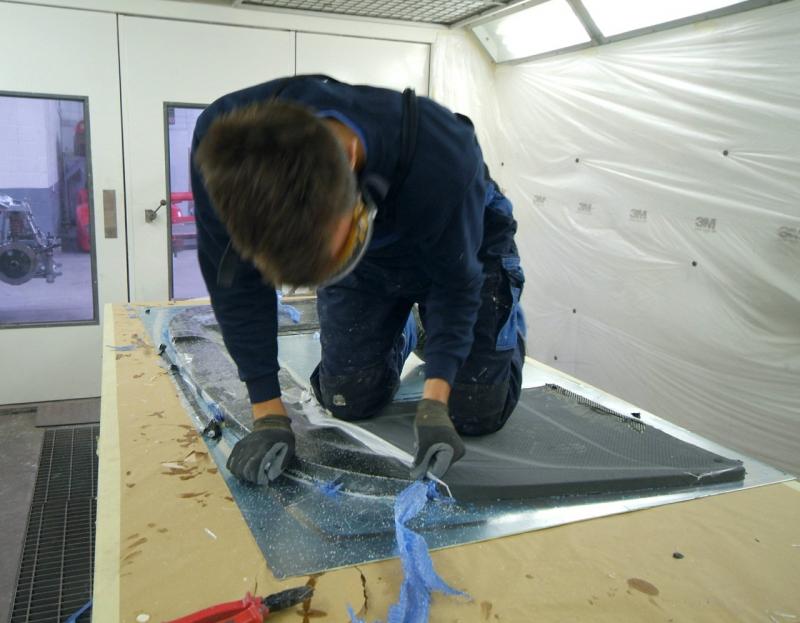
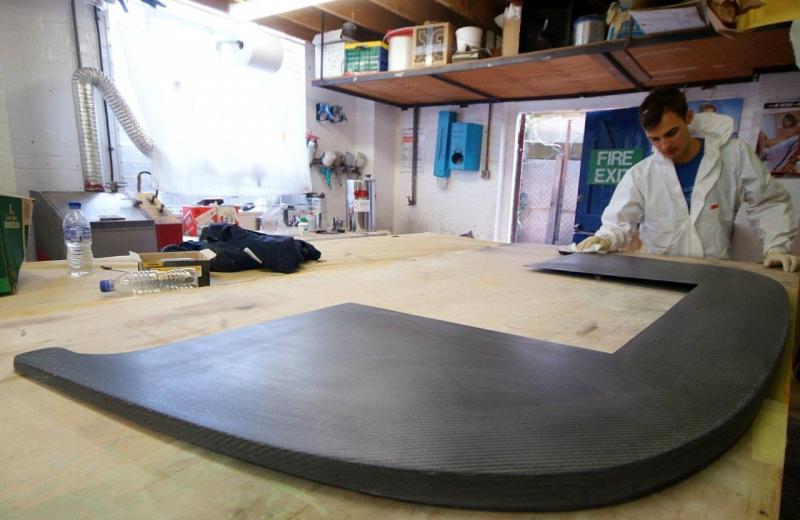
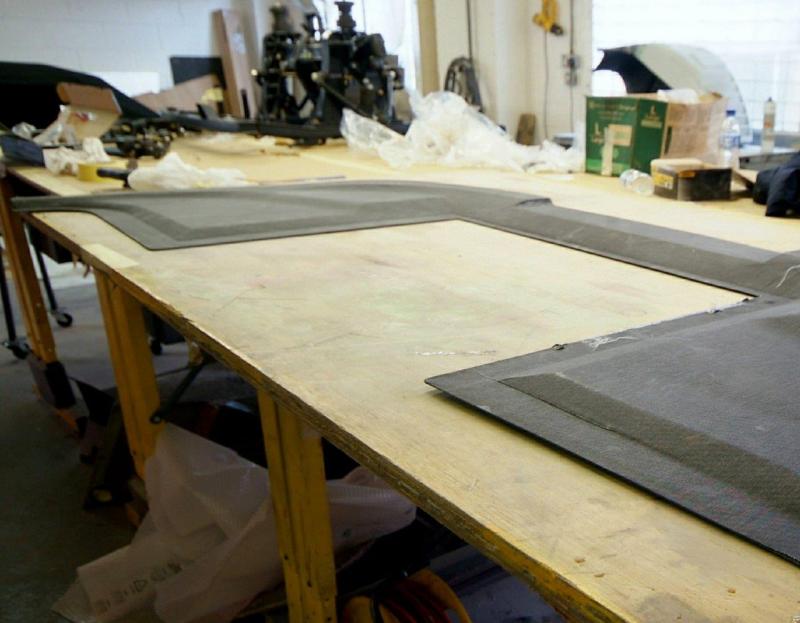
We keep on digging into our box of parts thrown together on disassembly without detailed consideration at the time and now we come to need them, what do we dig up but this sort of rubbish. The rear wheel arches, a mess, untidy duct work all very un Germanic (car was run by a German race team) and just not up to scratch, so yet another element for ‘Mototechnique Magic’.You can see the progress from what we started to where we currently are, still with some work to do on the ductwork, but a veritable world of difference. These show the rear wheel arches laid up in Carbon / Kevlar and that stripey material is a layer of sacrificial rip film …… it soaks up the excess resin and when removed gives that pro matt finish.Let me tell you they don’t give this Kevlar sheet away and I was hoping we had just about seen the back of it and frankly I am not sure where Kevin can fit anymore. Unfortunately I feel hoisted by my own petard and keep on coming back to my motto, ‘the last bit has to be as good as the first’.
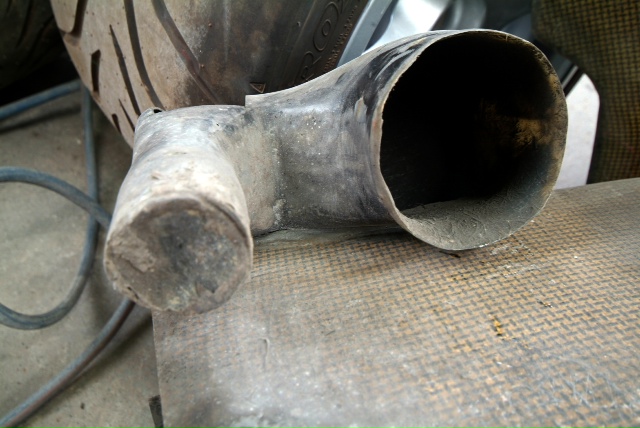

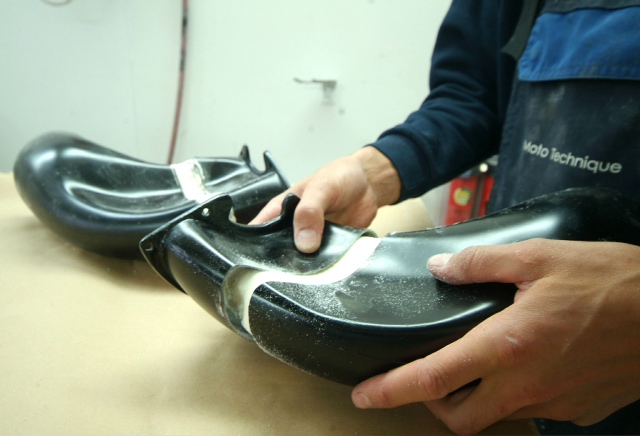
The insatiable James just fine tuning the Italians best efforts and adapting the rear LM brake ducts so they line up perfectly with the rear inner arches and so less prone to stress and failure. After slicing them in half, he inserted a shaped plug of cheap insulating foam, refitted them to the car and aligned them properly. Then he rebonded them together in situ and once cured will be removed and shaped prior to paint The difference was small, but no point building in a weakness if we can avoid it.
Getting there with our new wheel arches. I am posting the before shots again, which already appear earlier on another page, so you can easily appreciate the difference. Startling.For those who may not be aware, the main side duct in the cill draws air which is channelled around the wheel arch in a plenum whence part of it is bled off through the small round tube into the wheel arch to balance the low pressure whilst the rest goes on to the rear brake duct. They had chosen to do some pretty weird mods.More exhaust suggestions please guys. Duskybird, I noted in my post that my Motec gear will handle that change so that should not be a concern. I am advised that even with turbos it could be too noisy.

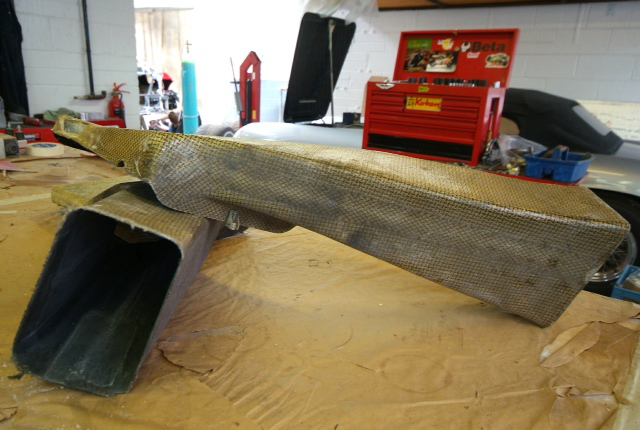
Better than new. The slightly modified LM brake ducts which were just pulling a little so James has extended them as per an earlier post so now they sit perfectly, everything in line with no tension and waiting to fail. Two more parts set aside for assembly.In the background you can see our finished lower clam waiting for paint which will be done with the air conveyor and front clam.
Prep work well underway on the front Air Conveyor. Like most everything else we have renovated, the standard of workmanship was not great and here we are having to lay in some additional Carbon to add rigidity. Would probably have been better off to make a new one but I know the right route is to restore it.Also all headlights have now been soft mounted to ensure fit, as well as indicators. Next up we have got to make a new front splitter which is quite complex and and then soft fit that and finally with a bit more work from James on the ductwork, it could be off to the paint booth? This element still seems like months away, whereas finally next week we might, perhaps, maybe actually start our engine rebuild which would be good.I have given up on October testing-this just seems endless………

A brief post in which a picture tells a thousand……

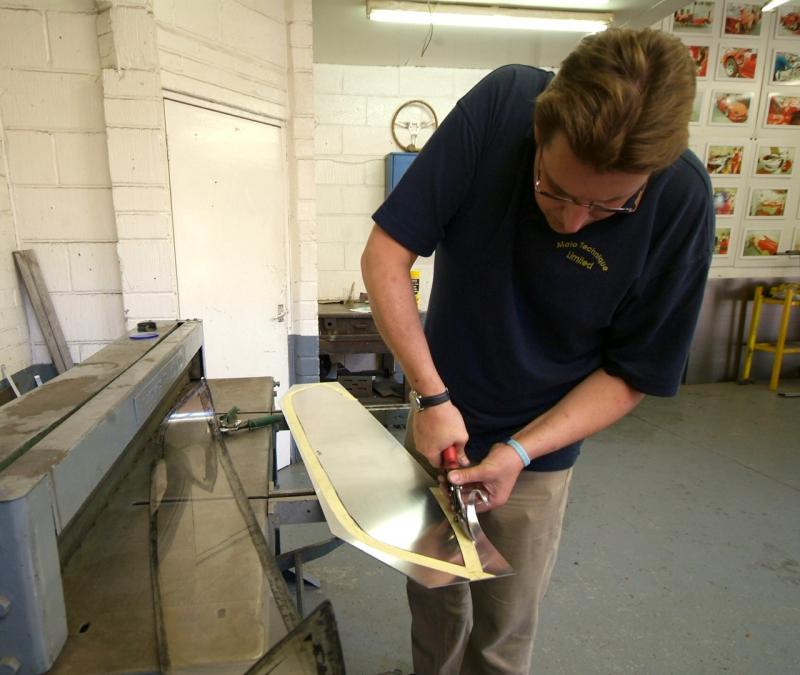
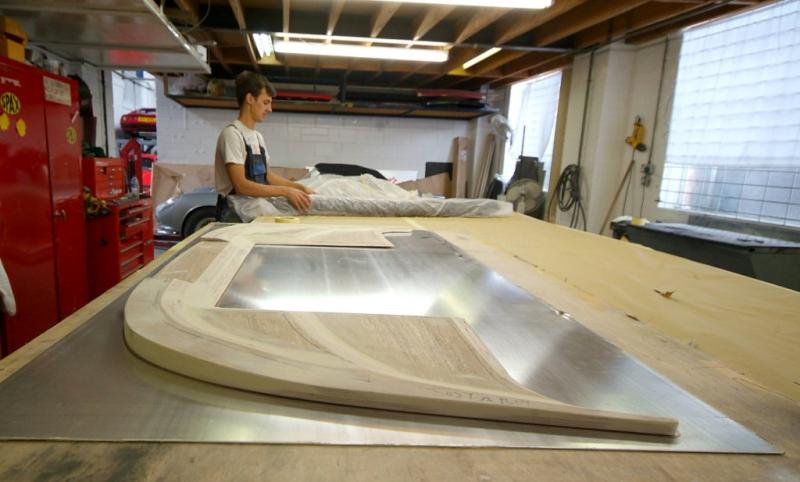
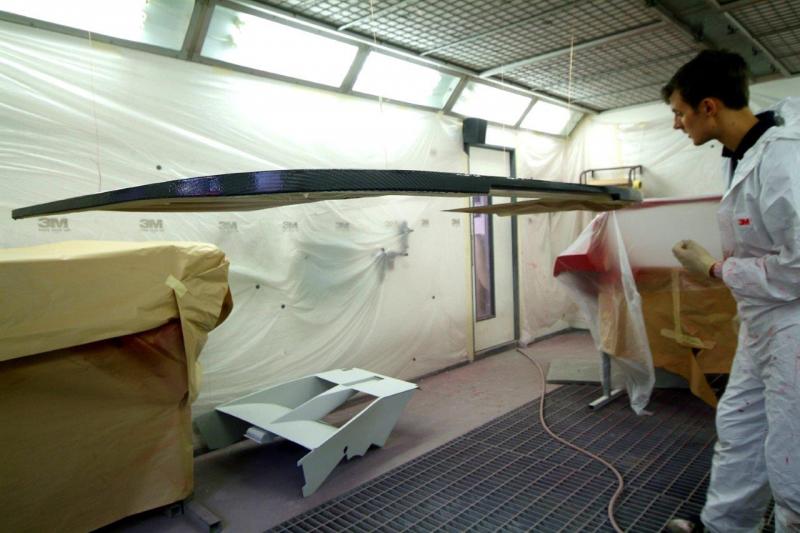
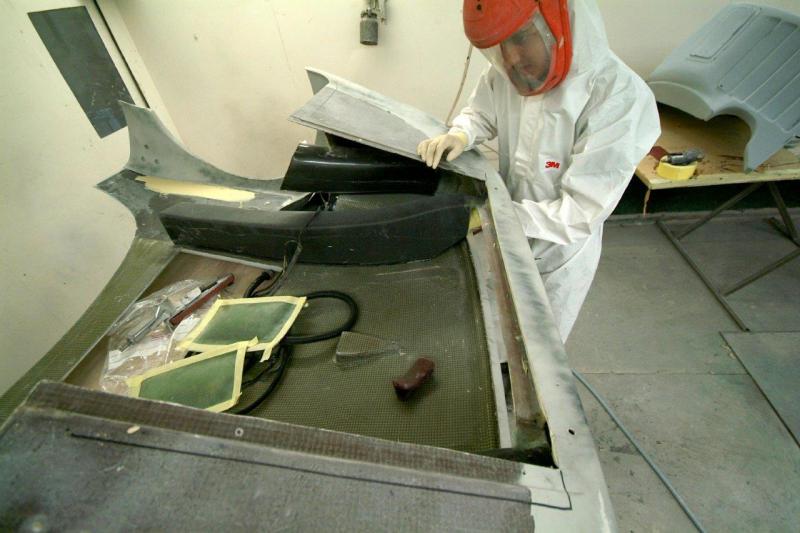
We are making a new front splitter as the pure LM one is simply not suitable for any form of road use, whereas the slightly different GTE form is, so we have decided that as even this slightly more modest affair will inevitably get damaged on the streets of the UK, it had better have some small element of replaceability married with an element of practicality. I knew Kevin would find somewhere else to carbon.Here you can see James now demonstrating his skills as a carpenter to add to his list of capabilities, and forming the marine ply filler which as you can see tapers, in depth, towards the rear. These parts have then been glued, screwed and sealed together and once finally shaped up,you can see the result in the 4th photo, a beautiful light ply core.This unit will then be encompassed in Carbon Fibre using the Resin Infusion method whereby the resin is introduced under vacuum as per the attached demo shot of James working on an F40 door in the last shot.
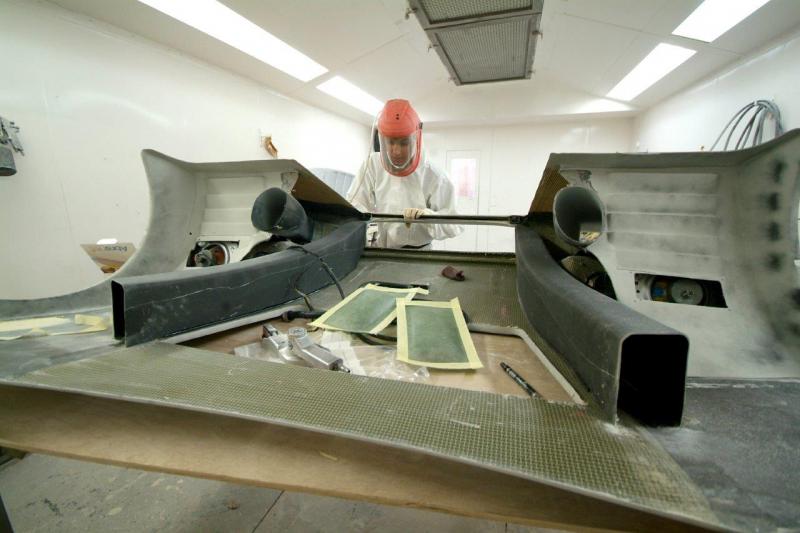
Stage 2 on the splitter process.A little explanation for those that don’t know (me) about the Resin Infusion method being employed this time on our splitter. The first photos show marking up, the raw cloth and one of the sacrificial layers, then James spraying the alloy base with a blue release agent, note the ring of butyl strip which once the protective tape has been removed will act as a seal; Finally the the carbon being glued down and trimmed in a neat package to larger than final size as it will be trimmed to perfection on the trailing edge once finished but at least so you can start to see the shape of the entire piece as it joins and is filled in with an undertray beneath the radiator so as to help create that important aerodynamic flat floor.Stage 3 tomorrow
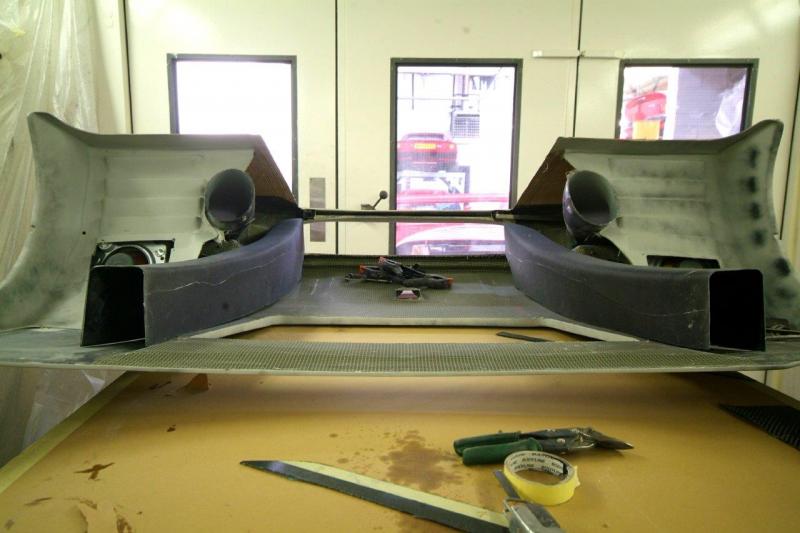
The next phase.1st photo shows James applying the various sacrificial layers including the ‘rip film’ which will enable the resin transfer, the next photo shows James creating and sealing the vacuum bag in which the process takes place, sealing against leaks is not at all easy and you will see the red meter which monitors the level of vacuum which has to be 00.30 or lower. Then you can see the sealing of the bag with the prepared splitter inside; great care has to be taken to ensure the creation of a near total vacuum or the entire process is voided. Next the pre-heated and activated epoxy resin which has had it’s air content removed by vacuum is poured into a shallow tray as this will avoid an exothermic reaction ……. and finally the valve is opened and allows the resin to start to flood through (see the dark blue stain); Final photo shows the extent of the resins travel in twenty minutes, James looking on concerned, a bit like watching blood being transfused into Frankenstein.During the infusion process, in order to assist resin flow, the booth is run at 40 degrees cent and the mould and resin are pre-heated prior to aid infusion.

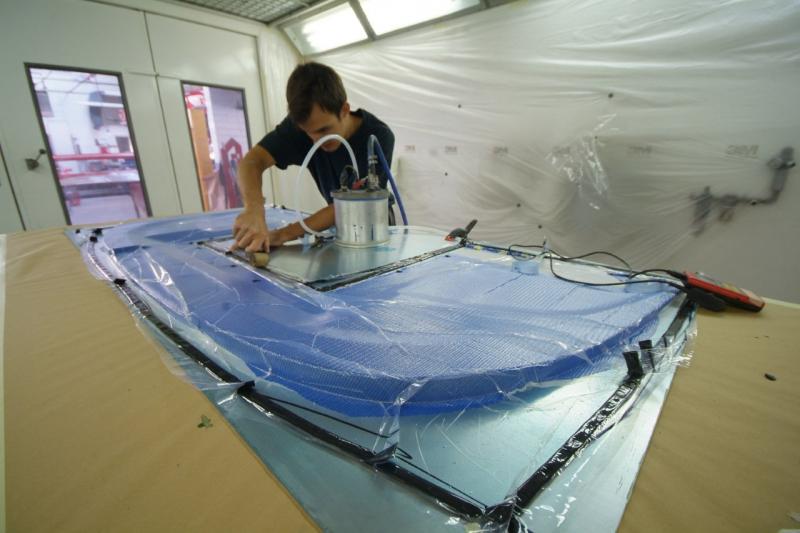
Meanwhile, the next stage. This all looks quite straightforward to the untrained eye, meanwhile much detailed control work is ongoing in the background. What we have not shown is the curing process which is a high risk area as the resin is heated to thin it’s viscosity so as to aid resin transfer, a rise in temp of 10 degrees centigrade halves the resins viscosity which is thick like treacle when cold …………. Obviously this has to be balanced with speedy transfer against the danger of premature curing half way through the process or an exothermic reaction which in extreme conditions can catch fire; you can play with the activator as various speeds are available and you can mix them to slow or speed the curing process so it is best to err on the side of caution and go for a slower cure. The booth is run at 40 C during the transfer process, by the time the part is fully saturated, the temperature of the piece naturally rises due to the curing process and it is baked using a “ ramping process†whereby it is cooked for one hour at 60 degrees C and then allowed to cool, then the process is repeated taking the temperature up to 70 C and then finally again allowed to cool and do it again at 90 C. The ‘boil in the bag’ splitter was then left to rest for three days before de-moulding and the part is now stable; it is tempting to de-mould and check earlier when the part is green but this can lead to warp age. The splitter is then undressed, rip film ripped etc as you can see here.You will appreciate why this does not translate into much photographically but it is still a fascinating procedure.Tomorrow, finishing.
Now the reveal.After stripping the oversize formed unit is cut to size specifically on the trailing edges where you can see how thin the carbon actually is. Final finishing yet to follow but pretty much there.As regards FD’s point on the weight, it may way a little more with the ply inner than without but firstly it is where a little weight is needed and secondly I understood that some of the original cars had a timber core if they followed this particular design, a few having a sort of tray shape.Given the beating the underside might take on the road, it seemed sensible to us for it to be as strong as possible.
Now dry fitting the new splitter to the front clam and once adjusted the it will be treated to a coat of lacquer to bring up that nice shine and provide protection. Next up we will turn our attention to the underside of the clam and finish up our ductwork and then seeing as how the lights, indicators, lenses etc have all be dry fitted, it might just be time for some more red paint. This would be another major element over.
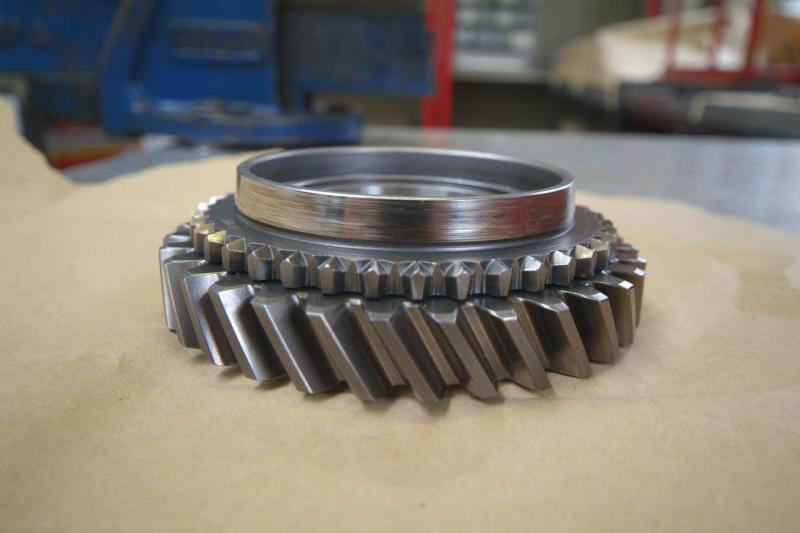
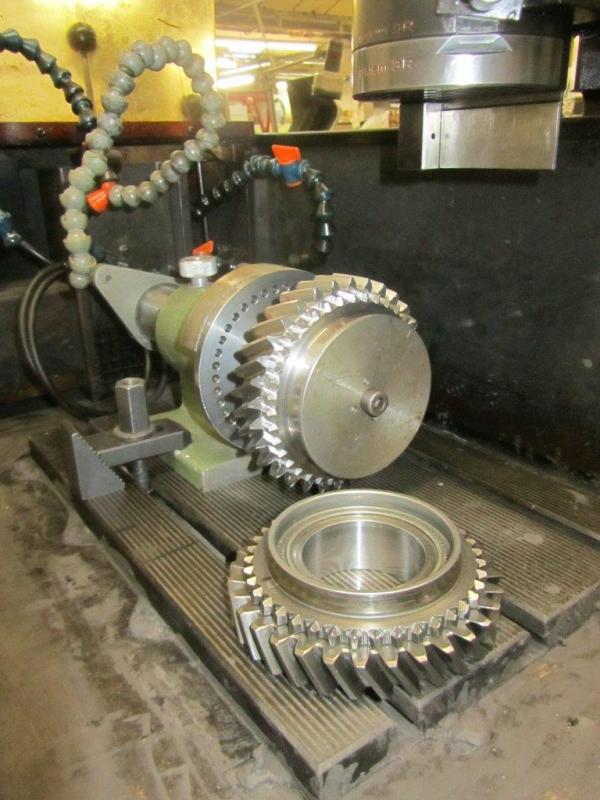
Eight months after we found we needed a new reverse gear, which was not available from Ferrari without most of the rest of the gearbox attached, finally it has made it to the top of a very tall Crosthwaites heap!
First up, the gear as before with what looks like fairly inconsequential marks on the flange. It looks like light surface scarring but on deeper inspection turns out to be evidence of cracking.
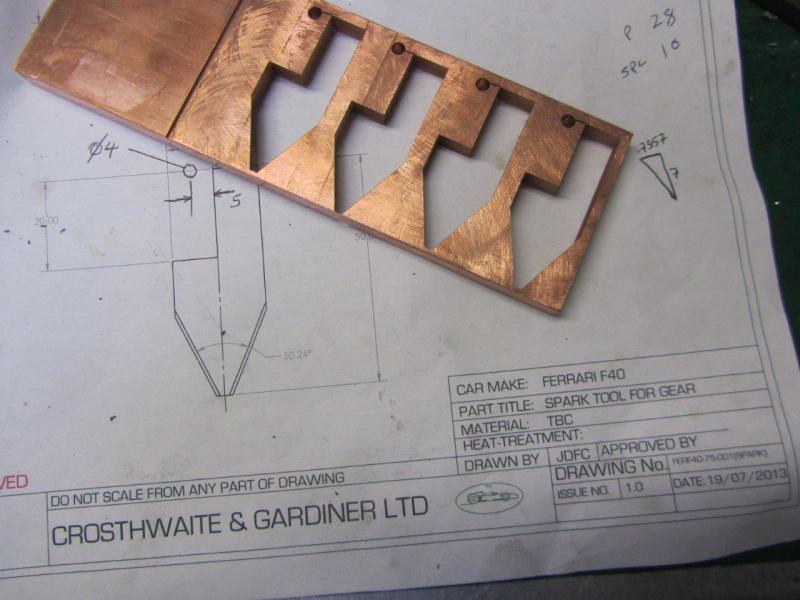
Interesting stuff ……… Here, after much background planning and tooling, you can see the gear well into being cut and as each tooth takes 25 minutes, at this rate they anticipate completion of the cutting in about a week!!
The last photo shows the stock bar from which the spark eroding tools have been cut from, these tools being used to cut / erode the engagement dogs. Then it goes off for hardening which will take another 10 days, so if we are lucky, that will mean we should have it in our hands in a couple of weeks. There would appear to be an insatiable demand for their services so we are lucky to have crept in and had their help on many major elements of the engine refurb.
Heads back from Crosthwaites with all new valves which are now being lapped in. As I said earlier the engine will be reassembled with maximum attention to detail, effectively ‘blueprinted’ so as to leave no spare horses on the workbench. Hopefully.

Well the splitter has finished its journey and not only does it look quite beautiful, it also levitates.
Another ‘Red Letter Day’. Finally the rear upper and lower clams are in colour. This time Neil applying the 2 pack clear lacquer and then wet sanding with 1200 wet and dry shortly to be re-sanded with 1500, 2000 and 4000 grit abrasives and then finally machine polished.Next up, some Michelotto silver on the rear clam around the engine shroud to be detailed in.Still leaves the awkward front clam and air conveyor still to go.

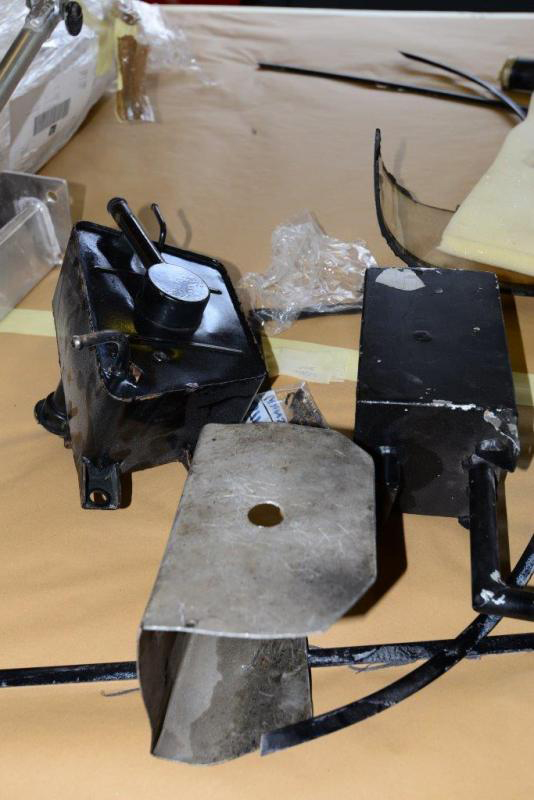
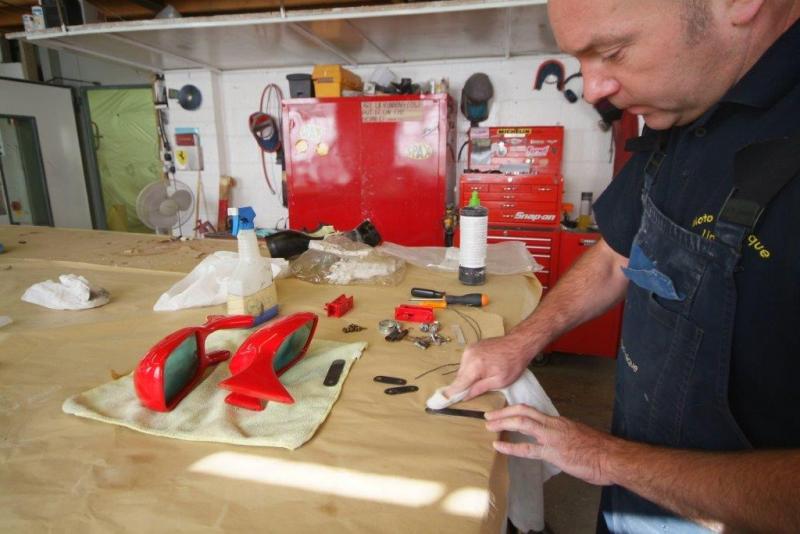
A few weekend titbits. Just showing that no stone has been left unturned and here the mirrors are shown completely stripped and rebuilt.
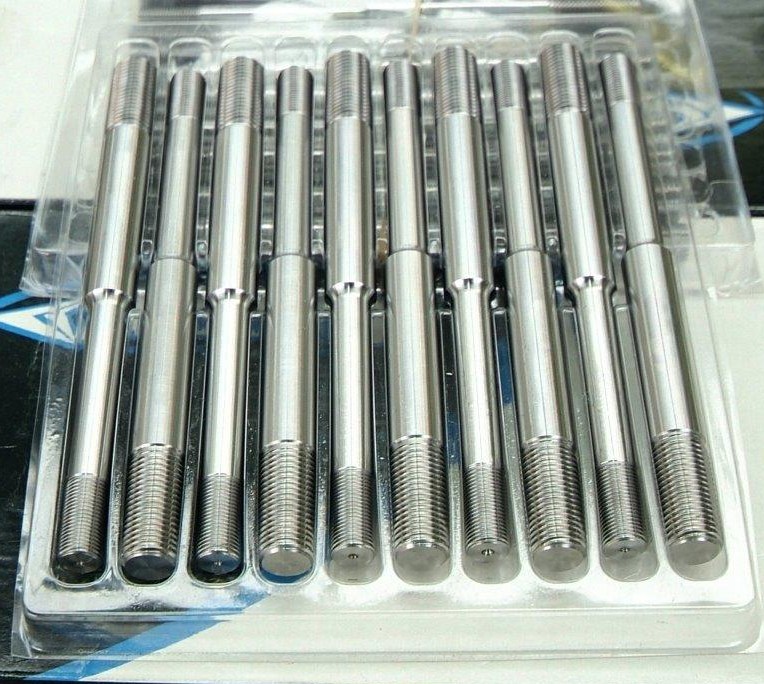
More excitingly our new high performance LM spec stainless steel head studs have turned up from Crosthwaites, so our engine rebuild may be finally in train next week. For those interested, the LM’s did have issues with cylinder head warping through running higher boost and one of the changes then introduced was upgraded cylinder head bolts. Indeed this very car suffered from the same problem and the last owner replaced both heads but failed to deal with the core of the issue.
I love it when one sees old cars that are restored so they run well but maintain their patina of age as they really are time capsules. At the other end of the scale, the inner perfectionist in me cannot help but be drawn by the totally different type of appeal of a Ralph Lauren/Pebble beach ‘over’ restoration. Here I had no choice which made it easy albeit I did start out down a much less perfectionist route until the inner me broke cover.
A few more details as we close in on finishing up the front clam. As I mentioned before, things get pretty busy under here as the high pressure ducts weave between the wheel arches, brake ducts and air conveyor. Also it is quite tiresome with the clam being mounted and taken off endless times to check clearances and avoid chafing. Just want to get all the bodywork finished and in colour and then we are down to the motor and ‘plumbing’.
Surely one of the great views in the automotive world-timeless and purposeful and 25 years old.
Second shot shows one of the very last parts of the rear clam, the screen, being polished up.
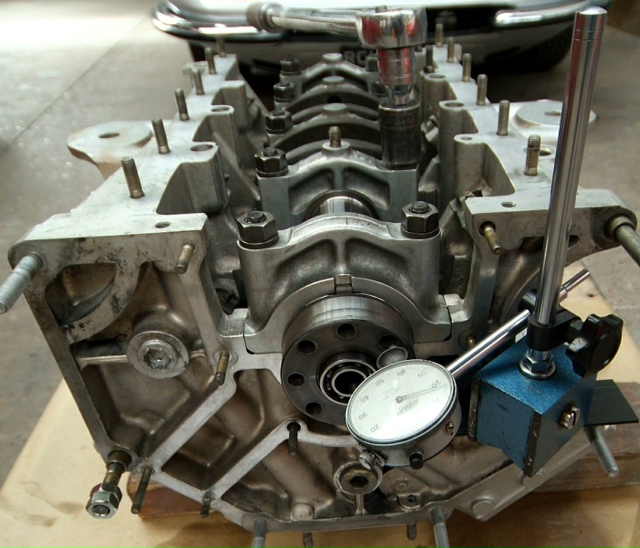
We now have most of our newly balanced crankshaft assembly back. Flywheel, clutch, titanium rods, crankshaft and block. Evidence of some oil issues on the old rods.The bubble wrapped package is our newly polished and balanced crankshaft.
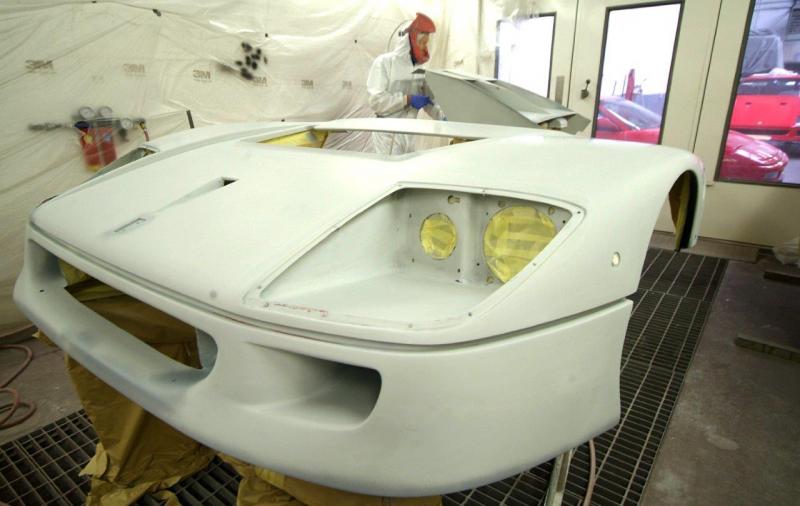
The very last shades of grey post, and that in itself will be something of a milestone.After much working, adjusting and fitting, the air conveyor is now finally just about ready for paint. That just leaves the front clam which as per my earlier post is just about there. Both elements will be in paint next week as they need to be sprayed together as they effectively create one unit.


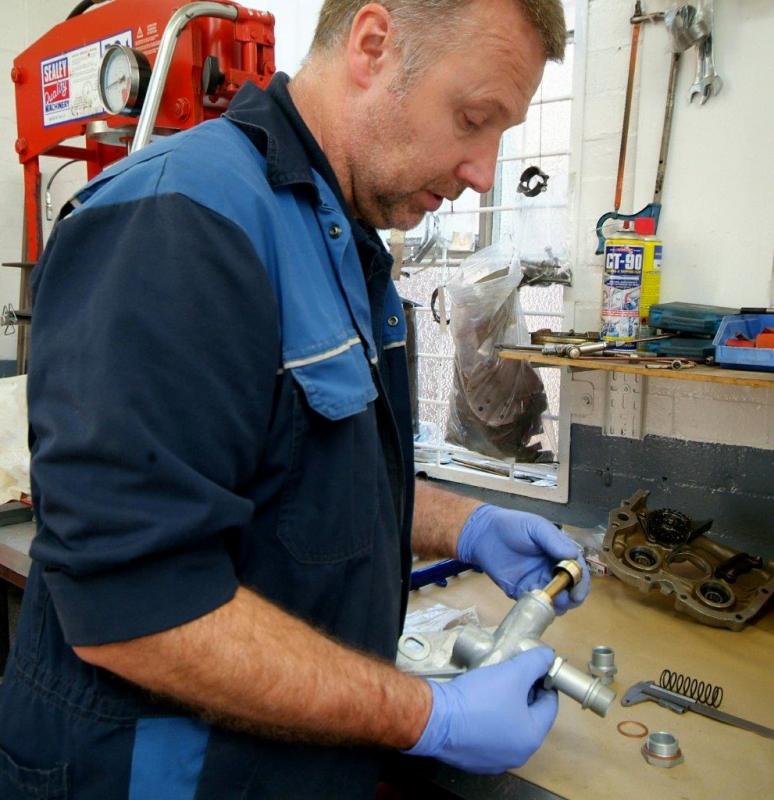
A nice shot of our block and Colin overhauling and rebuilding some engine element which I cannot identify (standard F40 in the background, not mine!). Any ideas?
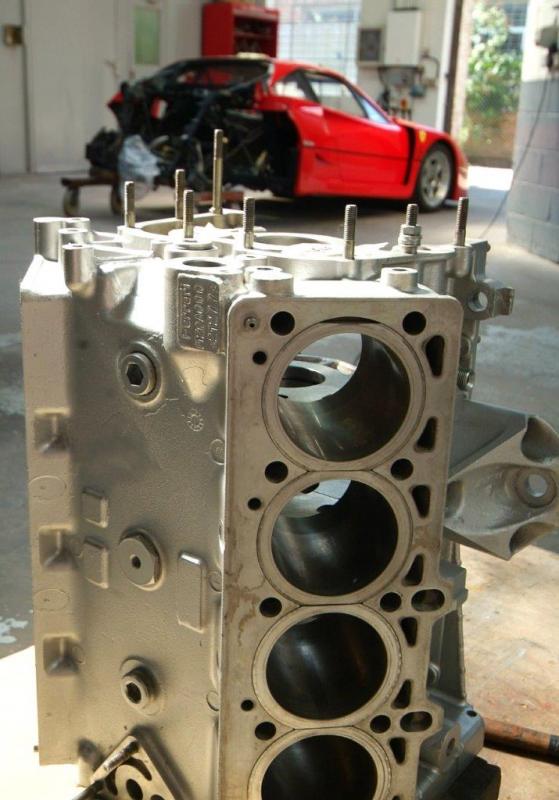
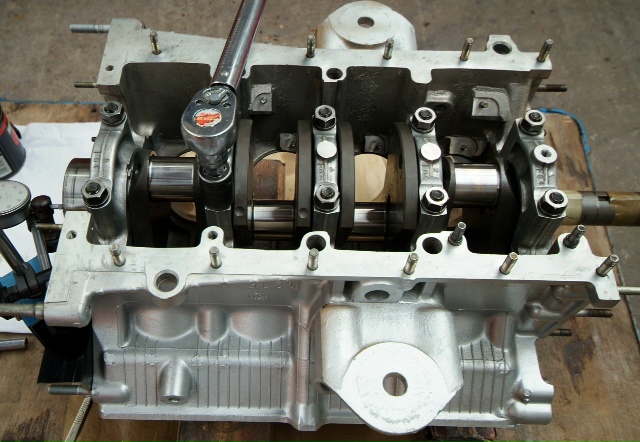
And so finally, all the parts are back and our engine rebuild can commence. The newly polished and balanced crankshaft is now installed and here Colin is setting up the end float.
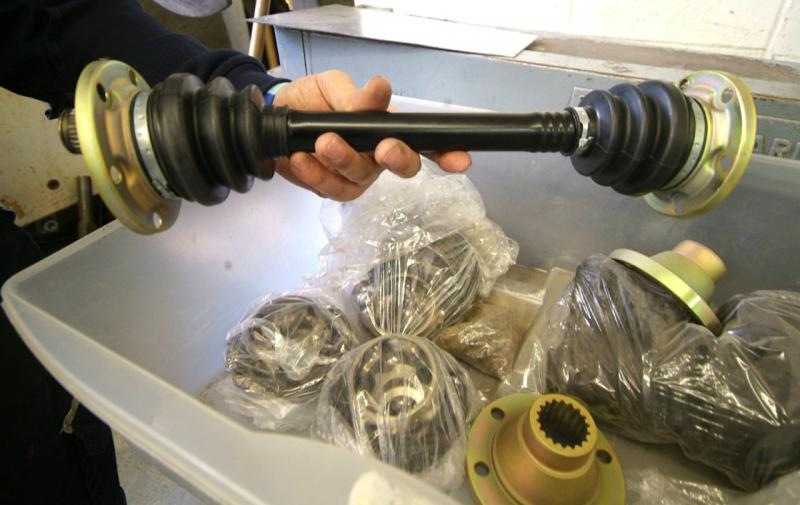
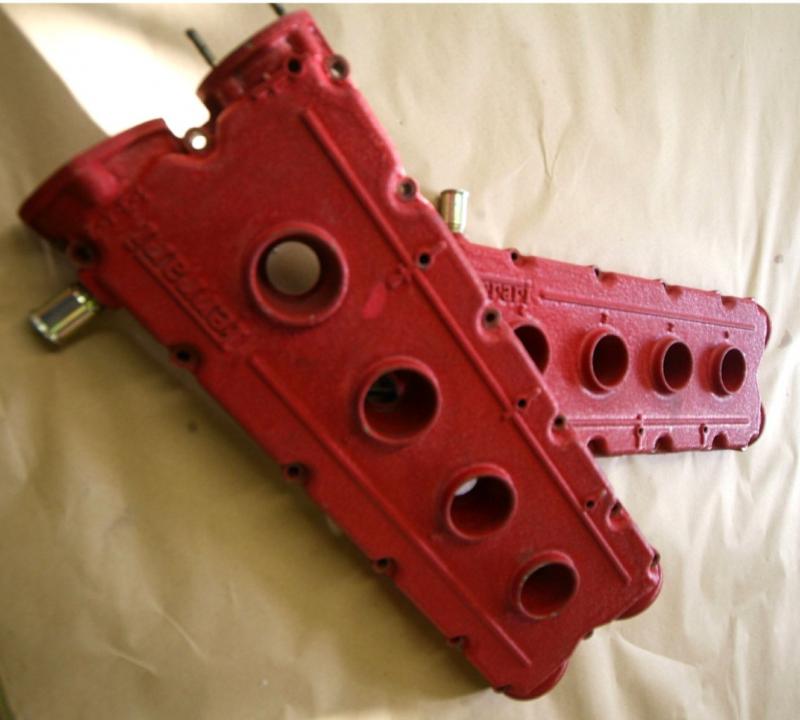
A couple of additional shots from the week but it was a short week as Kevin took the team on a day out to the Goodwood Revival so they can see some of the cars they have worked on over the years driven in anger.Our box of restored parts reveals our newly restored drive shafts and the cam covers before they receive similar attention.
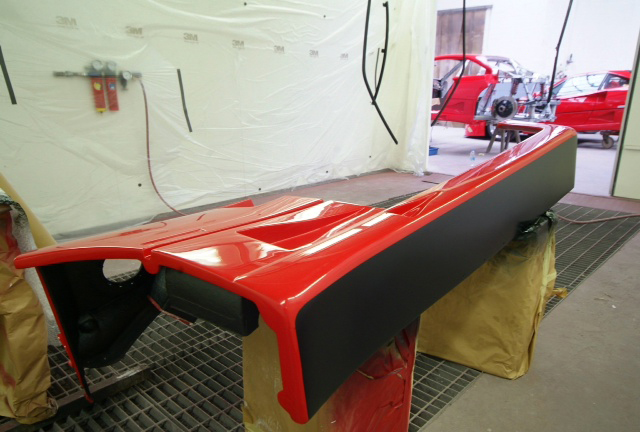
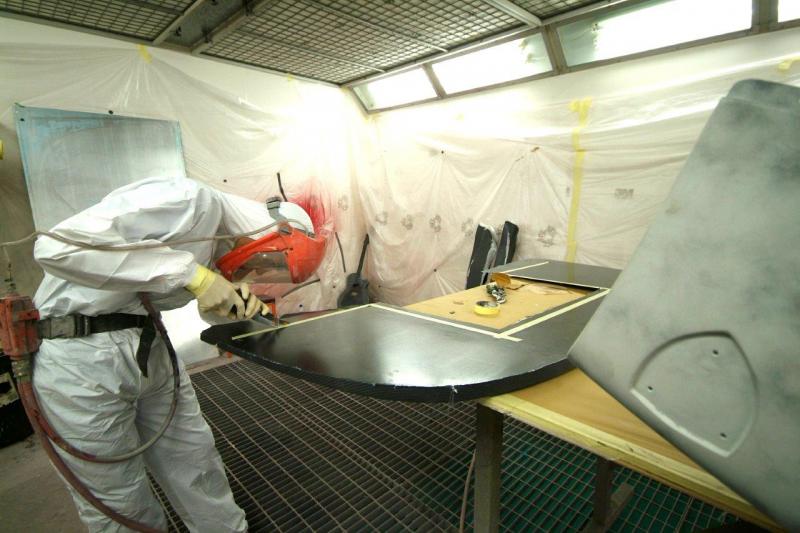
I know I said no more shades of grey but then black does not really count and this is veritably last stage pre-colour. The front clam and air conveyor is finally in the paint shop and colour will be in the gun Wednesday signalling another major milestone as the bodywork is then just about done. Here you can see the first coat of black on the wheel arch area and clam underside

We are using model GTX3071r with Tial wastegates currently used on a couple of LM’s racing in UK. As I have posted earlier, but I don’t blame you for not reading the entire thread, the car used to race with twin wastegates and so we will mirror that setup as a nod to history. The Motec unit will control boost and mapping and we will probably have four settings ranging from wet to Banzai Lap all controlled by a Manettino a la GTE.Attached is a pic of the turbos with Inconel Impeller and I note that they all seem to have this green/yellow mark on the impeller-any ideas?As mentioned earlier we are also keeping the original KKK’s and wastegates for any history buffs in the cars future.

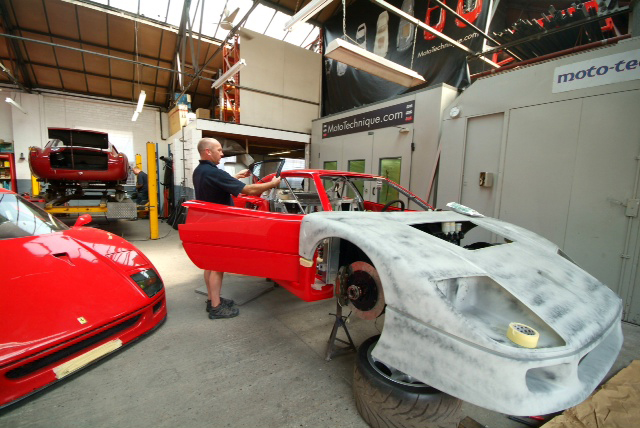
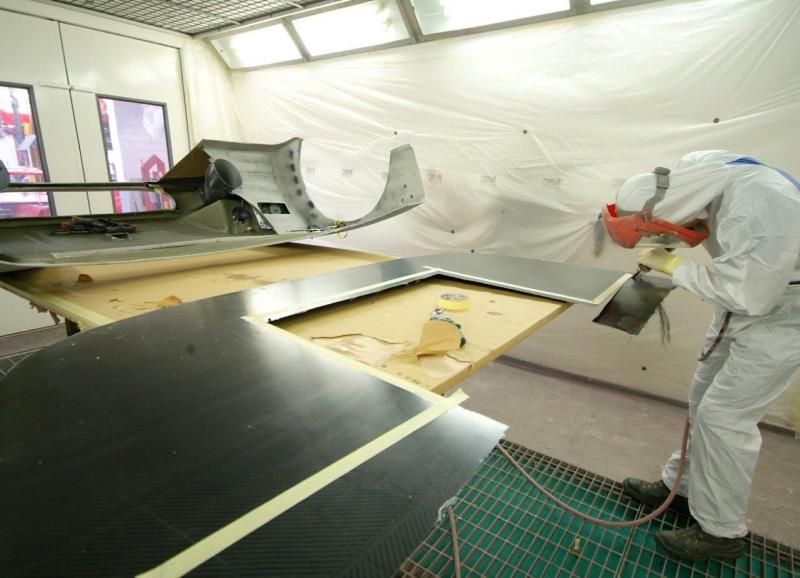
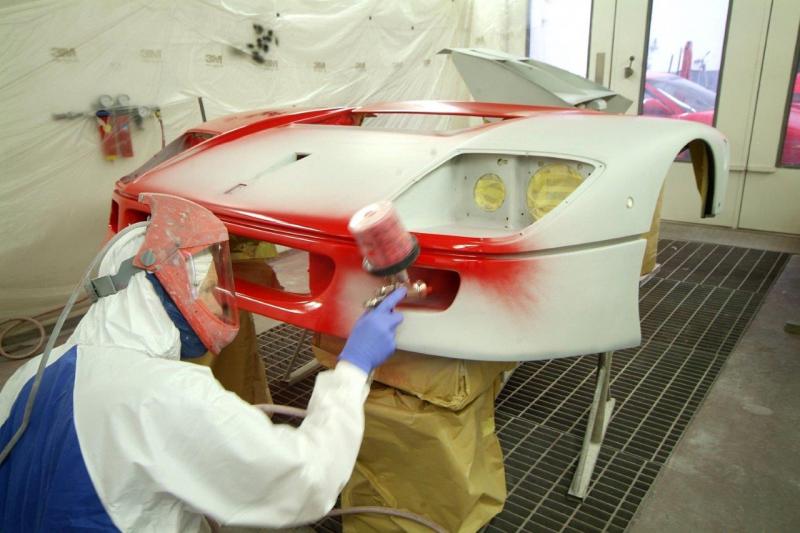
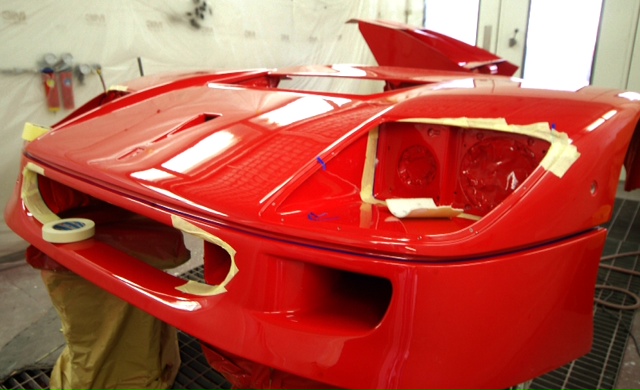
Yes, finally, after a tortuous journey, the front clam and air conveyor is changing colour. Same process as before, spray, rub down, finer and finer, polish etc etc, so absolutely no orange peel. This is halfway through the process so next clam post they should be flawless. Always seems very frustrating the time it takes to get the paint on as so much time has been spent in prep and dry fitting everything so that it all goes together smoothly for real. Hopefully. Photos don’t really do the red justice so I will be down later in the week to photograph.Very tempted to fit the bodywork just to gaze at where we might soon be for real.
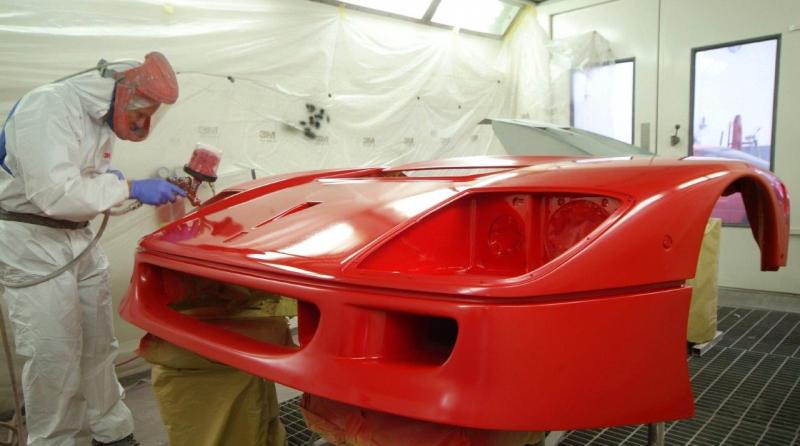
Now into the final stages on the front clam paint. Last shot shows it all polished up and now being masked off for the matt black areas around the radiator inlet, behind the headlights and multiple areas of the air conveyor. Then we can get on with fitting all the ‘bits’Kevin has now got the colour dialed in much better in this flurescent lights

Shame about those agricultural TiAl wastegates. Some high-tech Turbosmart ones would have made more sense with this “no expense spared” build.
Awesome Job and craftsmanship.
I only wish I can go there to help you guys.
Just that will be the best payment in the world.
Oh, by the way that’s my favorite Ferrari ever.
Would you have any of these parts?
143985
62742200
62742300
62742100
62742000
I am led to believe you had a book published on this build. Could you please tell me how I can get hold of a copy please? It would mean the world to my someone special
Hi Kate, unfortunately I have no offical ties to this build or the book. You will have to contact the relevant people from the Ferrari Chat thread. Sorry I couldn’t be of more help.
Just found Part 2 of your ‘build’ during a Google search for rear shock absorber mounting details. I am up to Issue 68/100 on the Panini F40 1/8 scale model, and it amazed me to see so much of the model detail very close to the real thing. Having said that, I would not recommend this company for a diecast model – it has been a nightmare, and I still wonder if I will ever get all the issues to finish it. Congrats from Down Under on the restoration of your F40, it is magnificent. If I ever get to see one in the flesh, I hope it is yours!
Incredible photo journal and information on the restoration process. I am about to start a 1:8 scale build of a F40 using a Tommasoiuele detail kit. Your story is going to a great help in building as detailed a model as possible.
Thanks again for making this type of information publicly available.